Homemade ciabatta bread is easier to make than you might think! All you need are a few ingredients and some patience, and there is no kneading required! You are going to love this bread from the very first bite!

Important Note: This is NOT a gluten-free bread recipe. I just wanted to point that out right away. While I specialize in posting gluten-free baking recipes, this is not one of them. It is simply a bread recipe that I also love to bake and I wanted to share how easy it is to do. That being said, I'm currently developing a gluten-free ciabatta bread that I hope to be able to make good enough to share soon!
***************************************************************************
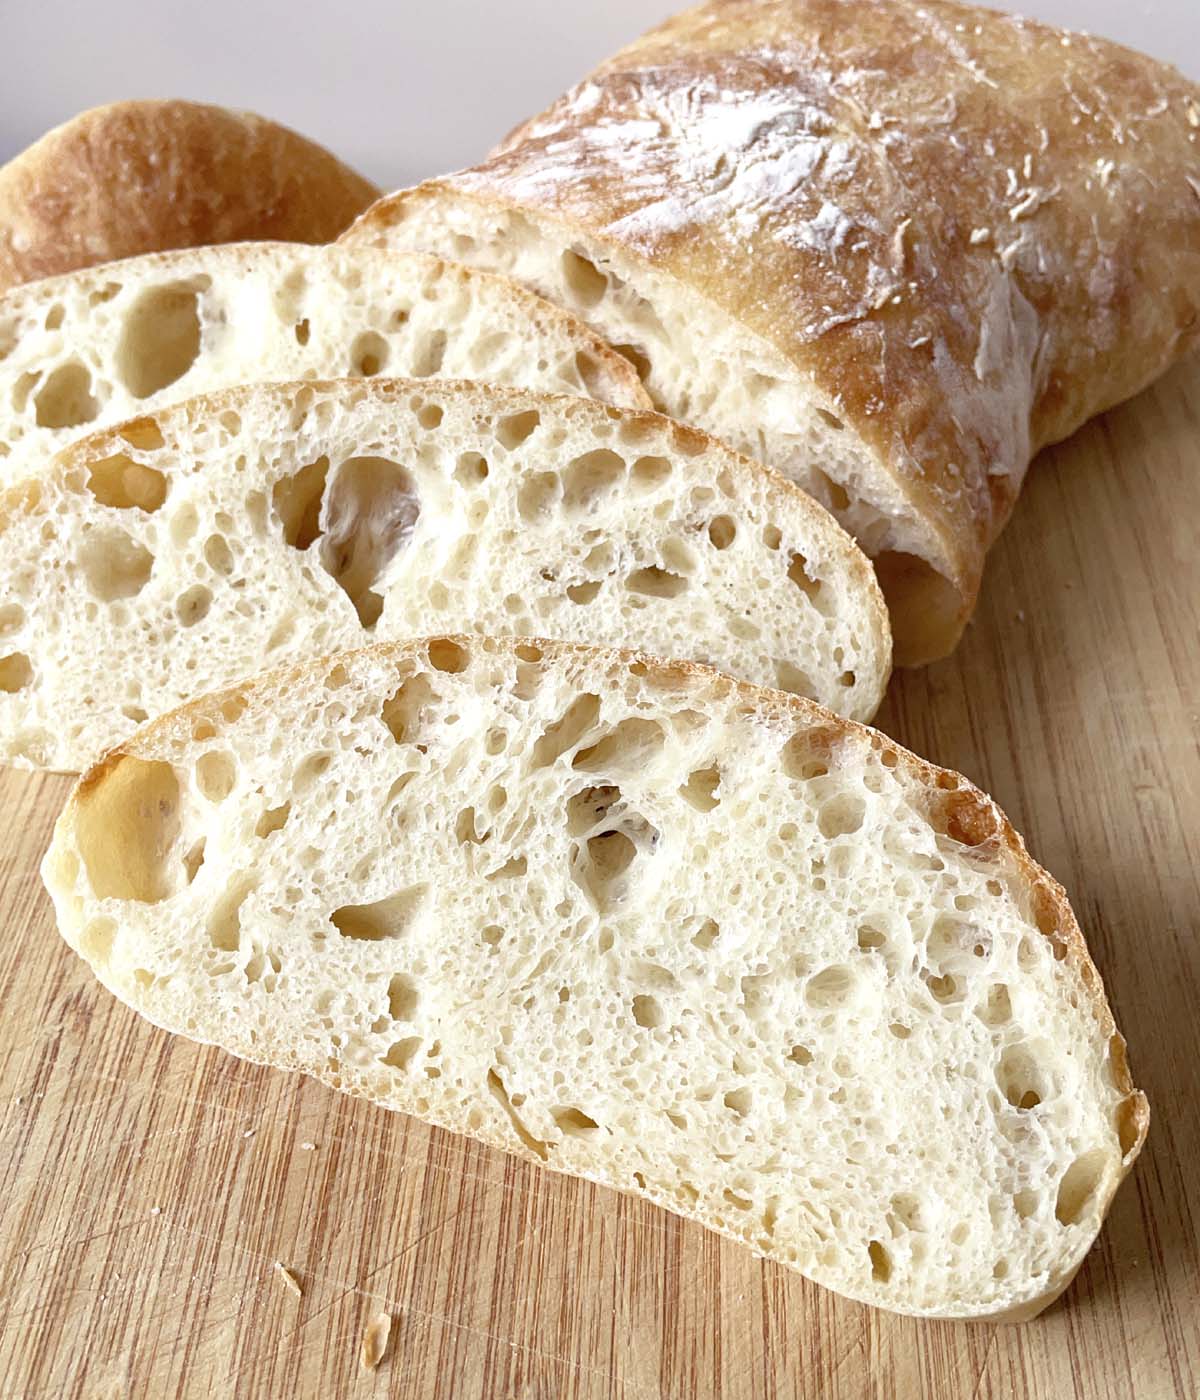
Ciabatta bread is one my all-time favorite types of regular wheat breads. I love the crust and how soft and dense it is inside, every bite having a wonderful satisfying chew to it. I wanted to figure out how to be able to make it easily at home and I'm excited to finally share this with you!
Ingredients
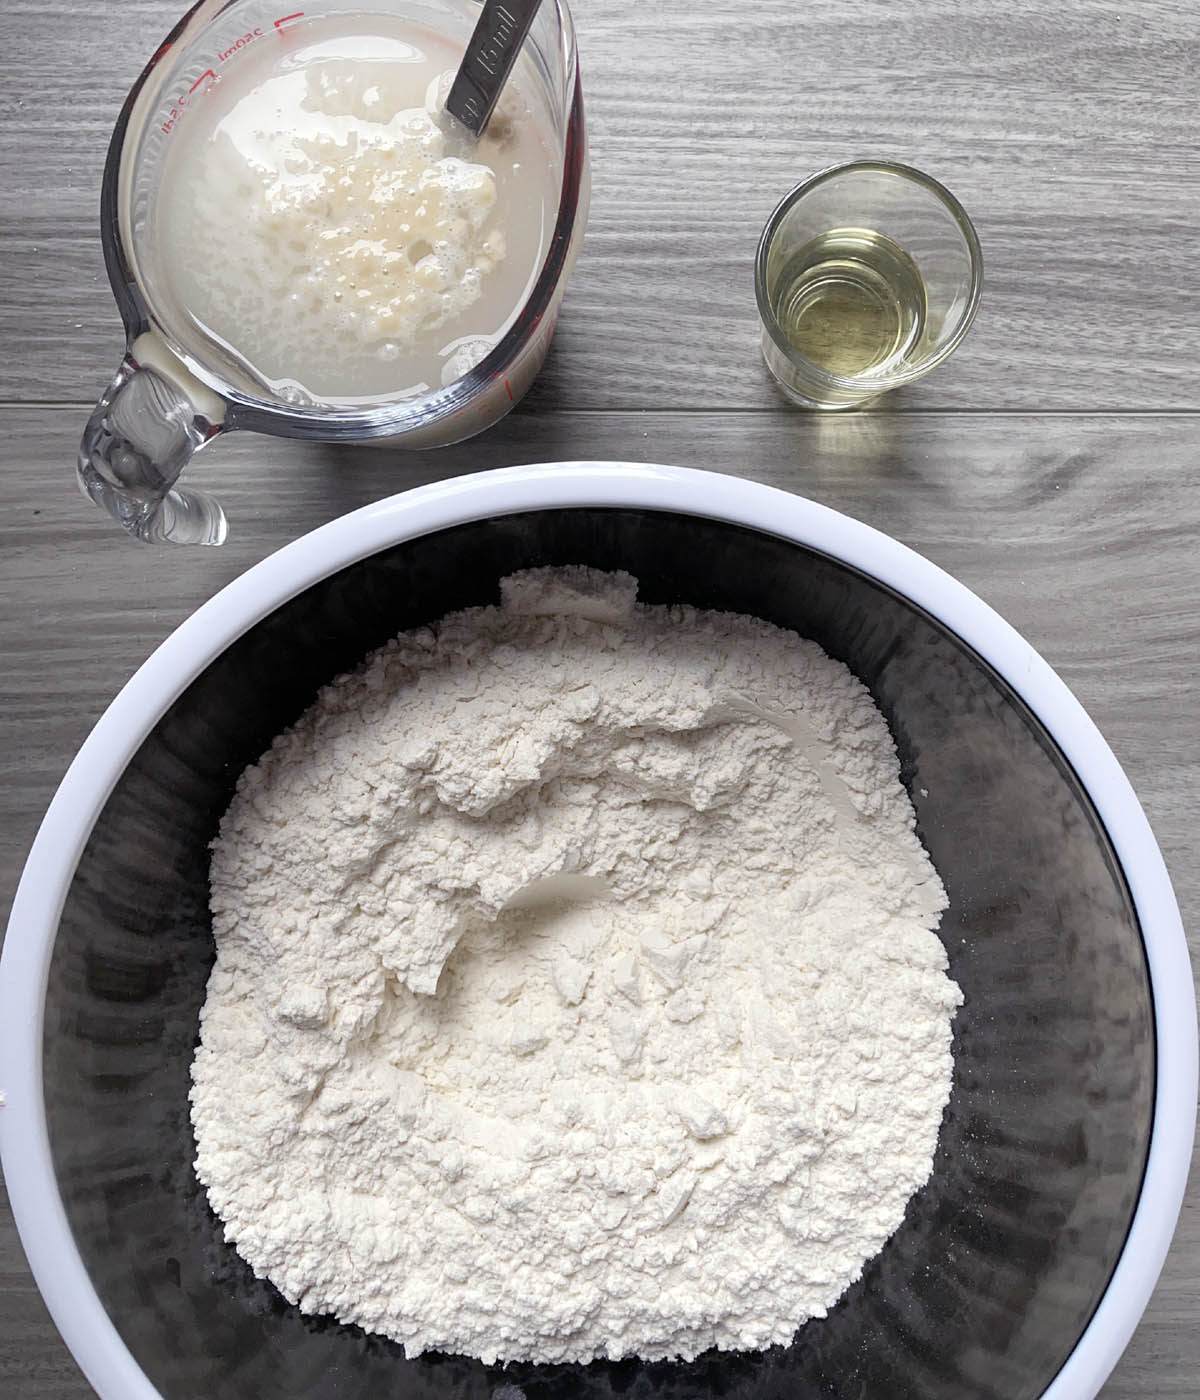
All you need are a few ingredients:
- Bread flour
- Water
- Active yeast
- Salt
- Oil
How To Make the Dough
In a small bowl or measuring cup, combine the warm water and yeast and let it sit for a few minutes. In a medium bowl, combine the bread flour and salt.

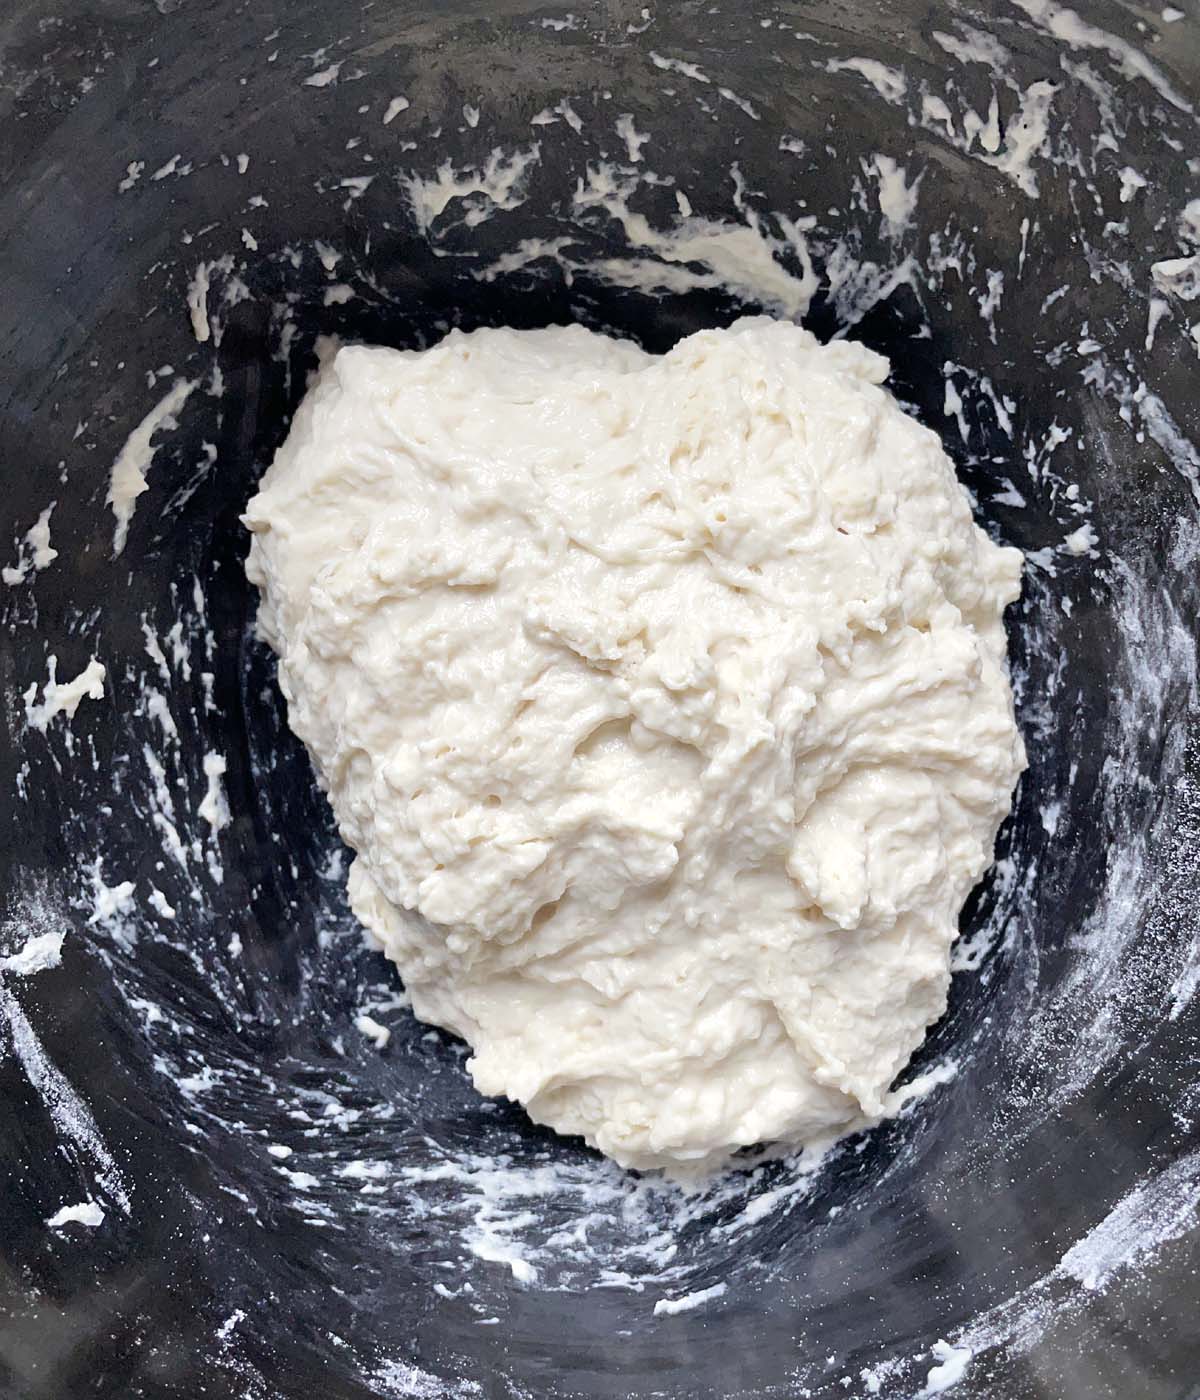
Add the yeast mixture and oil to the flour mixture and use a spoon or spatula to mix the ingredients together until a dough forms and no dry flour remains.
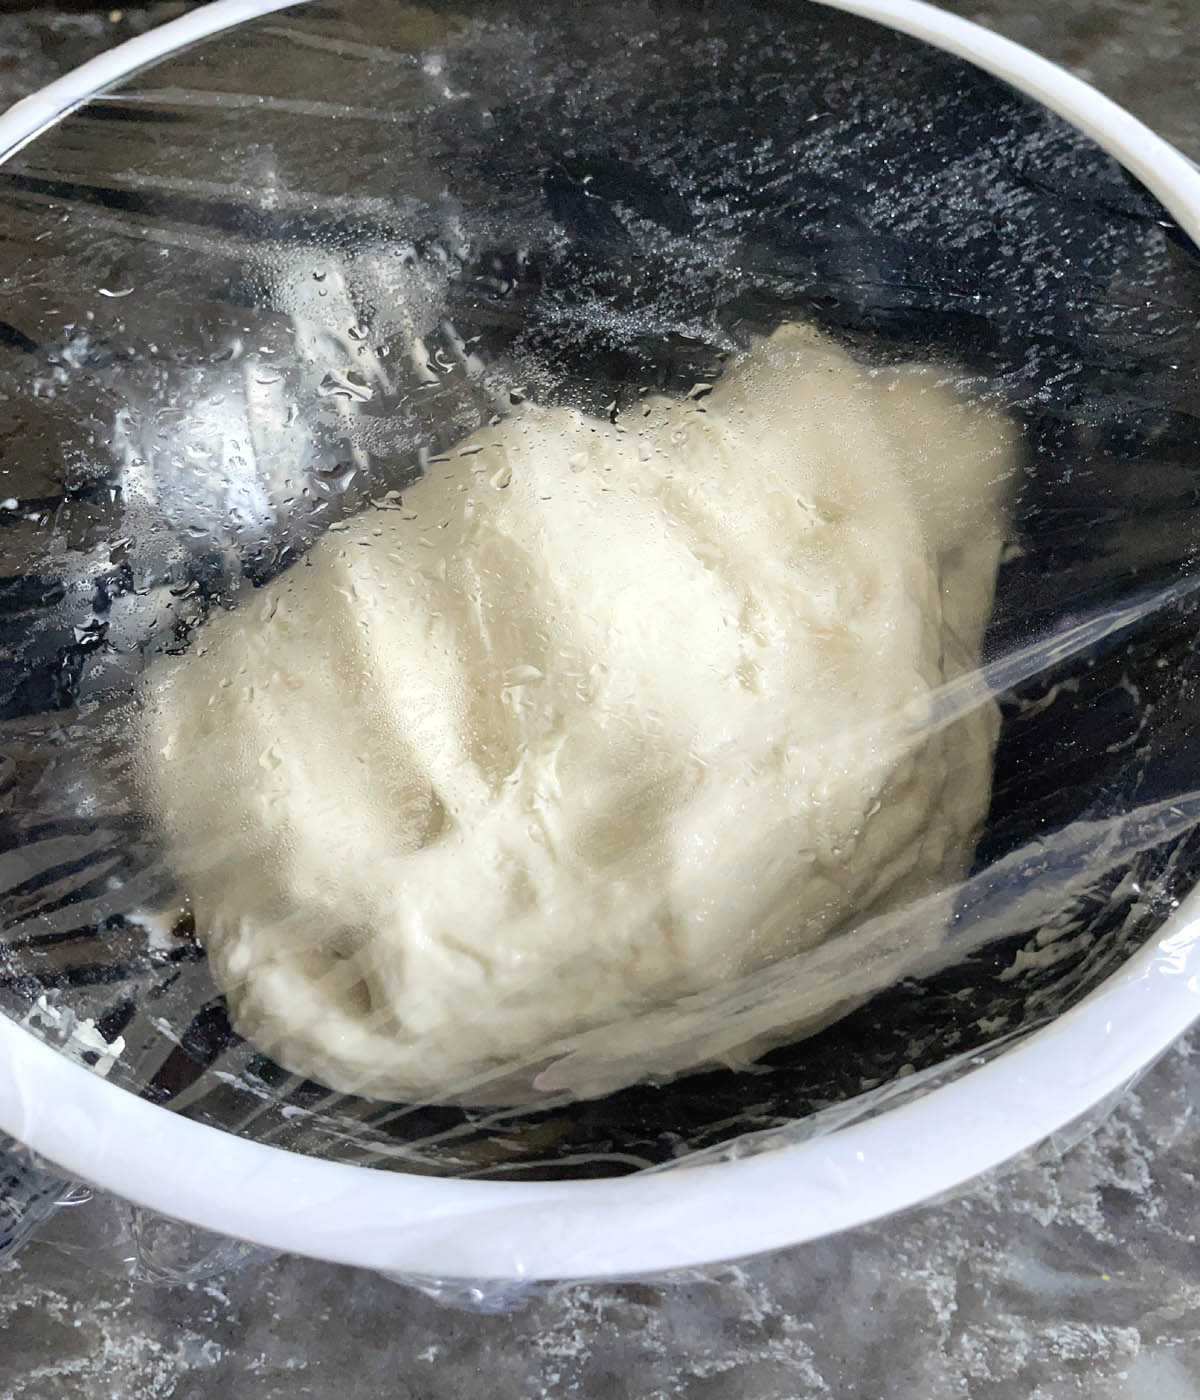
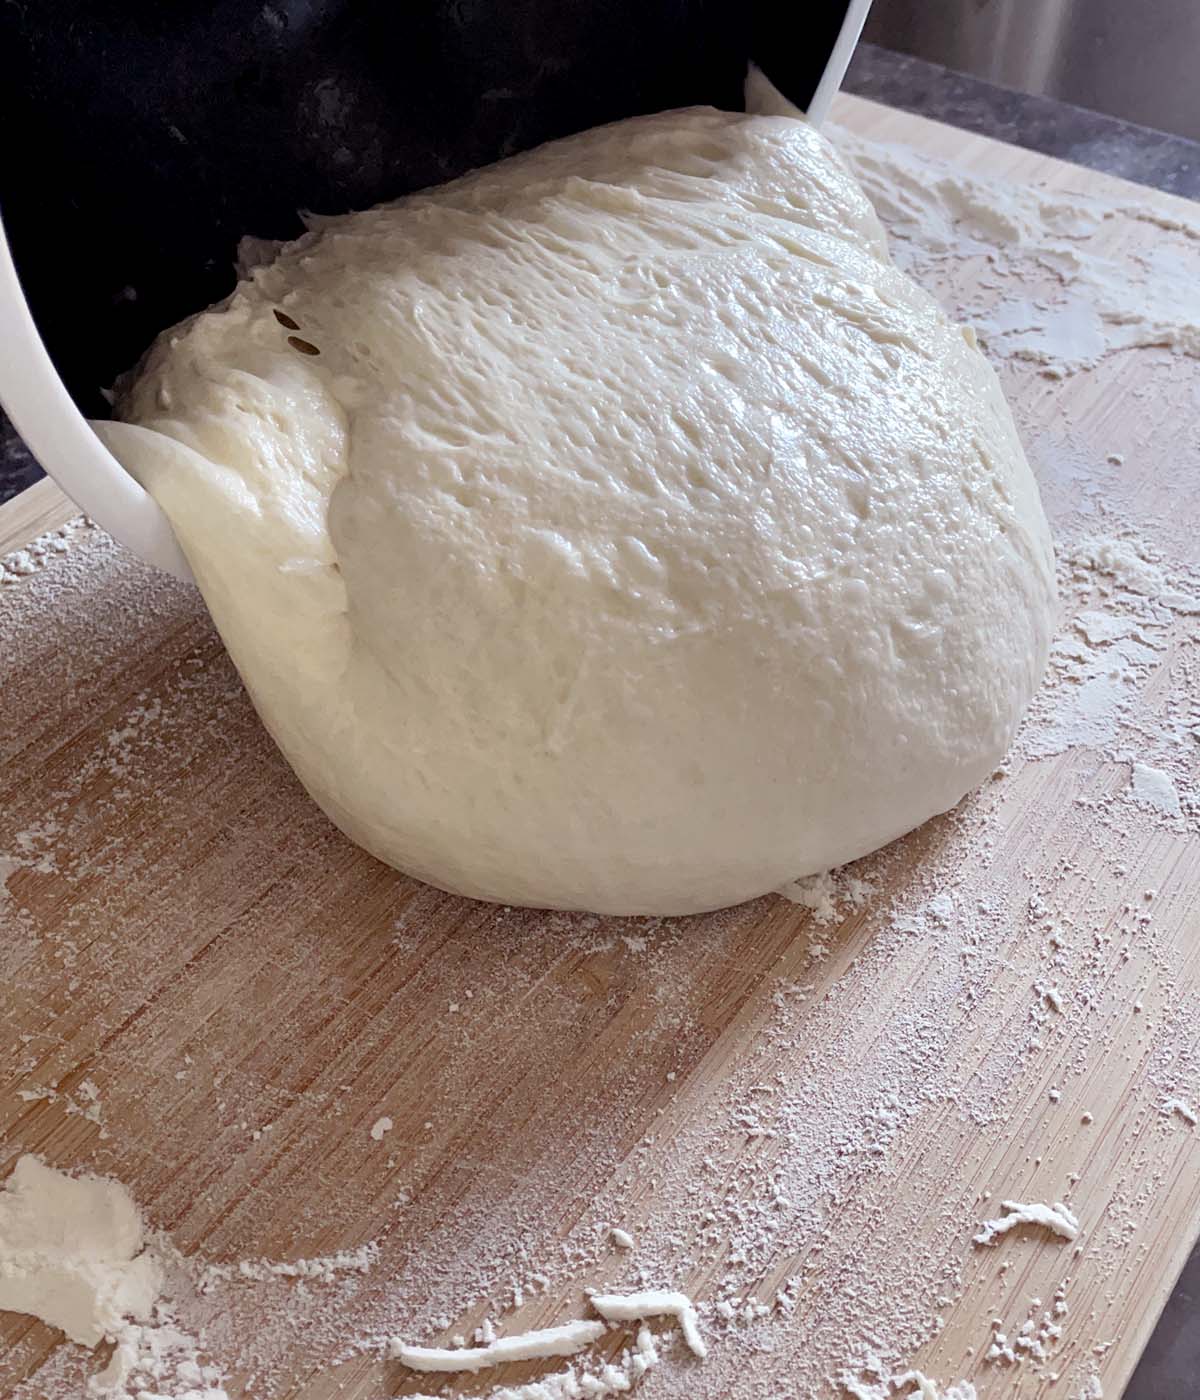
Cover the bowl with plastic wrap and let the dough rest for 1 hour.
Stretching and Folding the Dough
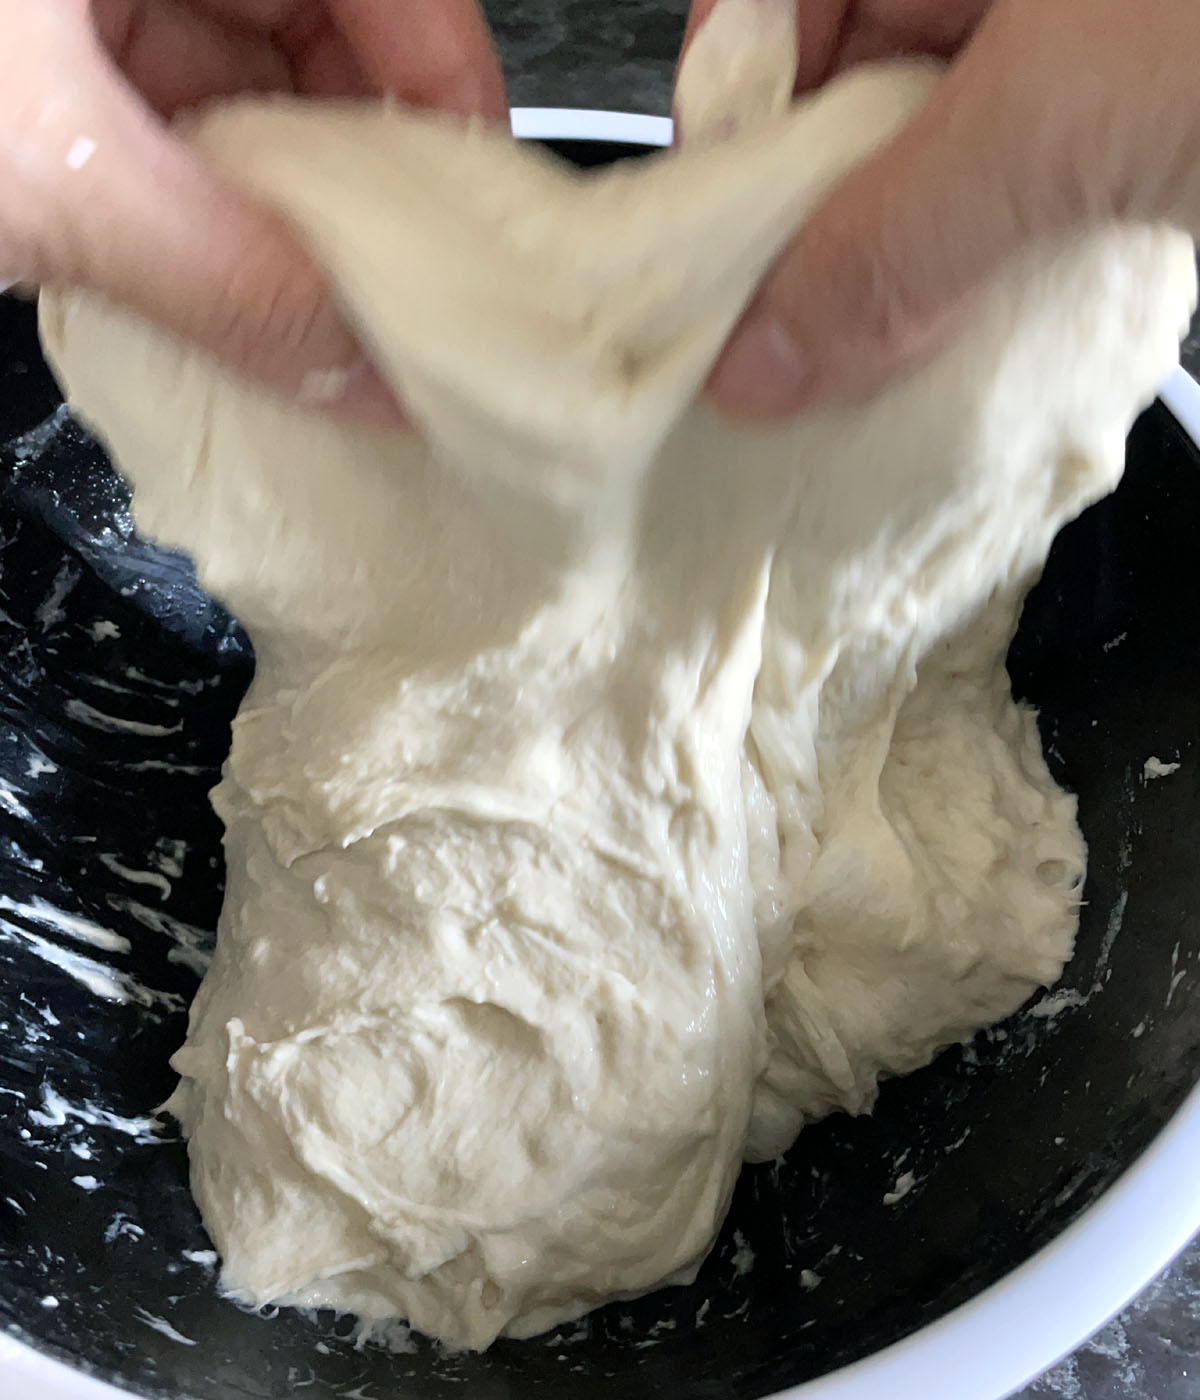
As I mentioned, there is no kneading required for this bread, but there is stretching and folding. The purpose of this action is to strengthen the gluten in the bread and to incorporate air into the dough without kneading.
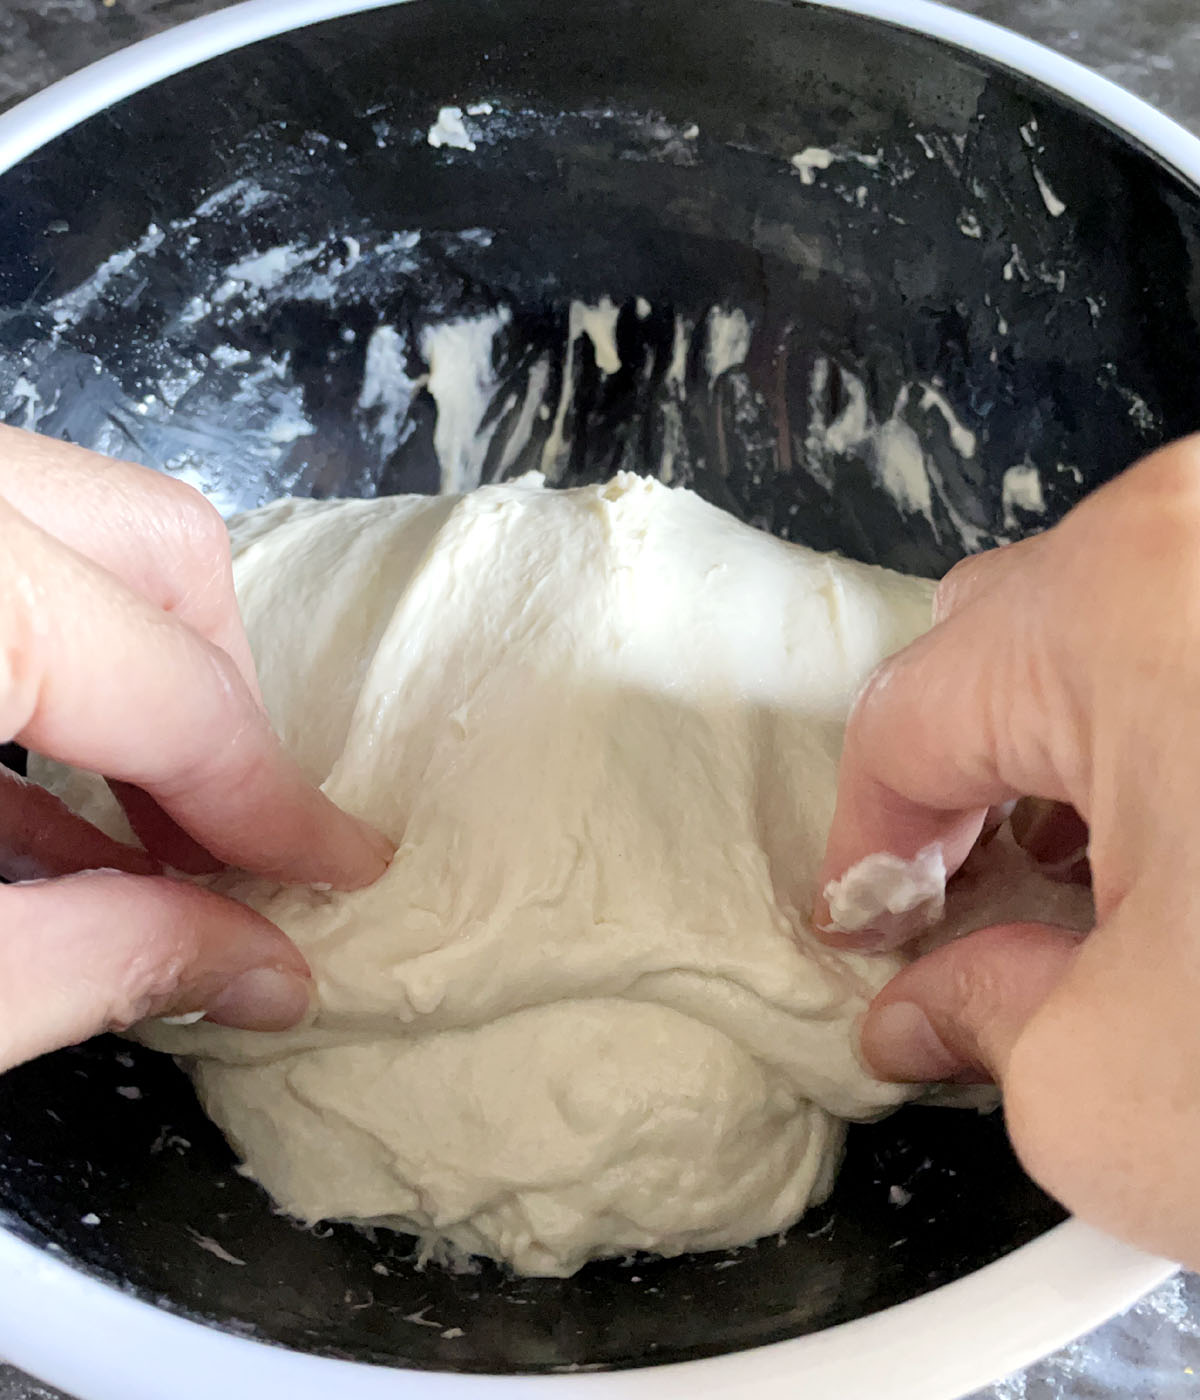
As the name states, you stretch the dough and fold it over onto itself. Making sure your hands are wet so that the dough doesn't stick too much, gently work your fingers under a section of the dough. Gently stretch upward and then fold the dough over onto itself.
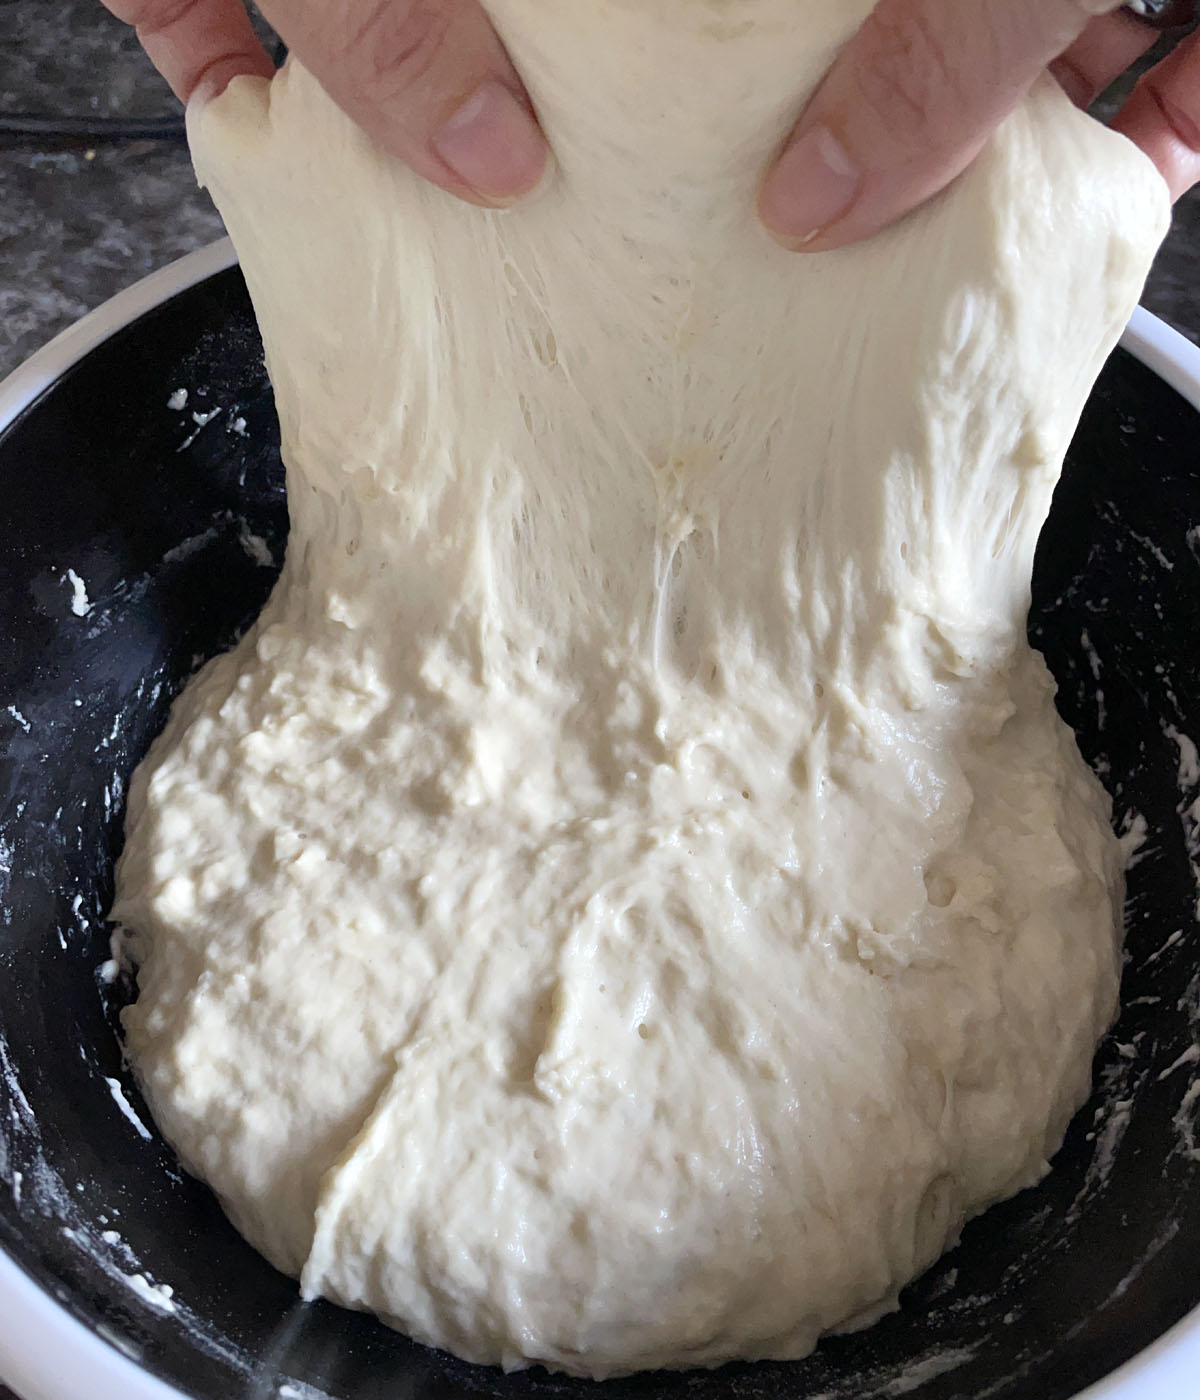
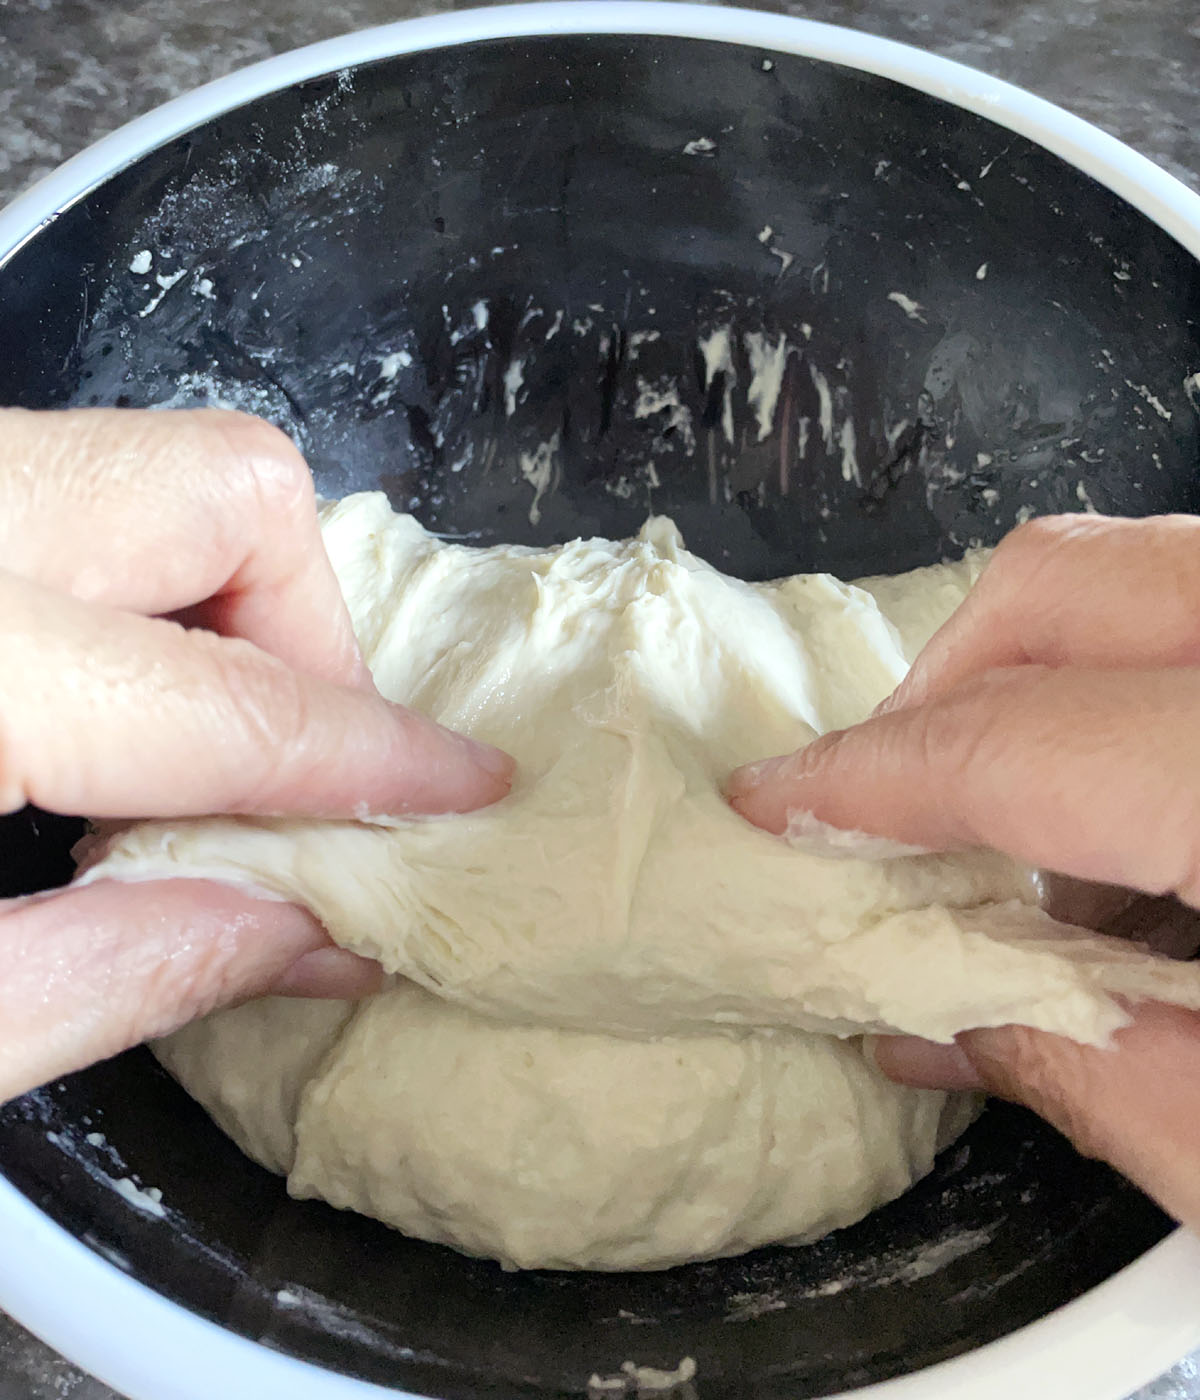
Rotate your bowl a quarter turn and repeat the stretch and fold. Rotate the bowl a quarter turn again, stretch and fold, and then repeat once more for a total of 4 rotations, 4 stretch and folds.
Cover the bowl with the plastic wrap again and allow to rest for 30 minutes.
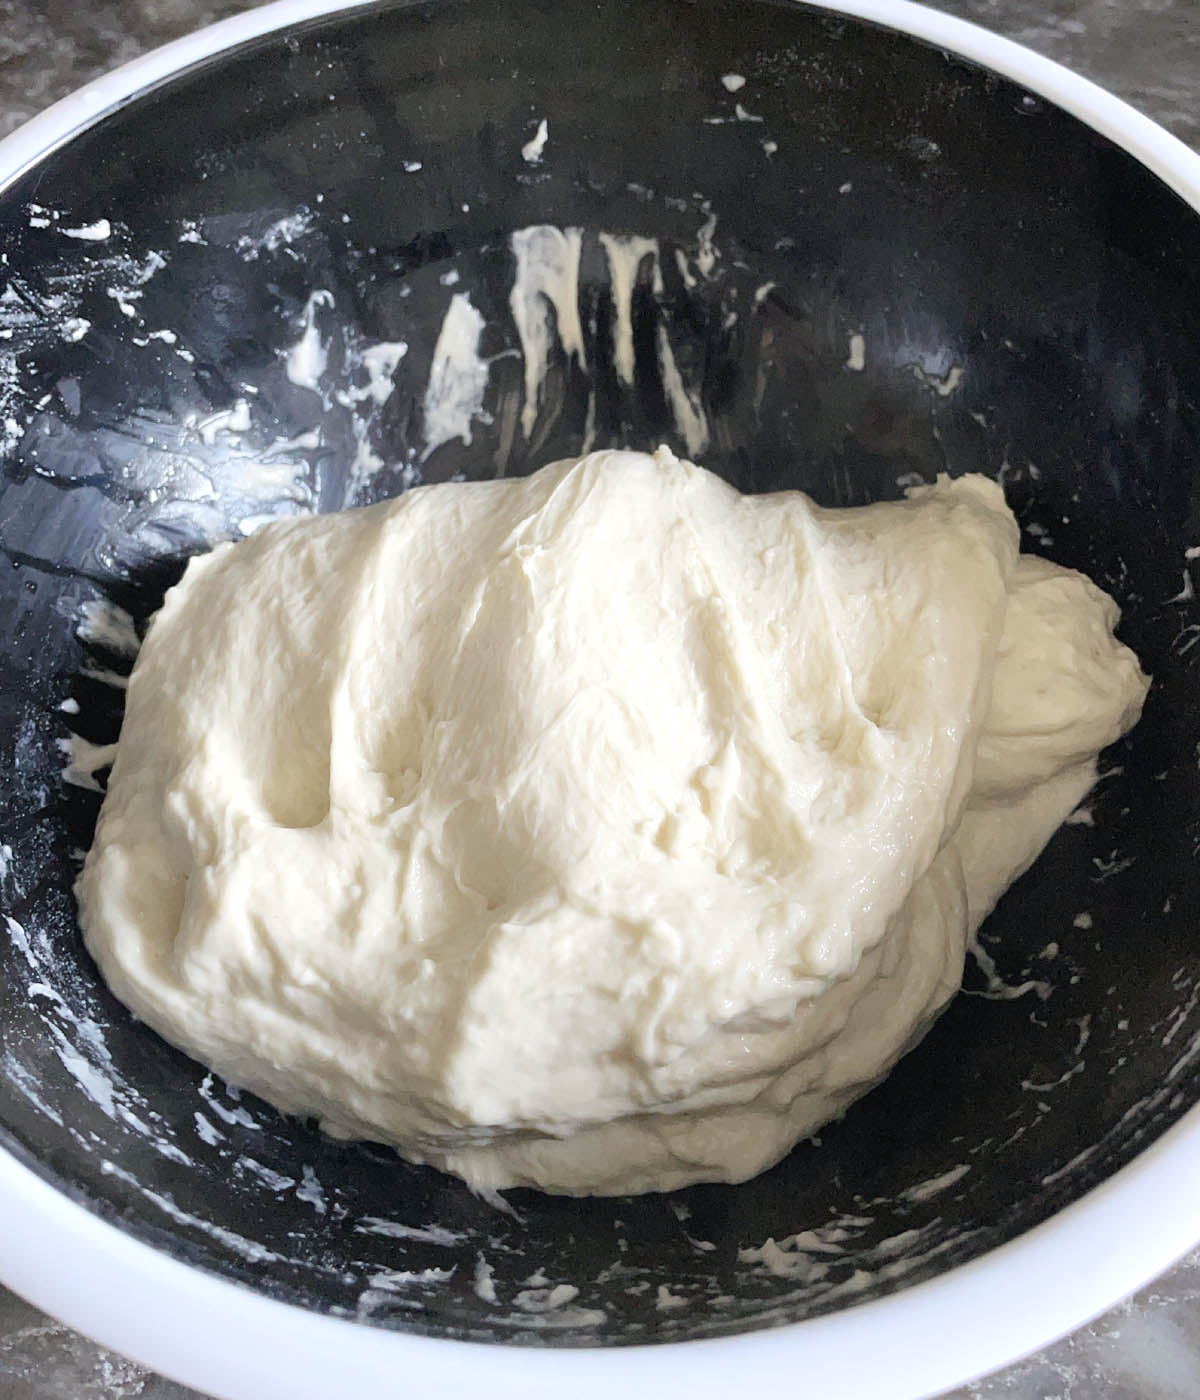
You will repeat the stretch and fold two more times, allowing the dough to rest for 30 minutes between each time. By the end of the three rounds of stretching and folding, you will end up with a very smooth, very elastic dough that has built up some volume because of the air bubbles inside.
Shaping the Dough
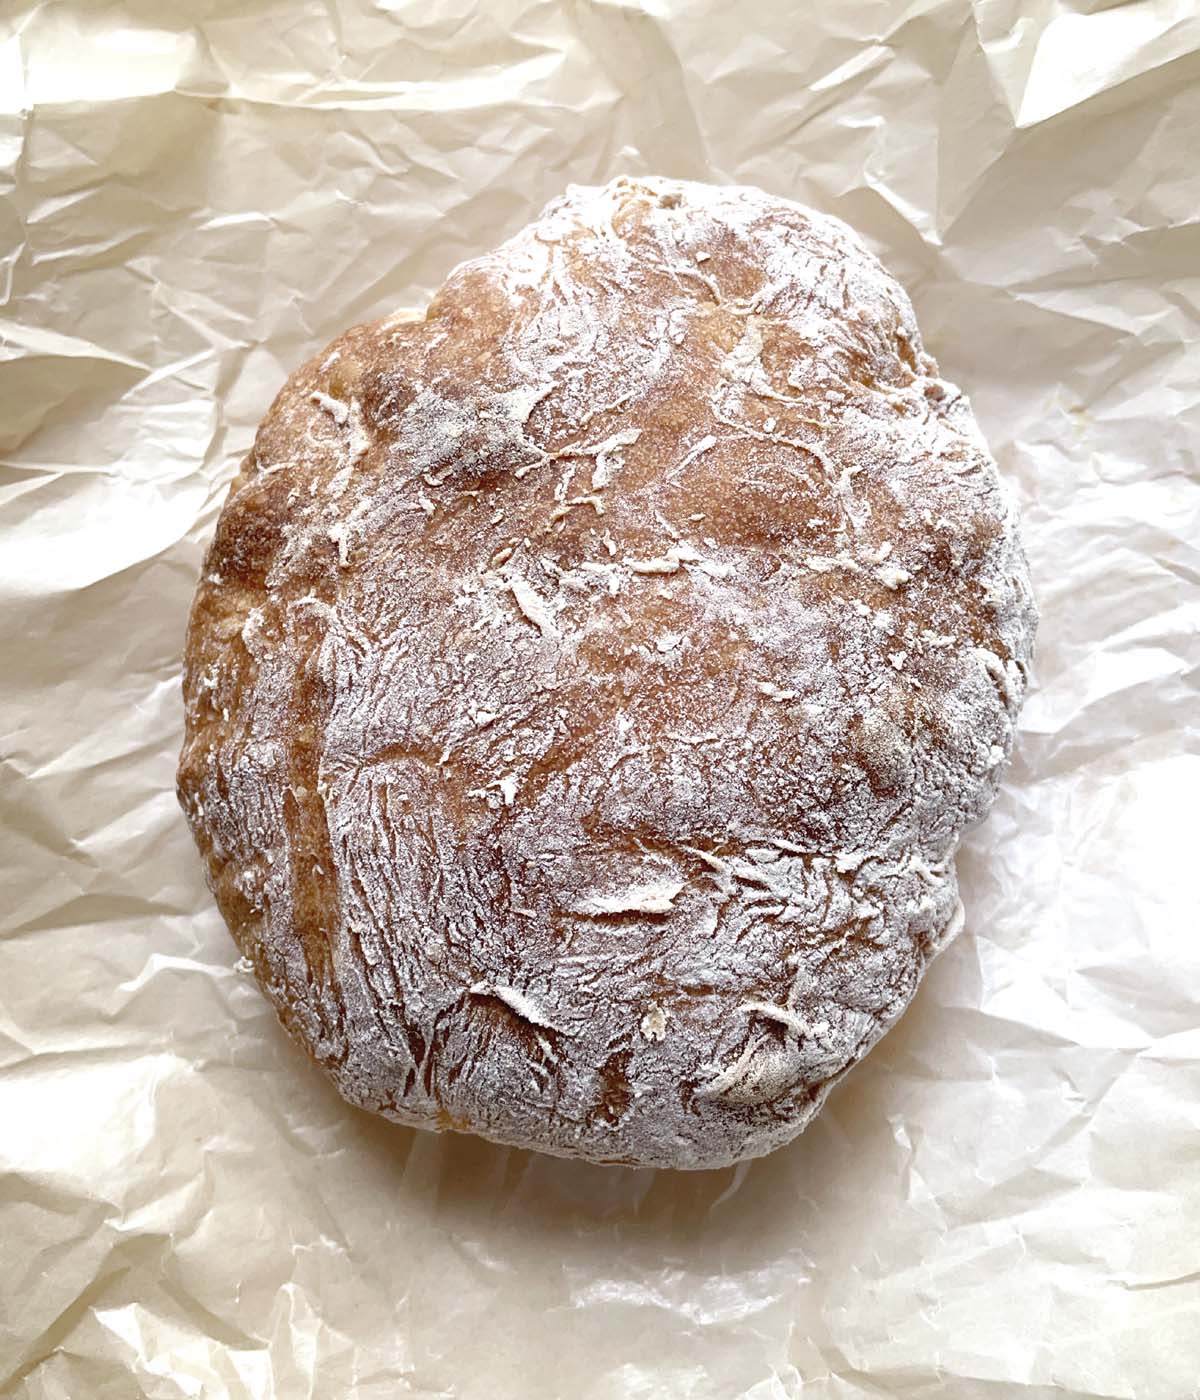
Turn the bread dough out onto a generously floured work surface. Sprinkle more flour on top of the dough. It may flatten out like a blob, but don't worry! It is a very loose and filled with air bubbles. Resist the urge to knead it, otherwise the big air bubbles will pop!
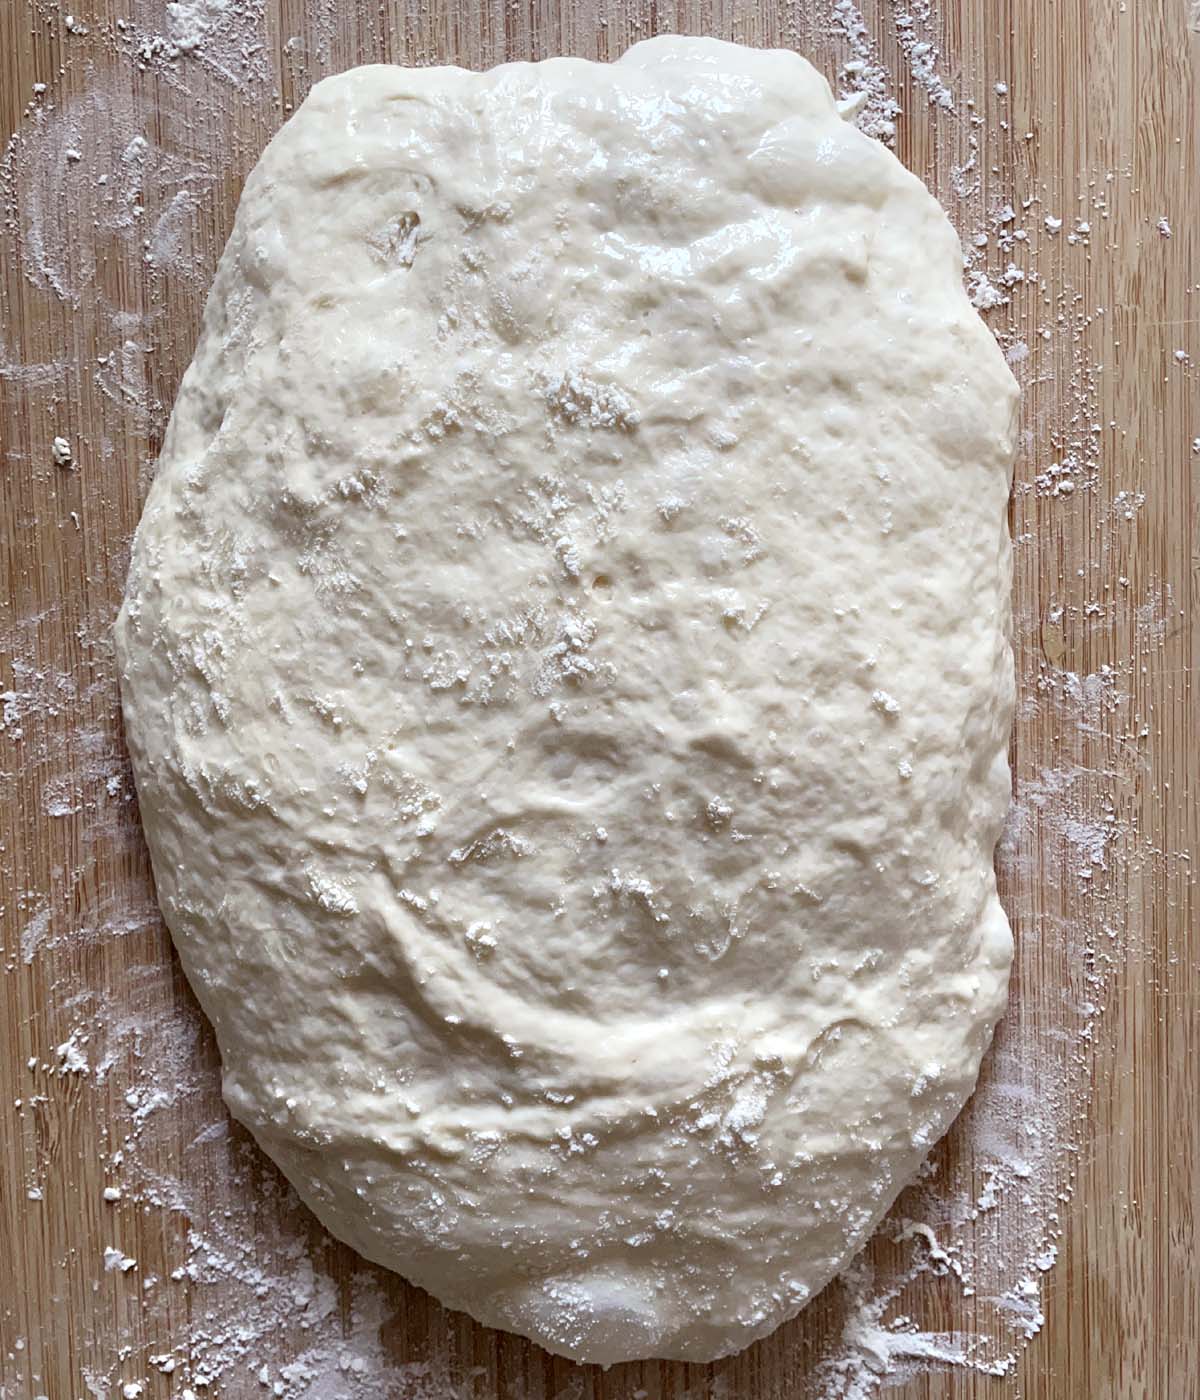
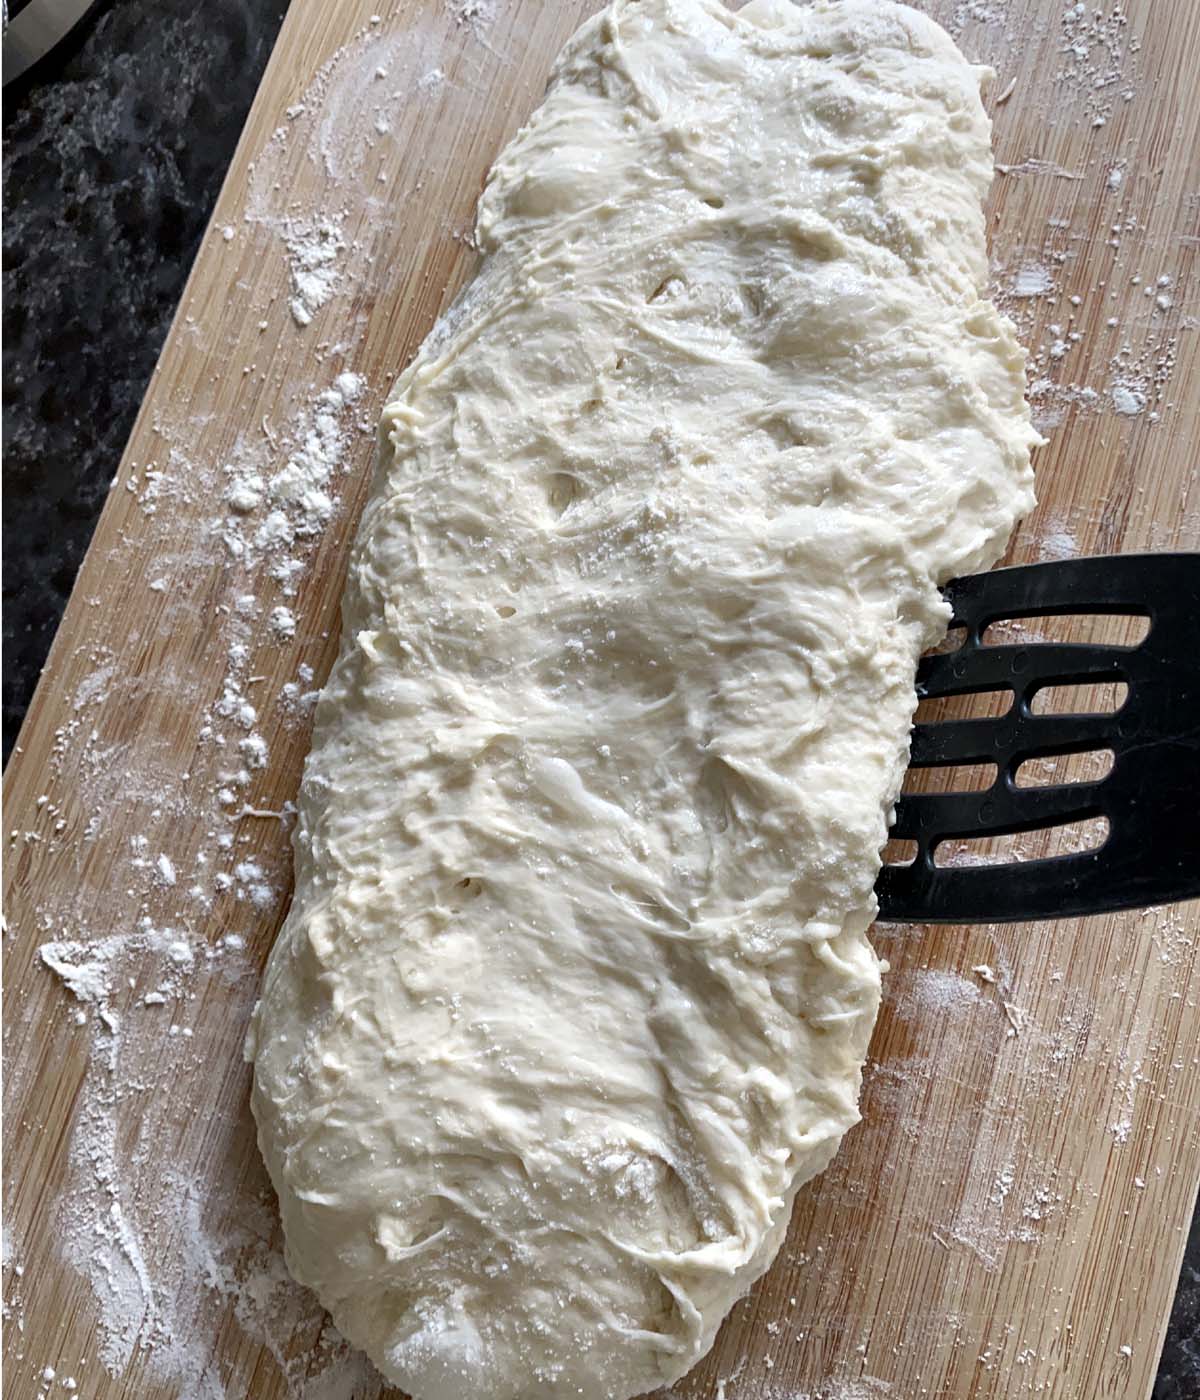
Using a bench scraper or spatula, shape the dough into a roughly rectangular shape, scraping the flour on the work surface under the dough as you shape it. The dough will be very sticky, so do not skimp on the flour. You can choose to make one large loaf or cut the dough into two or three smaller pieces.
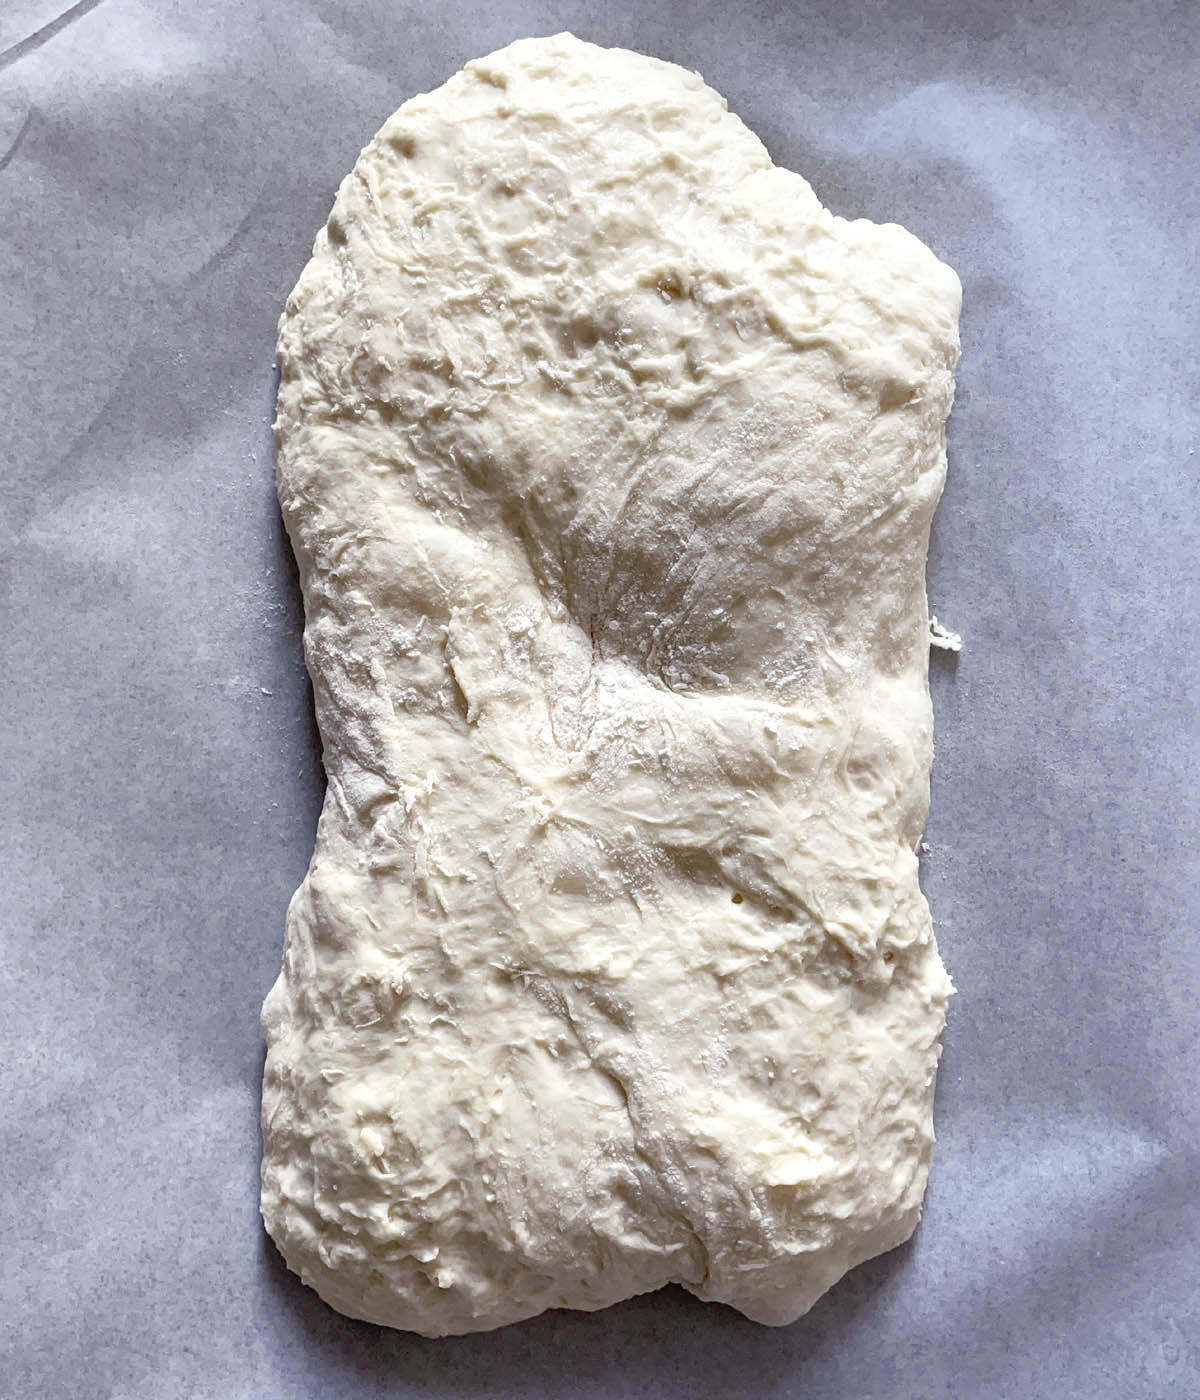
Transfer the dough to a parchment-lined baking sheet, flipping the dough upside down so the flour-coated bottom is now facing up.
Let the dough proof on the baking sheet for 20 minutes.
Baking the Bread
Bake the bread in a preheated 420F/215C oven for 10 minutes.
Then reduce the temperature to 400F/200C and baking for another 10 minutes.
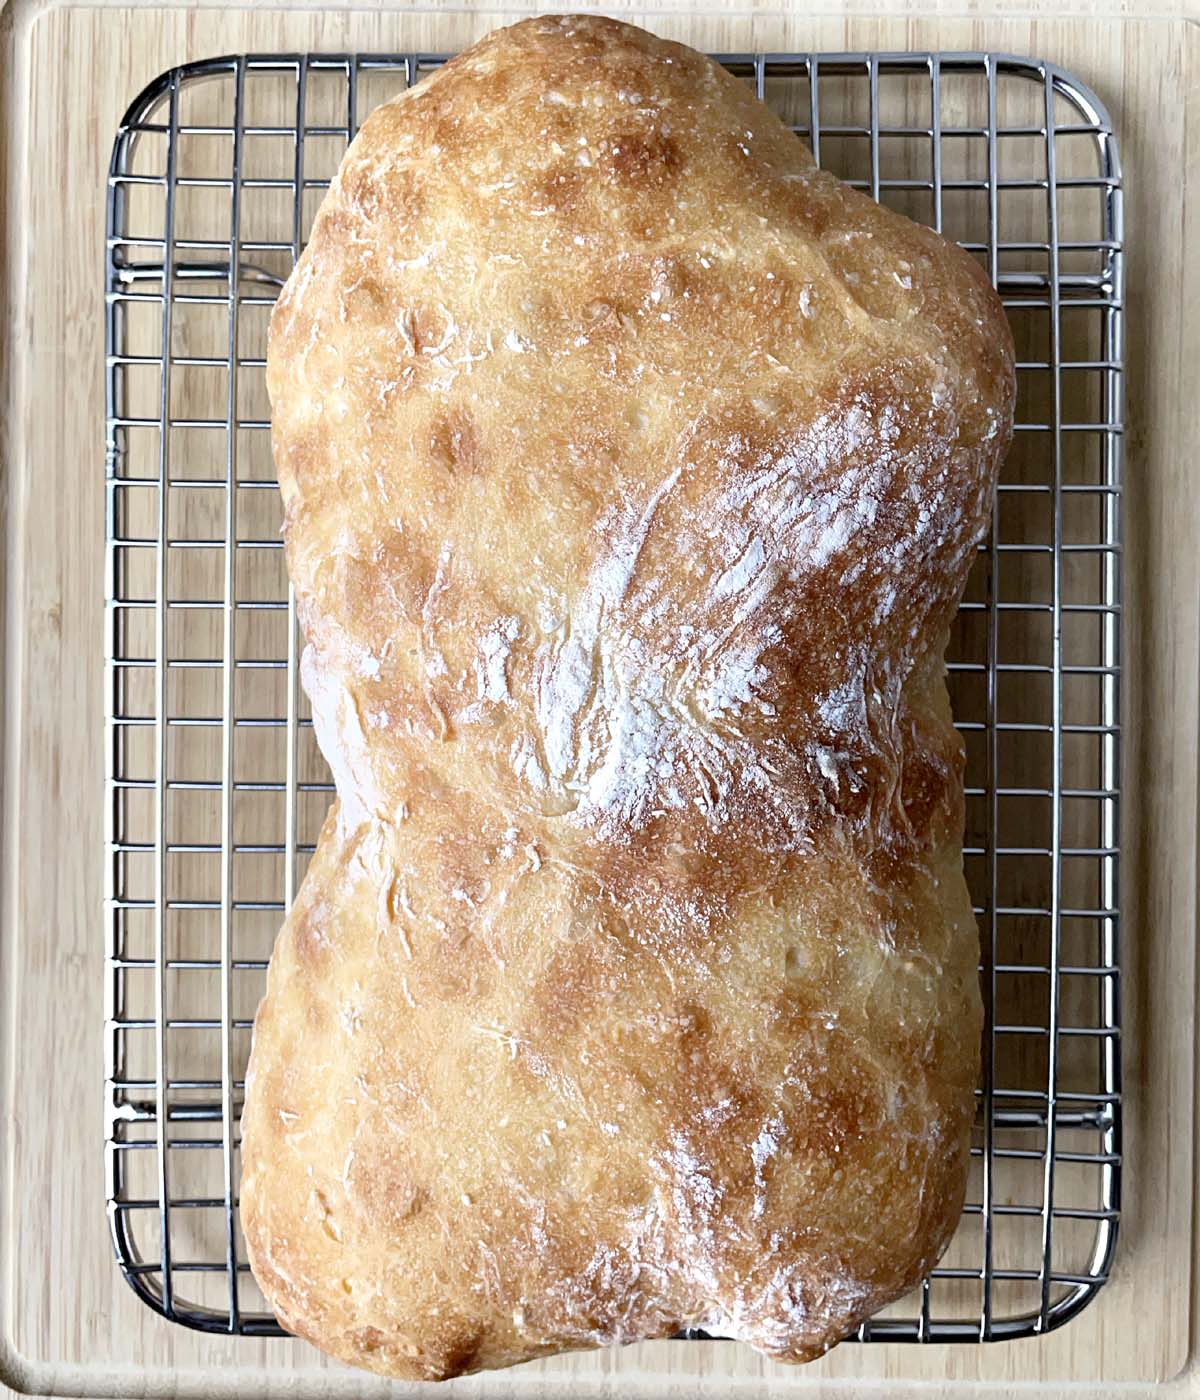
The bread should sound hollow when tapped. The crust will be hard when the bread first comes out of the oven, but it will soften as the bread cools.
Commonly Asked Questions
You can use all-purpose flour, but note that your ciabatta will not have as dense an interior as when you use bread flour. Bread flour has more protein which translates into more gluten, more chew.
Contrary to popular belief, you do not need to add sugar for the yeast to feed off of to make dough rise. The yeast feeds off the carbohydrates that are in the flour.
Measuring ingredients by weight for baking is always more precise and yields more reliable results.
Since there are no preservatives, the bread will keep in a resealable bag on the counter for 2-3 days. You can also store the bread in the fridge for up to a week. Simply warm slices in the microwave or toaster.
YES! I have made a small ciabatta, perfect for serving 2-3 people at one meal. Simply divide the ingredient amounts by 3 and follow the same instructions.
Not yet! But I am working on developing one that I'll be happy enough to post on the blog!
Gluten-Free Bread Recipes
If you are looking for gluten-free bread recipes, you can check out a few of my recipes like: Soft Homemade Gluten-Free Bread, Soft and Delicious Buckwheat Bread, or Gluten-Free Honey Oat Nut Bread. These are not rustic artisan type breads like a ciabatta, but they can still satisfy a bread craving if you are gluten-free!
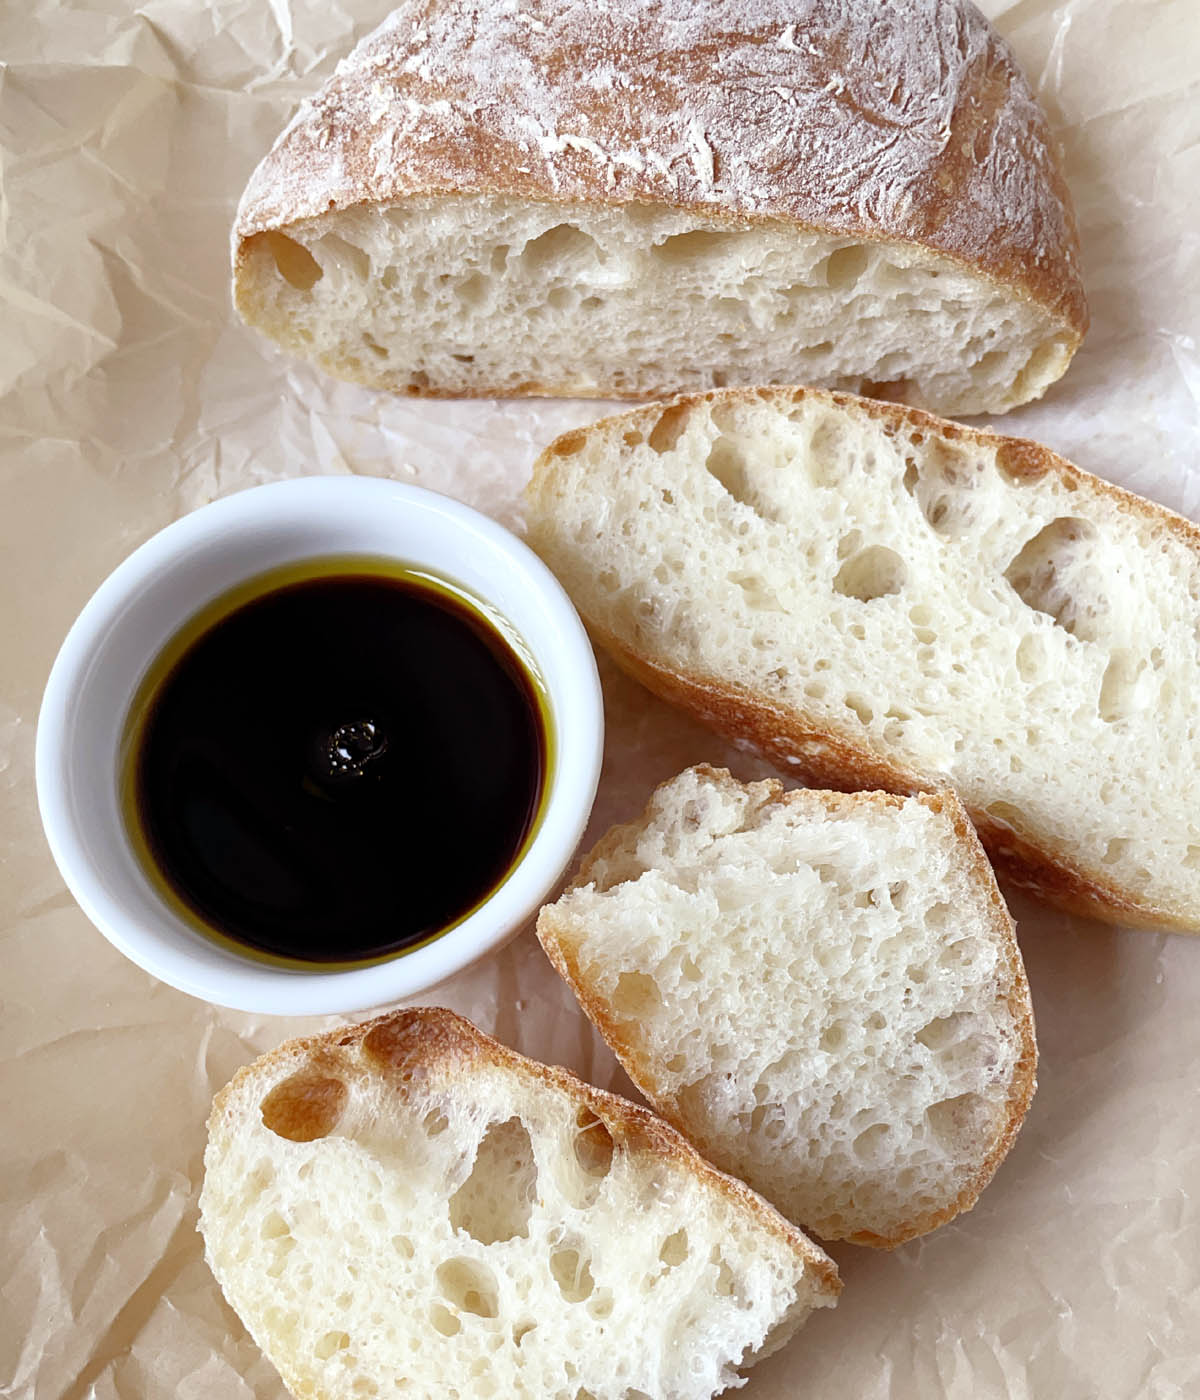
I certainly don't need to tell you how to enjoy this ciabatta bread. It's perfect for eating with a hot bowl of soup or for dipping into oil and vinegar. Slice it horizontally and stuff it with generous layers of deli meat and cheese and greens and you've got a beautiful sandwich. Make avocado toast! It's so delicious!
Like I said, this is one of my favorite breads and I love being able to make this at home whenever I want. Baking your own bread is incredibly satisfying and rewarding, and when you discover how easy it is to make this ciabatta, you're going to want to make it all the time!
~ Lisa.

Easy Ciabatta Bread
Ingredients
- 300 grams organic bread flour
- 5 grams salt
- 240 grams warm water
- 3 grams active yeast
- 10 grams extra virgin olive oil
Instructions
- Combine warm water and active yeast in a bowl and let sit for 10 minutes.
- In a mixing bowl, combine bread flour and salt.
- Add yeast mixture and oil to the flour.
- Mix with a spoon or spatula until all ingredients are combined into a dough and there is no dry flour remaining in the bowl.
- Cover bowl with plastic wrap and let dough rest for 1 hour.
Stretching and Folding the Dough:
- Wet hands lightly with water and starting on one side, lift the dough up and pull upwards gently to stretch and then fold it over onto itself.
- Rotate the bowl 90 degrees and repeat 3 more times, wetting hands as necessary between each stretch so that the dough doesn't stick.
- Re-cover the bowl with plastic wrap and let dough rest 30 minutes.
- REPEAT these same steps for stretching, folding over, and resting the dough 2 more times.
Shaping and Final Proof:
- Preheat oven 420F/215C.
- Gently scrape the dough out of the bowl onto a generously floured work surface.
- Sprinkle flour over the dough and onto your hands. The dough will be very sticky, so be generous with the flour on the work surface. Do not knead the dough otherwise you will lose all the air bubbles inside.
- Using a bench scraper or spatula, scrape and shape the dough, pushing the flour on the work surface underneath. You can cut the dough into two or three pieces at this point or leave it as one loaf.
- Transfer the dough to a flour-dusted parchment-lined baking sheet, flipping the dough so the floured underside is now on top. Let dough proof 20 minutes.
Baking the Bread:
- Bake bread for 10 minutes. Reduce heat to 400F/200C and bake another 10 minutes until golden brown on top.
- Allow bread to rest 5 minutes on the pan and then transfer to a wire rack to cool completely before slicing.
Notes
- 3 grams yeast = about 1 teaspoon
- If you want to omit the oil from the recipe, use 250 grams of water.
- Bread keeps at room temperature for 2-3 days. Store in the refrigerator to keep it longer. Warm leftover bread in the oven or toast slices.
- You can use all-purpose flour but the bread will not be as dense or have the same chew as using bread flour.
- Make a smaller loaf by dividing the recipe ingredient by 3. Follow the same instructions to make the bread.


Leave a Comment