• Skip to primary navigation
  • Skip to main content
  • Skip to primary sidebar
A Day in the Kitchen
  • RECIPES
  • ABOUT
  • CONTACT
menu icon
go to homepage
  • RECIPES
  • ABOUT
  • CONTACT
    • Email
    • Facebook
    • Instagram
    • LinkedIn
    • Pinterest
    • YouTube
  • Homepage link
    • RECIPES
    • ABOUT
    • CONTACT
    • Email
    • Facebook
    • Instagram
    • LinkedIn
    • Pinterest
    • YouTube
  • ×

    Home » Recipes » Breads » Soft Homemade Gluten-Free Bread

    Soft Homemade Gluten-Free Bread

    Published: Jul 13, 2020 · Modified: Feb 27, 2022 · This post may contain affiliate links · This blog generates income via ads.

    JUMP TO RECIPE

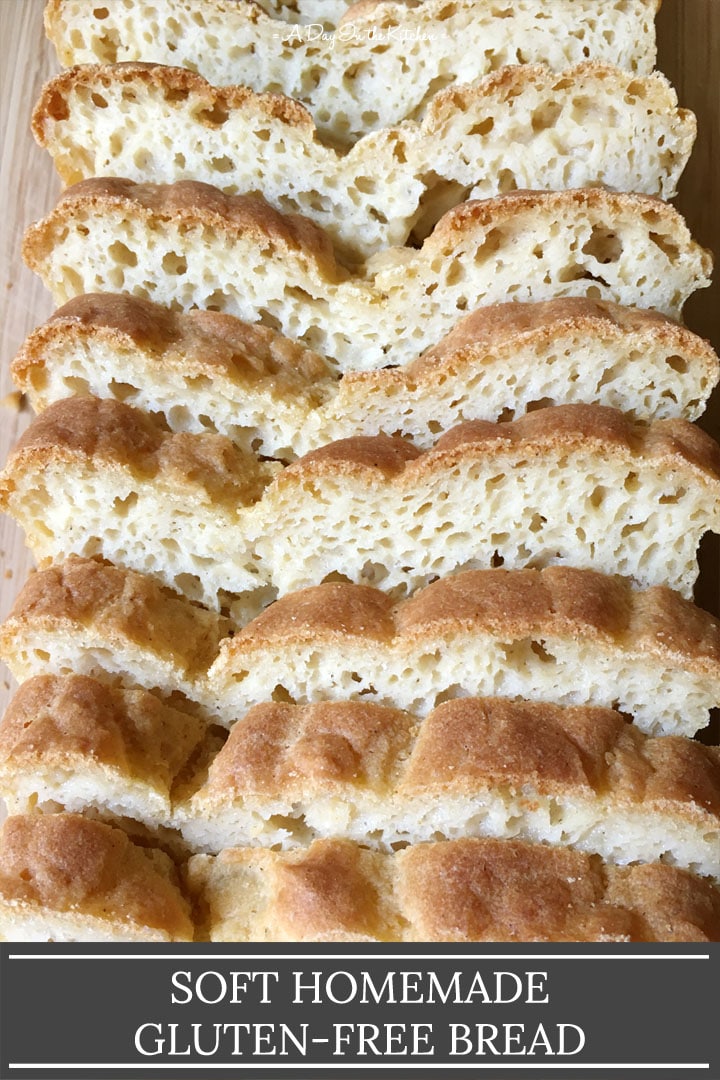
    Soft homemade gluten-free bread is easier to make than you think! Simple and delicious, you'll love it in a sandwich or with some butter and jam. Most importantly, you'll be amazed that this bread is gluten-free!

    Close-up of slices of bread on a wooden cutting board

    Believe it or not, I still have trouble convincing some people that gluten-free bread can actually be good.

    Crazy, right?

    I've been doing gluten-free baking for a long time...

    ...and if you know me, you know I won't actually post a recipe unless it ticks all the boxes.

    For bread, it's got to be SOFT...

    ...and delicious...

    ...and good enough and close enough to "real bread" that you don't realize it's gluten-free.

    Bonus points if it's also easy to make!

    Well, this bread recipe ticks all the boxes and is just another example of how good gluten-free bread can actually be!

    The Dry Ingredients

    I like to keep the ingredients fairly simple, and this bread recipe is no exception. The dry ingredients are made up of rice flour, tapioca starch, sorghum flour (which can be substituted with buckwheat or oat flour), xanthan gum, and salt. That's it! The rice flour provides the bulk, the tapioca starch provides the moisture, and the sorghum flour gives the wheat-like smell and taste. The xanthan gum acts as the "glue", if you will, giving the bread that chew that we want from bread.

    I prefer not to use pre-made gluten-free flour blends as they often contain other ingredients that I do not want, so I like to create my recipes from scratch with the core ingredients. However, be rest assured that the gluten-free flours I use are commonly found and affordable, so anyone can make these recipes.

    Now on to the other dry ingredient...yeast.

    A bowl of dry flour ingredients, dry yeast becoming foamy in a measuring cup containing water

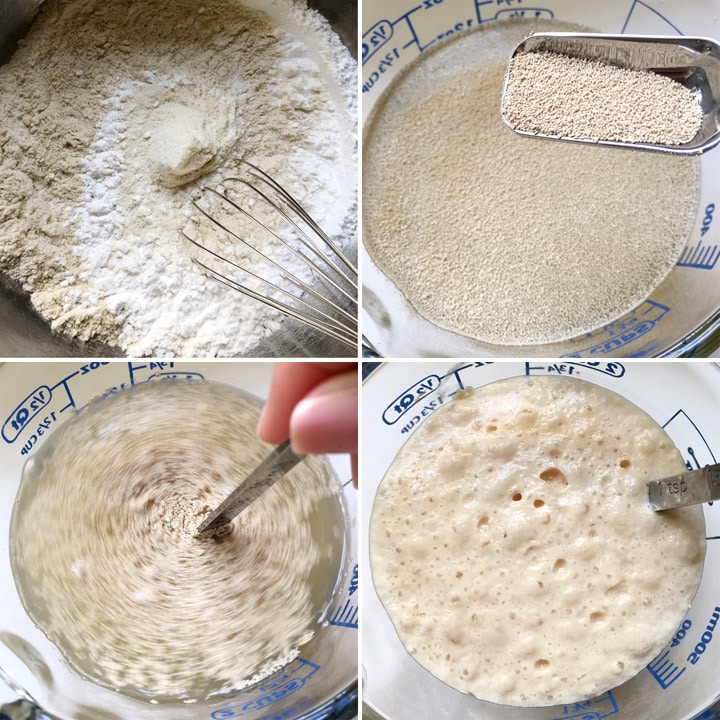
    Contrary to common thinking, you do not have to proof yeast before adding it to the rest of the ingredients. If you are confident that the yeast is active (or if you want to live life on the edge!), you can simply add it dry to the rest of the dry ingredients. I have done this and the bread has always worked out without any issue. Keep in mind that I also store my yeast in the fridge to facilitate it staying active longer.

    If you aren't sure if your yeast is active, or if you just want to make sure it is before you combine it with all the other ingredients, there is nothing wrong with proofing it first. For proofing the yeast for this recipe, I simply take ¼ cup of the required amount of warm water, mix it with the 2 tablespoons of honey, and add the yeast.

    Creating the Batter

    Yes, I said batter.

    One major difference from regular wheat bread is that gluten-free bread dough is more like a batter and doesn't require any kneading. It is as simple as mixing all the wet and dry ingredients together with a mixer, pouring the batter into a pan and letting it rise once before baking. In that respect, making a gluten-free bread is much simpler than wheat bread!

    The wet ingredients are also very straightforward, being composed of eggs, honey (which you may have already used for proofing your yeast), warm water, oil, and apple cider vinegar.

    A bowl containing dry flours and eggs and wet ingredients, batter being mixed by a mixer, batter in a bowl and in a loaf pan

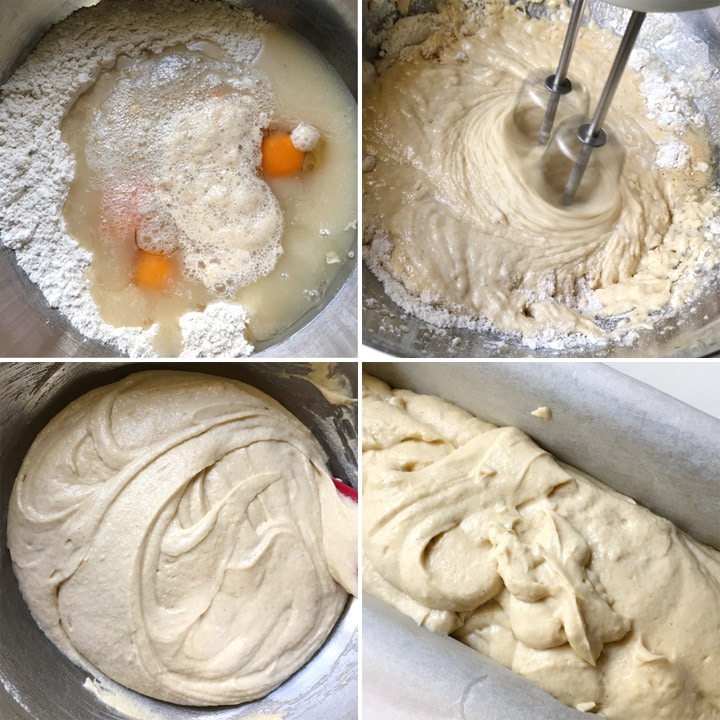
    The dry, the wet, and the yeast mixture (if proofing ahead of time) all get combined into a mixing bowl. Whether you are using a stand or hand mixer, it only takes about a minute for the bread batter to come together.

    The Rise

    Scoop the bread dough batter into a parchment-lined loaf pan and now you just have to let it rise. (See Recipe Notes below regarding pan sizes.) If my kitchen is already warm (like during the summer months), I will simply leave it on the counter. Otherwise, during the colder months, I will often put the bread pan in the oven with just the oven light on and that creates a perfect warm environment for the bread to rise.

    Once the bread is no more than ¼" above the edge of the pan, it is ready to bake. I know it may be tempting to let it rise just a *little* bit more until it reaches, what you think, is the perfect height. However, take it from someone who has done just that...don't. 🙂

    Side by side photo, batter in a bread loaf pan, batter that has risen in a loaf pan

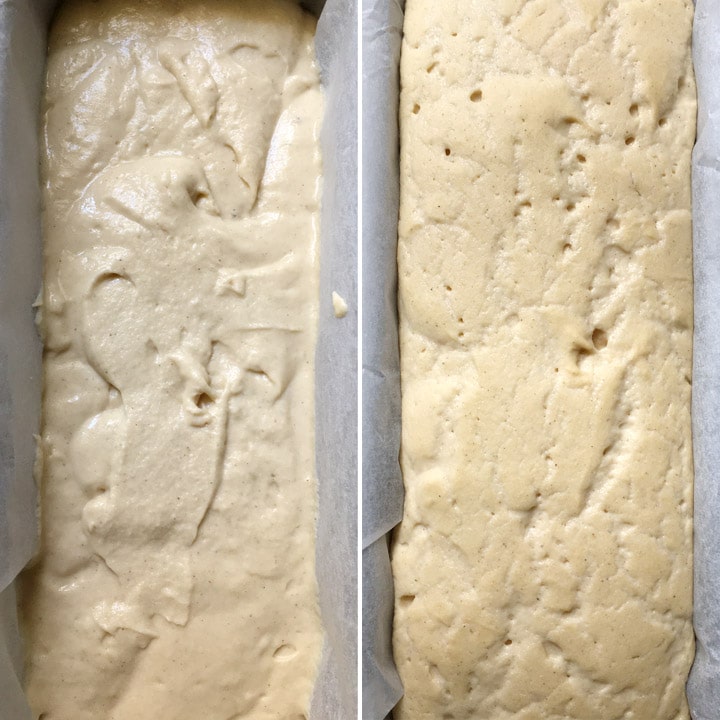
    The bread batter continues to rise a bit once it goes into the oven and that can result in your bread having a "ledge" or, even worse, the batter may spill over the edge of the pan. So err on the side of being conservative.

    Bread Magic

    After the bread dough has risen, it's time to bake and let the heat do its magic. Before you know it, the wonderful aroma of fresh baked bread will be wafting through your home! In 45 minutes, you'll have a beautiful loaf of bread..that looks and smells like "real" bread!

    Close-up of a slice of bread on a wooden cutting board

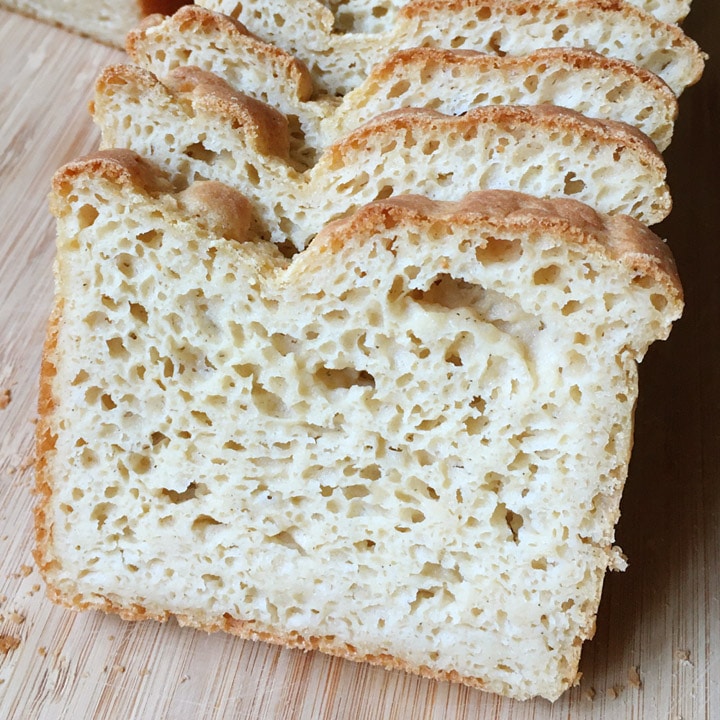
    I know it will be difficult, but it's best to let the bread cool completely before slicing. Your patience will be rewarded when you make those first slices, see the beautiful airy bubbles, and take your first bite!

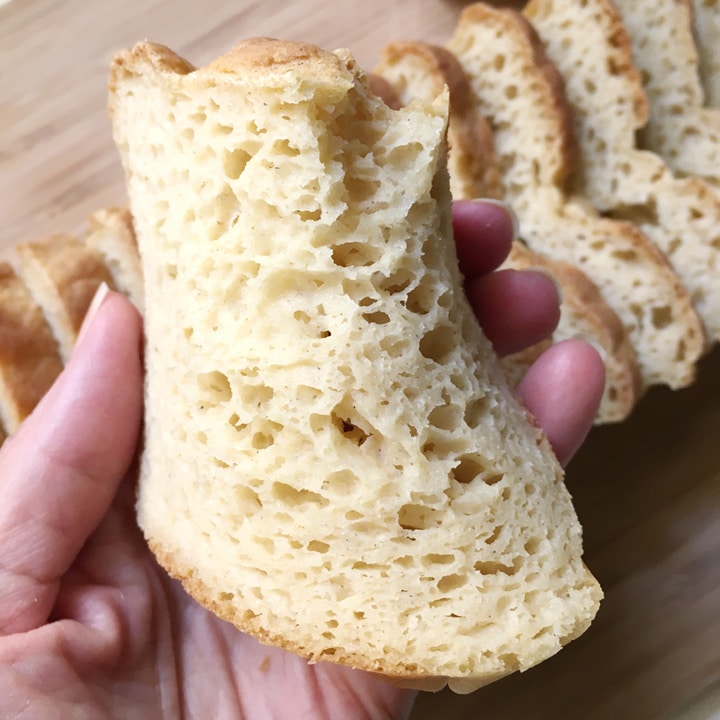
    And of course, no gluten-free bread recipe of mine is complete without a shot of the "bend" test! It's softness you can see!

    A hand bending a slice of bread

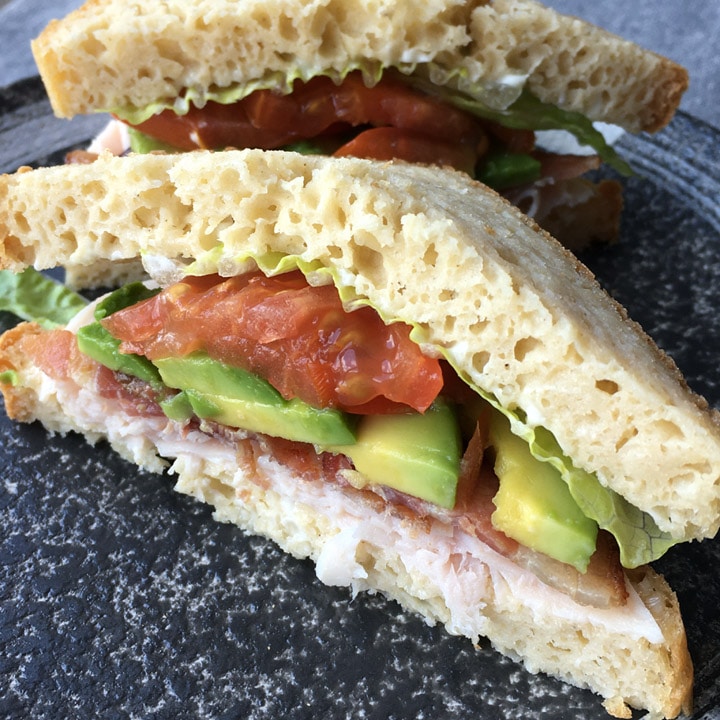
    Did I mention this soft homemade gluten-free bread makes awesome sandwiches?? Get your favorite fillings, like my Easy Homemade Sandwich Deli Meat, and pack them between two slices…there's something incredibly satisfying about making fresh sandwiches with your very own homemade bread!

    A round plate containing a sandwich filled with red tomatoes, green avocado, white meat

    As I mentioned above, I have been baking gluten-free for a long time. So it would only make sense that I have a few gluten-free bread recipes!

    • Soft Gluten-Free Sandwich Bread
    • Soft and Delicious Buckwheat Bread
    • Gluten-Free Honey Oat Nut Bread

    They're all slightly different, and each delicious in their own way. It's definitely worth trying any, or all of them to see which one you like best! If you're like my family, we actually love all of them, and I find having the different recipes a nice way to have some variety.

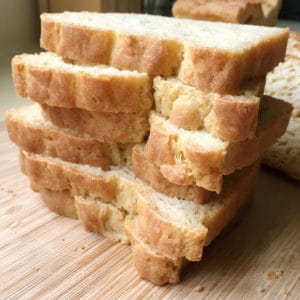
    So back to this recipe, just as the name says, it's soft. It has a tender crumb, good structure, lots of air bubbles, just the right amount of moisture, and it is just plain GOOD. It is also very easy to make...what's not to love?

    ~ Lisa.

    Soft Homemade Gluten-Free Bread

    Soft homemade gluten-free bread is easier to make than you think. This is a very simple bread that is a breeze to throw together, and it's delicious whether you enjoy it in a sandwich or with some butter and jam. Most importantly, you'll be amazed that gluten-free bread can be this good.
    4.68 from 28 votes
    Print Pin Rate
    Course: Breads
    Cuisine: Western
    Keyword: gluten-free bread
    Prep Time: 30 minutes
    Cook Time: 45 minutes
    Rising: 1 hour
    Total Time: 2 hours 15 minutes
    Makes: 1 loaf
    Author: Lisa from A Day in the Kitchen

    Ingredients

    Proofing the Yeast (see Recipe Notes below):

    • ¼ cup warm water (about 100F/37C)
    • 2 tbs honey
    • 1 ½ teaspoon active yeast

    Dry Ingredients (volume ingredients in the Recipe Notes below):

    • 260 g rice flour (white or brown is fine)
    • 80 g tapioca starch (same as tapioca flour)
    • 60 g sorghum flour (can substitute with buckwheat or oat flour)
    • 1 ½ teaspoon xanthan gum
    • ½ teaspoon salt

    Wet Ingredients:

    • 3 eggs room temperature
    • 1 tbs apple cider vinegar
    • 1 ¼ cup water (about 100F/37C)
    • ¼ cup light olive oil

    Equipment

    • Pullman Loaf Pan
    • Long Loaf Pan
    • Parchment Paper
    • Hand Mixer
    • Stand Mixer
    • Stainless Steel Wire Whisks
    • Instant Read Thermometer

    Instructions

    • Combine ¼ cup warm water with 2 tbs honey and stir well. Mix in the yeast and let sit for 10 minutes to proof.
    • Combine all dry ingredients in large mixing bowl and whisk together well.
    • Add yeast mixture, 1 ¼ cups warm water, ¼ cup oil, eggs, and apple cider vinegar to the dry ingredients.
    • Using a hand or stand mixer, beat mixture for 1-2 minutes, scraping down sides of the bowl halfway. Dough will be like batter.
    • Scoop bread batter into parchment lined loaf pan and tap pan on the counter a couple of times to help the dough fill the corners.
    • Place bread dough in a warm location to rise for approximately 1 hour, checking after 45 minutes. The center of the loaf should be more than ¼" above the edge of the loaf pan. (See note below.)
    • Preheat oven 350 deg F (180 C).
    • Bake uncovered for 45 minutes, or until internal temperature taken with an instant-read thermometer registers at least 200F/93C.
    • Let bread rest in the pan for 5 minutes before transferring to a cooling rack. Let cool completely before slicing.

    Notes

    • This recipe works in different sized loaf pans: 5 x 9, Pullman tall style pans, 4 x 11.5 long pans.
      • For the tall Pullman style pans, let the bread proof until doubled in size; do not let it rise above the edge of the pan.
    • It is not necessary to proof the yeast. You can also simply add the dry active yeast to the dry ingredients and whisk together and simply add the 1 ½ cups warm water and the honey to the bowl with the rest of the wet ingredients. I have done it both ways without any issue.
    • Volume Measurements:
      • 2 ¼ cups + 2 tbs brown rice flour
      • ¾ cup + 2 tbs + 1 teaspoon tapioca starch
      • ½ cup + 1 tbs + 1 teaspoon sorghum flour
      • Please note that gluten-free recipes work best with weight measurements because they are more precise than volume measurements. Gluten-free baking requires more precision and can be less forgiving than baking with regular all-purpose wheat flour.
      • These volume measurements were made from spooning each of the flours into the measuring cups/spoons (so they are not packed) and leveling them off.
      • The volume measurements are approximate. Make slight adjustments to the recipe as needed, adding a bit more water or tapioca starch or brown rice flour to achieve the correct dough consistency.
    • Millet, buckwheat or oat flour can be used in place of sorghum flour.
    • I have used sparkling mineral water in place of regular water, but have found that both yield similar results. You can use whatever you prefer!
    • It is important to not let the bread rise too much before baking it. It is best to bake it when the rise looks just less than the "perfect" height, otherwise the dough may end up spilling over the edge.
    • Keeps well in a sealed bag or container on the counter for a couple of days, in the refrigerator for a few days (if it lasts that long!). If you refrigerate the bread, the slices taste better toasted.
    Have you tried this recipe?Mention @dayinthekitchen or tag #adayinthekitchen!
    Close-up of slices of bread, the words soft homemade gluten-free bread on the bottom

    This recipe was January 14th, 2018 and republished on July 13th, 2020 with recipe updates, and new photos and writing.

    « Super Food Quinoa Bowl
    Iced English Tea Latte »

    Reader Interactions

    Comments

    1. Sharol

      May 15, 2022 at 8:17 pm

      O. M. G. This is what I've been searching for. Until about 6 months ago, I thought good gf bread was impossible. Then I found (actually my daughter found) a GF bakery in a nearby town, and she makes fabulous GF bread, so I knew it was possible. That was when I began a serious search for a recipe.

      I've probably tried 10 or 15 recipes since then and they all ended up feeding chickens. THANK YOU for creating this wonderful bread.

      For others wanting info, the flavor is excellent. I made it exactly as the recipe was written (like I always do the first time). I ordered flour that I didn't have rather than substituting. I have a pullman pan (that I bought for another bread recipe) and it worked perfectly. I used the parchment on the bottom and long sides (a single piece) and it came out of the pan perfectly when it was done by lifting the paper lining. I used my meat thermometer and it was at 200 degrees after 45 minutes, so it all went as it was supposed to. I do use an oven thermometer because I've discovered that my oven says the preheating is done before the oven reaches the set temperature. For me this is a gift. I can make my own bread and not have to order 3 days in advance and drive 50 miles each way to collect my bread.

      I purchased the flours from Amazon. Figuring actual cost of all ingredients, but not accounting for the electricity to bake the bread, my cost per loaf is 5.64. (In 4H 60 years ago my leader made us figure the actual cost of what we cooked so that we would have a realistic idea of the value of our items if we were to have a bake sale, and that has stuck with me for years.)

      Again, thank you for your recipe. I think I'll laminate the paper.

      Reply
      • Lisa

        May 16, 2022 at 10:12 pm

        Wow! Thanks for your comments and for detailing everything that you did in making the recipe! It will be very helpful to others who are looking at making this bread. I'm so glad you found my recipe and that you like it so much!

        Reply
    2. Vicki

      May 13, 2022 at 11:14 am

      5 stars
      Love this. I used a flour blend that you can buy but other than that followed the recipe.

      Reply
      • Lisa

        May 13, 2022 at 1:49 pm

        Fabulous! Thanks so much, Vicki!

        Reply
    3. Linda Kelly

      May 08, 2022 at 2:29 am

      This is NOT a complaint. I simply need your help!! I’m brand new to the gluten free diet and never made bread before! I need your help to figure out what I did wrong.
      I used a Zisbet scale for the gram measurements. I’m 100% sure it’s accurate. My bread didn’t rise at all. It’s cold here so I preheated the oven and sat the bread pan on the front burner. (It’s a gas stove so the grate lifted up the pan a couple inches).
      I originally lined the entire pan. But it was starting to overflow behind it. So, I emptied it into a bowl, lined the bottom of the pan, and waited for it to rise.
      As far as the ingredients and directions:
      I used oat flour because you said it was okay and I had a lot of it.
      I whisked all the dry ingredients including the dry yeast (since you said it’s okay)
      Then I whisked the room temperature eggs and added all the other wet ingredients except the water. I blended the wet ingredients until well combined. Then I added the warm water.
      I’m questioning, Maybe it should have been warmer? Maybe I should have done the yeast separately. I don’t understand. But I want that delicious looking bread.
      I’m nervous because all I have is a meat thermometer. It’s been in the oven for ten minutes, and it’s definitely not rising. 😖 it’s more like cornbread.
      I want to 😭

      Reply
      • Lisa

        May 08, 2022 at 7:50 pm

        Hi Linda! Thanks for reaching out. It is hard to know for sure what went wrong, but my first inkling is the yeast. Yes, I say that you can simply combine it with the dry ingredients...but that also takes a certain amount of confidence that you know the yeast is active. Taking the step to proof the yeast it to make sure it is active before mixing it in with all the ingredients is never a bad idea. So I would try that first. If it proofs, then you can be confident it is not that. Also, there won't be much more rise once you start to bake it...there will be some, but the majority will happen during proofing. So again, I would consider the yeast to be the issue. Just try doing a proof of the yeast to test it, just as an experiment. If it doesn't proof, buy fresh yeast. I hope that helps. Don't give up! 🙂

        Reply
    4. Lenny

      April 13, 2022 at 10:24 am

      5 stars
      Usually, I don't comment even when I try a recipe that turns out well. Today, I tried this recipe. Had to make a few slight changes 'cuz I didn't have some of the listed ingredients and equipment.
      First, I proofed a packet (7g · 1/4 oz) of Red Star Quick-Rise Instant Yeast. I had Bob's Red Mill Gluten Free All Purpose Baking Flour which has no xanthum nor guar gum so, I added the appropriate amount of xanthum. Due to my yolk intolerance, I mixed 2 eggs worth of Bob's Red Mill gluten free vegan Egg Replacer which has potato starch, tapioca flour, baking soda and psyllium husk fiber. For the 3rd egg, I used a 1/4 cup of liquid Egg Beaters. I substituted the light olive oil with the last bit (just enough) of almond oil I had.
      The old stand mixer that no longer works that I still have taking up space in the pantry is for sentimental reasons - it belonged to my mom. One of these days, when I'm ready to let go... To mix and knead all the ingredients, I used my bread maker machine with the "knead" setting.
      The dough raised more than I expected (yes, it rose over the edge of my plain 5 by 9 inch loaf pan). Fortunately, I had excess parchment paper around the edges of the pan to keep the dough from making a mess inside the oven while baking.
      With experience, I've noticed my oven runs about 15 degrees cooler than the settings indicate. So, I preheated the oven at 365° F, which at my guess made it closer to 350° F. You guessed right - don't have an instant-read thermometer.
      Waiting for the bread to cool so I could taste test it was challenging for me. Had to keep busy until it was time.
      Then, it was time...OMG!!! This bread is incredible! The crust is fantastic, the inside is soft and pliable and tasty. The best part is that i can make a sandwich and not have the bread fall apart in my hands like so many gluten free breads do. This recipe is definitely a keeper!
      Thank you so much Lisa for sharing your fantastic gluten free recipe. This is the recipe I will always use from now on. Thank you, thank you, thank you!!!

      Reply
      • Lisa

        April 13, 2022 at 10:44 am

        Wow, Lenny! Thank you so much for leaving a comment and for taking the time to detail the modifications you made to the recipe! I was very happy to read that the recipe worked with the all-purpose GF flour and egg replacement, and am also very happy that you love the bread. 🙂

        Reply
        • Lenny

          April 13, 2022 at 11:54 am

          Lisa, you have no idea how many gluten free recipes I have tried over the years. Some were better than others and yet... Your recipe is a dream come true for me. The fact that I can actually make myself a sandwich with gf bread that doesn't have to be toasted first, and doesn't fall apart before I can even get the sandwich up to my face blows my mind!

          Reply
          • Lisa

            April 14, 2022 at 7:45 am

            Thanks so much, Lenny. I'm glad you found my recipe and that it worked for you!

            Reply
    5. Olga

      March 26, 2022 at 1:42 am

      This looks amazing! Do you think using a 1:1 GF flour mix would yield the same results instead of buying separate flours?

      Reply
      • Lisa

        March 26, 2022 at 12:55 pm

        Hi Olga! I have had readers make it with a GF flour mix with success. It's definitely worth a try! Just make sure to check the ingredients in the mix to see if it already includes xanthan gum. If it does, be sure to omit the amount stated in this recipe.

        Reply
    6. Cara

      March 24, 2022 at 3:43 am

      5 stars
      Great recipe!!! Have you ever froze the bread after baking??

      Reply
      • Lisa

        March 24, 2022 at 9:18 pm

        Thanks, Cara! Yes, I have frozen the bread as have several readers. The best way is to slice the entire loaf before freezing. Then you just take out slices as you want them. I have had readers mention warming slices up slightly in the microwave before toasting, but I have also toasted slices straight from the freezer.

        Reply
    7. Mar

      March 17, 2022 at 9:08 am

      Hi so can you use a regular bread pan? Has anyone done that yet?

      Reply
      • Lisa

        March 17, 2022 at 5:30 pm

        Hi Mar! Yes, you can use a regular bread loaf pan. The volume of a standard regular loaf pan is about the same as the long loaf pan you see pictured in this recipe. I have also made this recipe using a pullman style pan. They all work. I hope that helps!

        Reply
        • Sheldon

          April 11, 2022 at 11:44 pm

          Hi Lisa,
          Do you use the cover on your Pullman bread pan when you are letting the bread rise and when it is baking in the oven?

          Reply
          • Lisa

            April 12, 2022 at 9:06 am

            Hi Sheldon! I put the cover on when I am ready to bake and bake with the cover on the entire time. So the top of the bread dough has not risen past the height of the pan when I slide the cover on. I hope that helps!

            Reply
      • Mj

        March 19, 2022 at 6:03 am

        It looks nice!💜 But 3 eggs??? Could it be sustituible? I dont like the egg-taste un bread. Thanks

        Reply
        • Lisa

          March 19, 2022 at 9:55 pm

          Hi MJ! I answered this question in my other bread recipe, but just to reiterate it here, I have read about flax eggs being a possibility, but I have never tried that myself. You could potentially experiment with reducing it to two eggs, but you would have to compensate with a bit more liquid so you get the right consistency for the batter. I also do not know how that would affect the final product, but again, it might be worth the experimentation. Thanks for the question, and I hope that helps!

          Reply
        • Beth

          May 09, 2022 at 2:13 pm

          5 stars
          I just pulled mine out of the oven, using home ground oat flour, cornstarch, and sorghum flour, using flax eggs for all three of the eggs-just to see if it would work. It did!!!! And cuts 78 cents off the price 🙂

          It might be ‘slightly’ more crumbly, then again, it’s probably more so because I have zero patience and insist on cutting it the second it is out of the oven 😂. So it definitely works!!!

          Reply
          • Lisa

            May 09, 2022 at 5:26 pm

            Hi Beth! I appreciate you taking the time to comment and detail your substitutions...I'm so glad it worked out! Great to know about the flax eggs, too. The bread should be less crumbly if you wait til it cools completely before slicing, but I'm glad you still liked it! Thanks so much!

            Reply
    « Older Comments

    Leave a Comment Cancel reply

    Your email address will not be published. Required fields are marked *

    Recipe Rating


    This site uses Akismet to reduce spam. Learn how your comment data is processed.

    Primary Sidebar

    • Email
    • Facebook
    • Instagram
    • LinkedIn
    • Pinterest
    • YouTube

    I cook up big ideas in my small kitchen in Hong Kong! My recipes are big on healthy eating, real food, and international flavors that you can create in any size kitchen. I also specialize in gluten-free cooking and baking, demystifying gluten-free and showing you how easy and delicious it can be!

    Read more...


    Quote for the Day

    "Cooking is like painting or writing a song. Just as there are only so many notes or colors, there are only so many flavors -- it's how you combine them that sets you apart." ~ Wolfgang Puck.


    Never Miss A Recipe!


    Reader Favorites

    • How To Peel and Cut A Mango
    • How To Cook Eggs In A Rice Cooker
    • Easy Homemade Sandwich Deli Meat
    • Japanese Butadon Pork Bowls
    • Yummy Cuppa English Tea Latte
    • Rice Cooker Chinese Sticky Rice
    • Easy Iced Milk Tea
    • Korean Kalbi Short Ribs

    Latest and Greatest

    • Rice Crust Pizza
    • Crazy-Good Gluten-Free Banana Bread
    • Asian Chicken Salad
    • Chunky Pickled Daikon and Cucumber

    Footer

    ↑ back to top

    About

    • About Us
    • Privacy Policy
    • Contact Us

    Related

    • A Day Out
    • A Day in the Life

    Never Miss A Recipe!

    A Day in the Kitchen participates in the Amazon Services LLC Associates Program. As an Amazon Associate I earn from qualifying purchases. If you purchase any item from Amazon by clicking to their site via the affiliate link, it will cost the same to you, but I will receive a small commission.

    Copyright © 2021 A Day in the Kitchen.

    We use cookies to ensure that we give you the best experience on our website. If you continue to use this site we will assume that you are happy with it.Ok