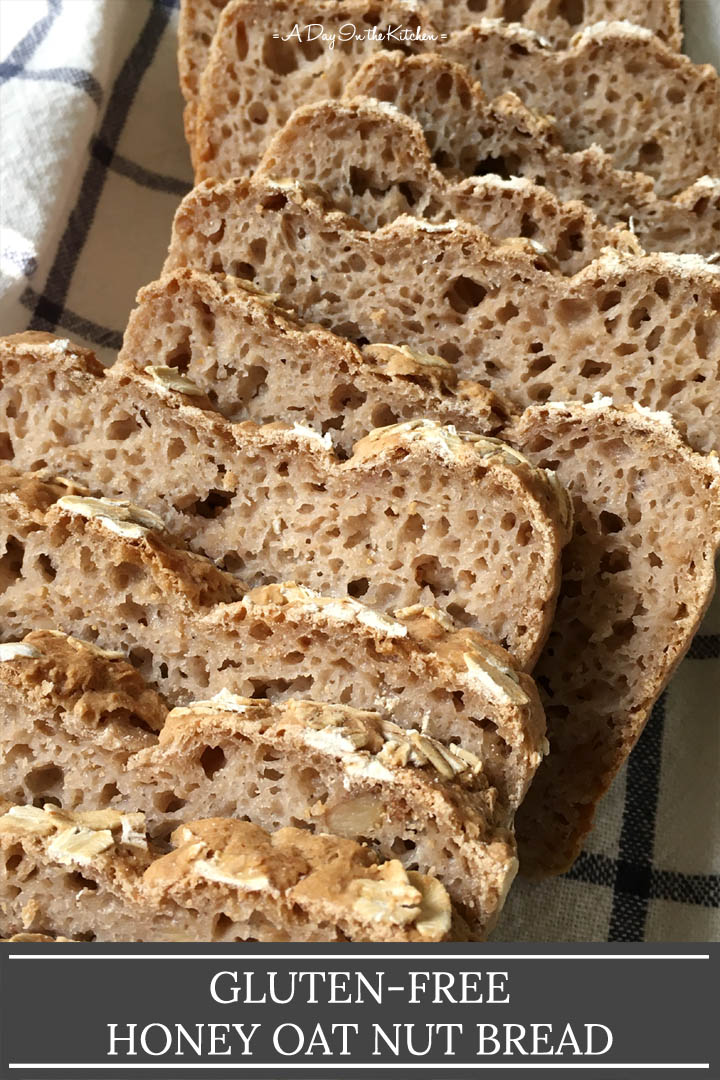
Soft, mildly sweet, and gluten-free, this honey oat nut bread gets a protein boost from the oats and a health punch from the walnuts. Hearty and delicious, it's perfect for fresh sandwiches or for enjoying with a simple spread of butter and jam.
I've got a new delicious gluten-free bread for you to try!
Not only is this honey oat nut bread gluten-free, it's got added protein from oats and nutrition from the walnuts.
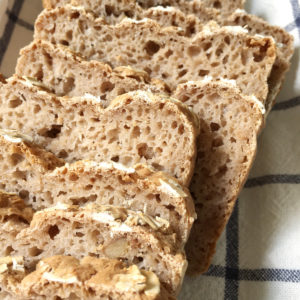
It's also soft and tender and makes for perfect sandwiches.
Oh, and it only took me 11 attempts to get here, but that's beside the point. 😉
This bread is so delicious, you are not going to miss the gluten!
It's Easier Than You Think
Gluten-free bread is actually easier to make than you think. In fact, it's easier than traditional wheat loaves in some ways.
First of all, this bread starts from a batter and not a big lump of dough that you have to knead. No need to knead! 😉
You also mix it with a regular mixer with beater attachments or a paddle attachment. No dough hook required, and all it takes is about 2 minutes of mixing.
Finally, you only need to let it rise once and then you bake it right away! In fact, you scoop the batter into the prepared pan you'll be baking in, let it rise in it, and transfer it straight to the oven.
The Bread Batter
Making the batter for this bread comes together in less than 30 minutes.
Aside from a couple of eggs, the wet ingredient component for the bread is simply a mixture of water, light olive oil, honey, quick oats, and active yeast. You simply mix those ingredients together, let them sit for a little while to let the yeast activate, and that's it.
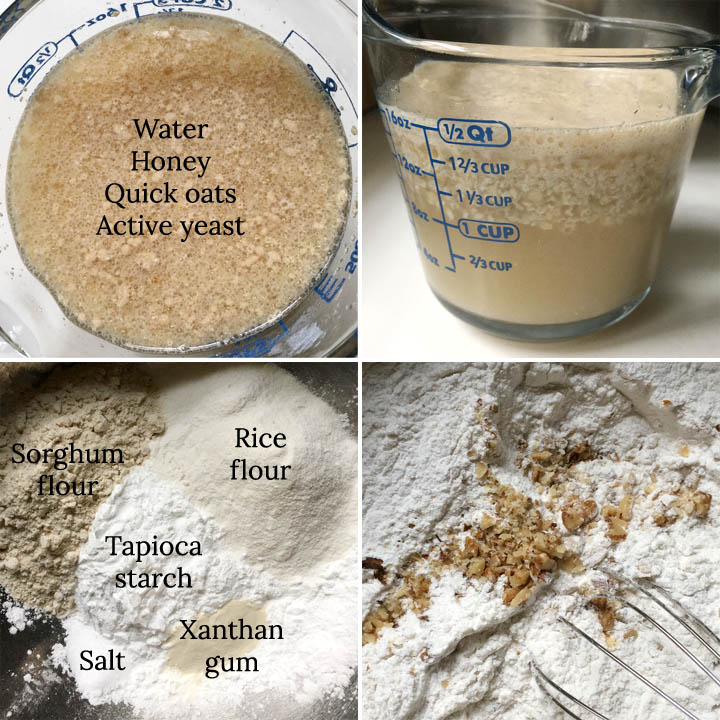
While the yeast is blooming, you can get to working on the dry ingredients, which is a combination of tapioca starch, rice flour, sorghum flour, xanthan gum, salt, and chopped walnuts. Those all get mixed together in a mixing bowl and you're ready to start mixing!
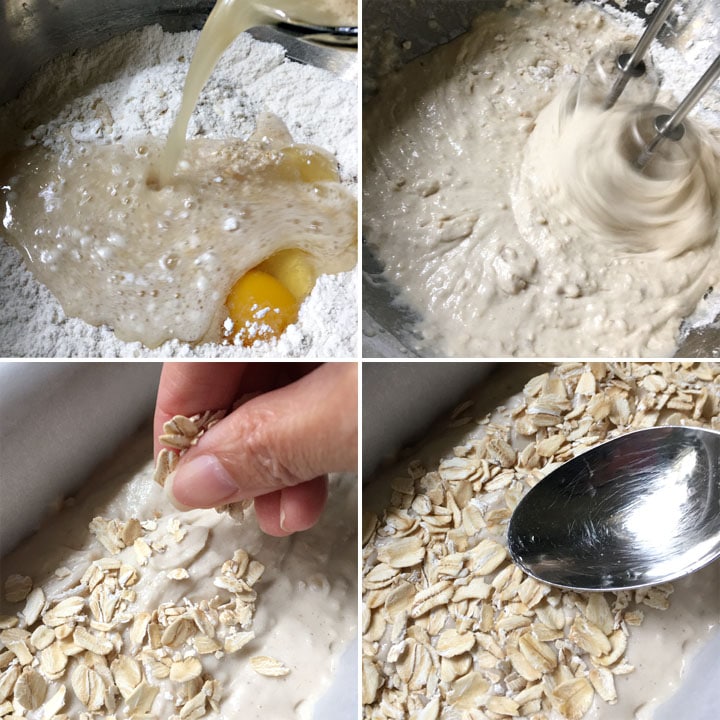
Add the yeast mixture and eggs to the dry ingredients and mix well for a couple of minutes, scraping down the sides of the bowl halfway through. Scoop your batter into the prepared loaf pan, top with rolled oats, and let it rise for about an hour.
Baking the Bread
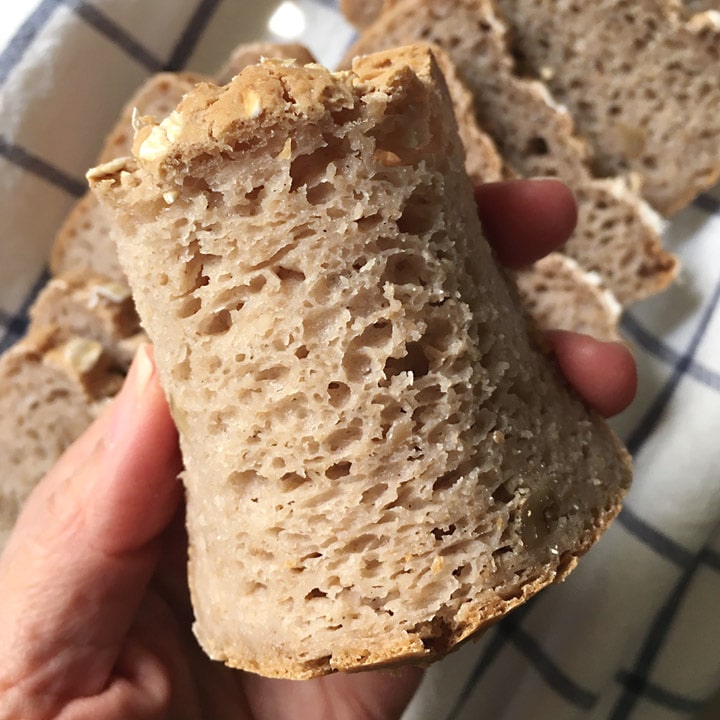
As I mentioned above, gluten-free bread needs only one rise and you don't handle it again once it's risen. You bake it immediately and in about an hour, you will have beautiful honey oat nut bread magic.
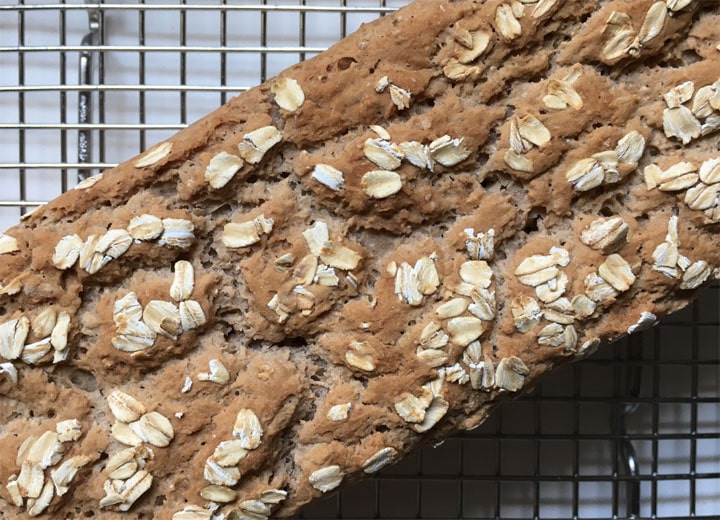
This honey oat nut bread has a tender crust, has bits of walnuts strewn through, is mildly sweet and delicious, and it's SOFT.
As with homemade bread, the first day is the best, but if you have leftovers, simply warm the bread in a 300 deg F oven for 10 minutes or toast up some slices to soften it right back up.
We love making sandwiches with this bread as it just tastes so good with whatever sandwich fillings we put in, including my Easy Homemade Sandwich Deli Meat!
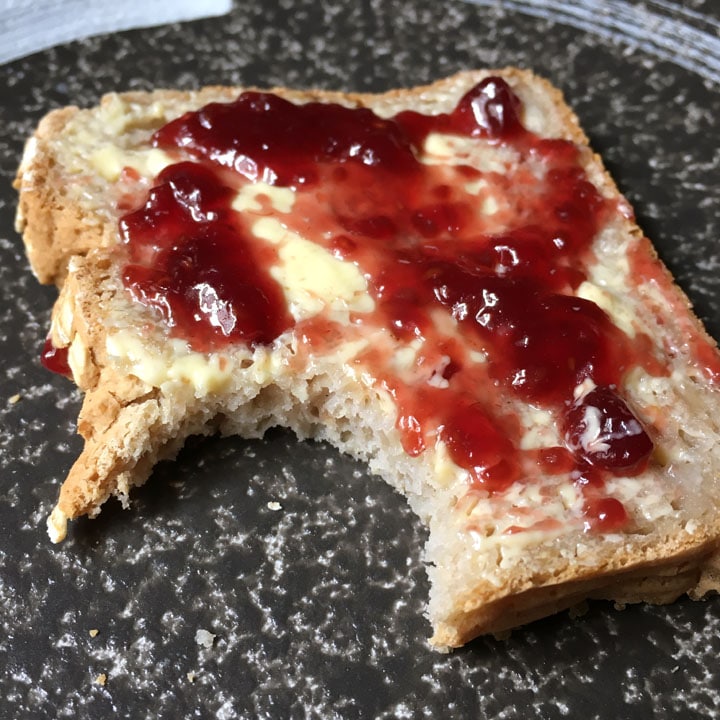
...and I also enjoy a slice with a simple spread of butter and jam. Simple things are sometimes the best things.
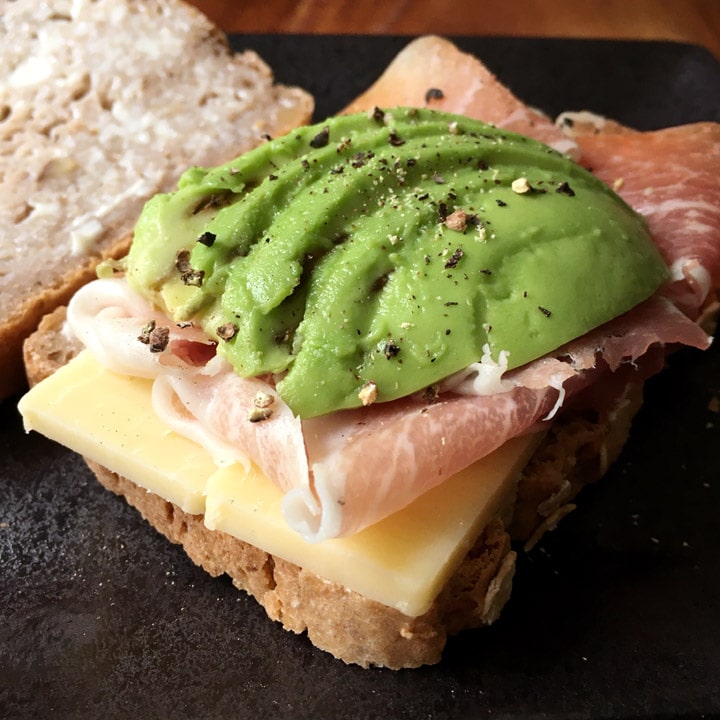
This oat nut bread also makes an awesome base for one of my favorite breakfasts... avocado and an over-easy egg on toast!
When I used to buy loaves of bread from the grocery store years ago, back when we weren't gluten-free, one of my favorite breads was Oroweat's Oat Nut Bread. It wasn't a dry bread, like their whole wheat, and I really liked the flavor...mildly sweet and a bit oat-y.
After perfecting my Soft Gluten-Free Sandwich Bread and coming up with another success with my Buckwheat Bread recipe, I decided I wanted to try recreating the oat nut bread I used to enjoy...but make it gluten-free! And while it's been so long since I last ate it and I can't remember exactly what it was like, this recipe is has a texture and taste that makes me think I've struck gold with it!
While my boys are not gluten-free and they do love their share of regular wheat bread, they also love this gluten-free bread. They love how soft and substantial it is, and as my older son says, it holds up well to being buttered! They will easily eat a couple sandwiches in one sitting!
If you're gluten-free and are missing bread, as I know many gluten-free people do, you have to give this bread a try. You will not be disappointed and you will never miss gluten again!
~ Lisa.
Watch How To Make It!
Gluten-Free Honey Oat Nut Bread
Ingredients
Yeast Mixture:
- 1 ½ cups warm water, about 100-110 deg F
- ½ cup gluten-free quick oats
- 3 tbs honey
- 1 tbs light olive oil
- 1 ½ teaspoon active yeast
Dry:
- 180 g tapioca starch (same as tapioca flour)
- 170 g brown rice flour
- 50 g sorghum flour
- 1 ½ teaspoon xanthan gum
- ½ teaspoon salt
- ¼ cup walnuts, chopped
Other:
- 2 eggs, room temperature
- 1-2 tbs gluten-free rolled oats for topping
Instructions
Yeast Mixture:
- Combine warm water, quick oats, light olive oil, honey, and active yeast in measuring cup or bowl. Stir well to mix and let sit for 10 minutes to let yeast bloom.
Dry Ingredients:
- Combine tapioca starch, rice flour, sorghum flour, xanthan gum, salt, and chopped walnuts in large mixing bowl. Whisk together well.
The Bread:
- Add yeast mixture and eggs to dry ingredients and beat with a mixer for about 1 minute, scraping down the sides of the bowl halfway.
- Scoop bread batter into a parchment lined loaf pan and even out.
- Top with rolled oats. Using a wet spoon, gently press the oats into the bread batter with the back of the spoon.
- Place loaf pan in a warm, draft-free location to allow bread batter to rise, about 1 hour. Do not let bread rise more than ½" above the edge of the pan.
- Preheat oven 350 deg F (180C).
- Bake bread uncovered for 1 hour, or until instant-read thermometer inserted in middle of loaf reads at least 200 deg F (93C). Check at 45 minutes.
- Let bread rest in pan for 5-10 minutes before using parchment paper to lift it out and place on a cooling rack. Let cool completely before slicing.
Notes
- Walnuts can be replaced with pecans.
- If you like your bread more nutty, increase the amount of walnuts to ⅓ cup.
- If you forget to take your eggs out of the fridge ahead of time to bring to room temperature, place the cold eggs in a bowl of warm tap water and let sit while you are preparing the other ingredients.
- Store leftover bread in a bag on the counter for a day, or in the fridge for a few days.
- Soften leftover bread loaf in a 300 deg F (150C), covered in foil, for 10 minutes.
- Soften bread slices by toasting lightly in the toaster.
- If you want to freeze the bread, slice the bread first before storing in a sealed bag with the air squeezed out.
- Use quick oats for topping the bread if you do not have rolled oats.
- Volume Measurements:
- 2 cups tapioca starch
- 1 ½ cups + 1 tablespoon brown rice flour
- ½ cup + 1 tablespoon sorghum flour
- Please note that gluten-free recipes work best with weight measurements because they are more precise than volume measurements. Gluten-free baking requires more precision and can be less forgiving than baking with regular all-purpose wheat flour.
- These volume measurements were made from spooning each of the flours into the measuring cups/spoons (so they are not packed) and leveling them off.
- The volume measurements are approximate. Make slight adjustments to the recipe as needed, adding a bit more water or tapioca starch or brown rice flour to achieve the correct dough consistency.
Nutrition


Betsy
Hi Lisa! I made your bread (this recipe) the other day, and it is delicious! My husband loves it and he is not gluten-free. Can’t wait to try some of your other recipes, especially the buckwheat. Keep baking!
Hi Betsy! Thank you so much for making the recipe. It's great to hear that your non-GF husband loves it, too...that's one of the best compliments! And thanks in advance for trying any of my other recipes!
Meg
Thank you so much for sharing your wonderful recipe!! I just made this today and it was so easy and delicious. I will be making this bread again and again. I'm so looking forward to trying more of your culinary delights🙂
Thank you so much, Meg, for making the bread! I'm so glad you liked it and I hope you find other recipes you might want to try!
Bharti mukhi
Its amazing want try bt is there any other substitute tried with flax egg know aquafaba result is good bt due to health issue can’t use it or can v use maple syrup instead of sugar
Hi Bharti. If you mean can you substitute the honey with maple syrup, that would be fine. Unfortunately, I don't quite understand the rest of your question in what you want to substitute. If you are wanting to replace the eggs with flax eggs, I have read that it works, but I do not know if it does or not.
Mary
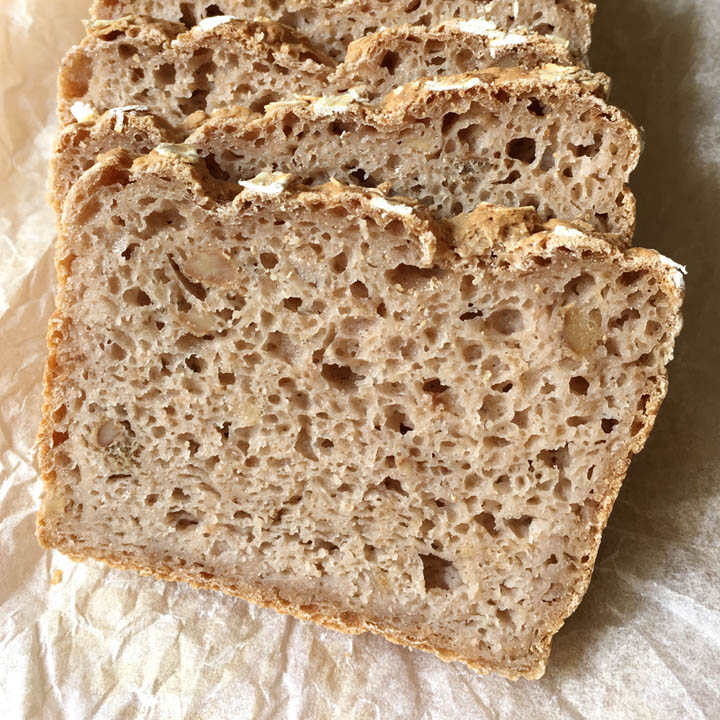
I made this bread today and I absolutely love it! This is the best GF bread I've had/made so far! I like the subtle sweetness of the honey and the nutty flavour from the walnuts. When I first took it out of the oven and out of the pan, I thought it felt heavy, but after cutting into it, I saw the beautifully proofed crumb! I followed the recipe very closely and it turned out amazing! I'll definitely make this again and would love to try other recipes too! 🙂
Thanks so much for trying the recipe, Mary, and I'm so glad that you liked it!
mary
Hi. This looks great! Can the eggs be replaced with Psyllium husks powder or anything else?
Hi Mary! I have never tried substituting with psyllium husk powder, but I have read about it being a decent egg substitute for baking. If you give it a try, please let me know how it turns out!
Lisa
Hi Lisa,
First time in making this and I was really surprised with how it turned out. It was perfect! This is the best GF bread that I ever tried my hand on. My husband can’t stop eating it. It’ll be gone before the day is over. 🙂
Thanks Lisa for sharing this recipe!
Hi Lisa! Thanks so much for making the bread and taking the time to comment! I'm so glad that you and your husband like it!
Patricia Asada
Absolutely amazing bread found the recipe about 10 days just made my fourth loaf love it and so easy to make Thanks Lisa.
That's so awesome to hear, Patricia! Thanks so much and I'm so happy that you like the bread!
Jessica
Hi Lisa, I hope you can help me, what would be the best substitute for sorghum flour? As where I live we don’t have any? Any suggestions? Thank you in advance 🙂
Thanks for the question, Jessica. Buckwheat flour would be my first choice as a substitute for sorghum flour. Other options I would consider are millet, teff, or amaranth flour. As a side note, if you happen to have any Indian grocery stores near you, you will probably be able to find sorghum flour there, but it will be called jowar flour. Good luck!
Sean@Diversivore
I've been making a LOT of bread lately (regular bread, with gluten), and I have to say that the crumb/texture of this loaf looks AMAZING! Airy, light - and great flavours to boot! Thanks for sharing it!
Thanks, Sean! I love making bread, whether it's got gluten or not, and I always want to make gluten-free bread as close to "real" bread as possible!
Katherine | Love In My Oven
I'm such a fan of walnuts, this bread is definitely calling my name!! What a hearty, nutritious bread!! 🙂
I hope it calls your name and tells you to make it, Katherine! 🙂
Jane
This looks soooo good! I'be been making a wheat honey oat bread we enjoy but can't wait to try your gluten free version! Do you think it would work in a breadmaker on the gluten free setting? Thank you!
Hi Jane! Thanks for the question. I have had other readers try my bread recipes with success in the breadmaker on the GF setting (the most important thing being only one proof/rise), so it is definitely worth trying with this! I hope it works out!
Colleen
I'm in love with the texture of this oat bread Lisa! I am super excited to try it. Thanks so much for this recipe.
Thanks, Colleen! It's a favorite in our house...even for my boys who aren't gluten-free! I hope you like it!