This chicken sandwich deli meat takes just a handful of simple ingredients to make and is healthy and delicious! It is the perfect alternative to store-bought deli meat and is lower in salt, lower in cost, and has no weird preservatives!
**I've added a video below (above the recipe) where you can watch how to make the deli meat and how I slice it thin!**
Did you know that you can make your own sandwich deli meat at home?
And that you can make it with something as simple and as readily available as chicken breast?

You don't need to make those giant deli loaves they have in the market, nor do you need a giant meat slicer.
All it takes is 5 ingredients, some patience, and a very sharp knife and you are winning!
Preparing and Curing
This deli meat is prepared using the Torihamu method, which I learned about through Just Bento's Homemade Chicken "Ham" recipe*. It involves marinating the chicken breasts for at least 24 hours in salt, honey, and other seasonings. The purpose of this step is not only to flavor the meat, but also to give the meat a slightly longer refrigerator "shelf life". Call it a homemade way of curing the meat, but without any chemical preservatives!
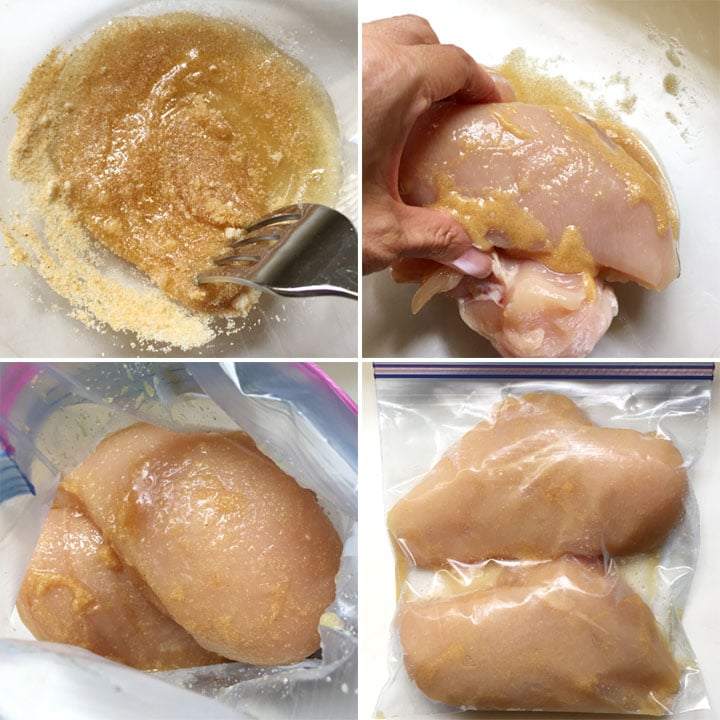
The marinade is made of honey, salt, onion powder, and garlic powder, and will be a very thick paste-like consistency. It might seem as if there's not very much to coat two chicken breasts, but never fear!
Spread the marinade all over the chicken breasts (I find that using my hands work best), and then place everything in a zip top bag (I use a quart-sized freezer bag). Squeeze out as much air as possible before sealing the bag and let the chicken hang out in the fridge for 2-3 days.
After the 2-3 day curing period is done, it's time to rinse the chicken and let it soak in a water bath for a bit. This additional step of soaking the meat in water before roasting is to desalinate the chicken, or remove some of the excess salt, while also balancing out the flavors.
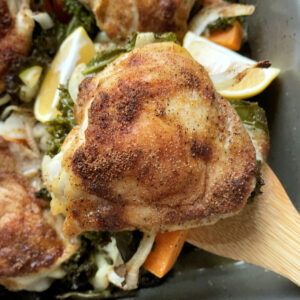
Pat the chicken breasts dry and then simply roast them as is, or coat them in herbs, spices, ground black pepper, etc.

Cooking and Slicing
An important detail in this recipe is to roast the chicken breasts low and slow as it ensures the meat doesn't dry out and become tough. You could roast the chicken breast at a higher temperature for a shorter amount of time, but in the case of this deli meat, you don't want to rush it.
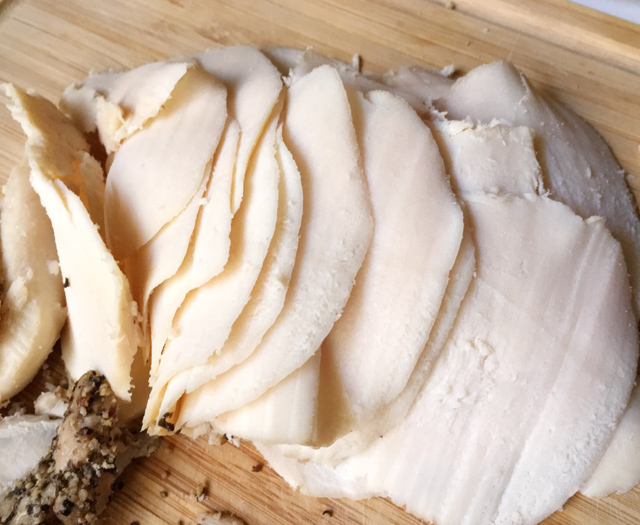
After roasting, let the chicken cool down to room temperature before storing in the fridge, waiting to slice it after they are completely chilled. And VOILA!
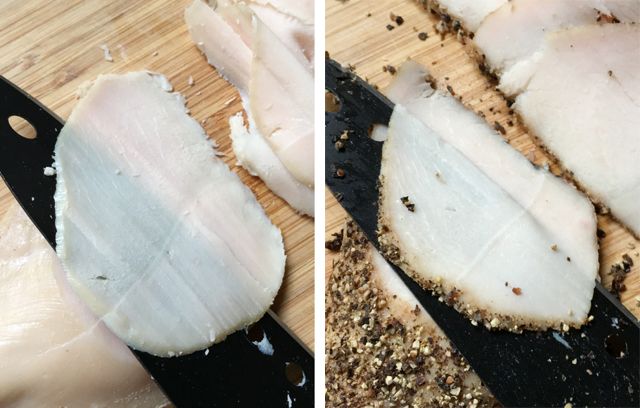
For those of you wondering how to slice them thin without an actual meat slicer, I use a sushi knife as you can see pictured below. The blade is thinner than regular knives, and I think the holes in the blade and the nonstick surface contribute to not grabbing the meat as you slice. I also don't rush the slicing...going a bit slower gives you greater control and it's helps get those nice thin slices.
I've used chicken for this recipe because chicken breast is readily available in the grocery store at any time of the year. It's also easy to handle (compared to a big turkey breast) and yields a decent amount of sliced meat without feeling like you have too much.
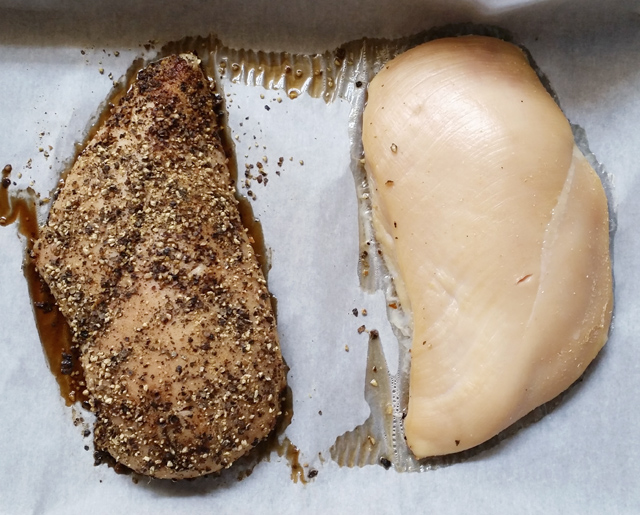
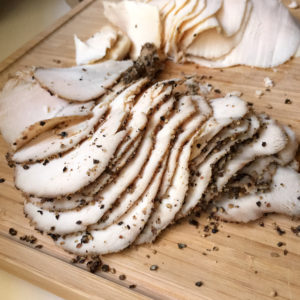
Also, as you can see from these photos, if you make two chicken breasts at once, you can make each one a different flavor!
Both chicken breasts started in the same marinade, in the same bag. But then I coated one in crushed black pepper because it is super tasty and we are all fans of pepper-crusted deli meat! You could do the same, or coat the chicken breast with spices or finely-chopped herbs for that added bit of flavor. I have also, in the absence of garlic powder, added Italian seasoning to the marinade, which imparted a delicious flavor to the meat. So you can play around a bit!
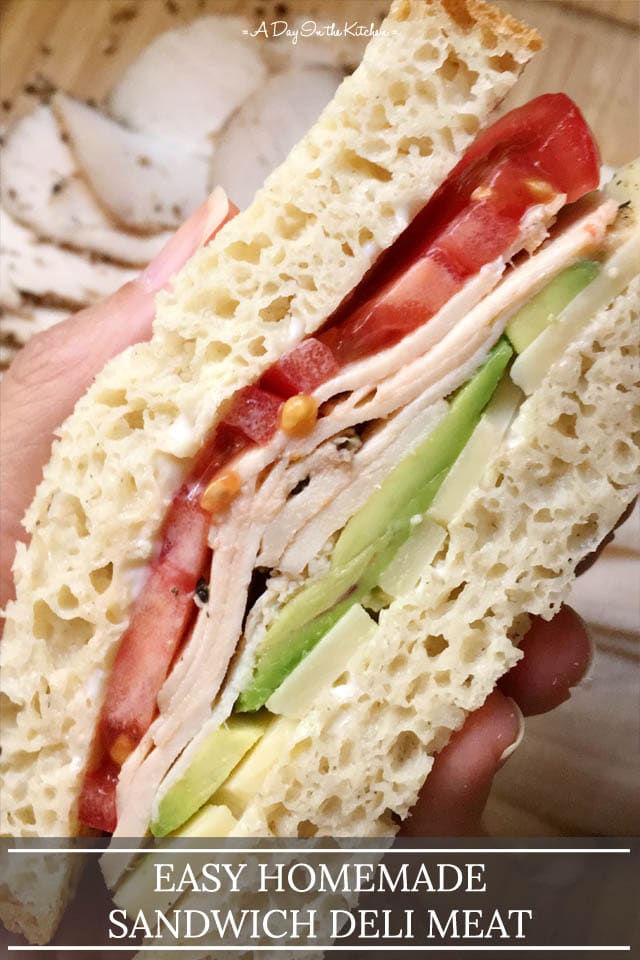
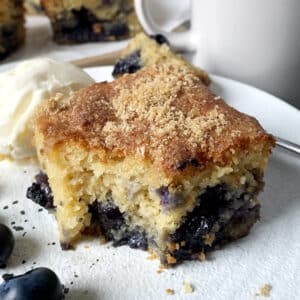
While my boys love to nibble on the meat straight from the fridge from a snack, let's not forget that it makes for awesome sandwiches, especially with homemade gluten-free bread, like my Soft Homemade Gluten-Free Bread pictured here!

A sandwich isn't complete with a nice stack of thinly sliced deli meat, but sandwich meat can be expensive, and this is especially the case here in Hong Kong where so much of the food is imported. Aside from cost, deli meat often contains ingredients you don't want, like too much salt and nitrates. But with this recipe, you don't have to worry about things like that any more!
This has got to be one of my favorite recipes that I make all the time. Easy, tasty, and healthier and more affordable than store-bought deli meat...what's not to love?
~ Lisa.
Watch How To Make It
Easy Homemade Sandwich Deli Meat
Ingredients
- 2 skinless, boneless chicken breasts (approximately 1lb. or 450 g total)
- 1 ½ tbs honey
- 1 ½ teaspoon sea salt
- 1 teaspoon onion powder
- 1 teaspoon garlic powder
Optional coatings prior to roasting:
- Black pepper
- Dried herbs
- Spices
Equipment
Instructions
Marinating:
- Combine honey, sea salt, onion powder, and garlic powder and mix well.
- Coat chicken breasts thoroughly in the honey marinade.
- Place chicken breasts in a zip-top bag. Press air out of the bag and seal.
- Refrigerate for 48-72 hours (2-3 days).
Preparing:
- Remove the chicken from the marinade and rinse with cool water.
- Place the rinsed chicken in a dish of cold water (make sure the chicken is submerged) and soak 30 minutes for every 24 hours you marinated it. (See note below.)
Roasting:
- Preheat oven 250 deg F (125 C).
- Remove the chicken from the soaking water and dry well with paper towels.
- Place the chicken on a parchment-lined baking sheet.
- Press black pepper or dried herbs into the chicken breast, if desired.
- Bake for 40-50 minutes, until the internal temperature taken with an instant-read thermometer is 165 deg F (74 C).
- Let cool at room temperature about 30 minutes.
- Place chicken breasts in refrigerator until completely chilled before slicing.
- Slice the chicken breast at an angle, as thin or as thick as you like. Store in a sealed container in the fridge for up to 1 week.
Notes
- The honey marinade will be a thick and paste-like. I find it easiest to spread over the chicken breasts with my hands to make sure covers the whole surface.
- When soaking the chicken in fresh water, soak 30 minutes for every 24 hour period it was marinated. ie. 72 hours marinating = 1.5 hours soaking
- When soaking the chicken in water, I put the chicken and water in a sealable container and place it in the fridge, making sure the chicken is submerged in the water. The purpose of this soaking step is to desalinate the chicken while also balancing out the flavors.
- You can marinate it for as little as 24 hours, but I find the best flavor comes from marinating it for 48-72 hours.
- Depending on if the thickness of the chicken breasts, it may take longer than 50 minutes to roast. The most dependable way to make sure they are done is to make sure the internal temperature is 165 deg F (74 C).
- I have found that dried herbs work better than fresh when roasting the meat.
Nutrition
Video added June 9th, 2023.

Michele
How long does the chicken last (use by date) after cooking and refrigerating?
Hi Michele! The chicken will last up to one week in the refrigerator. You can also freeze the sliced deli meat and pull out portions as you need them. Thanks for asking!
John
I have 2 breasts marinating in a vacuum packed bag i the fridge to give this a try. It sounds so delicious. Do you have any other deli meat recipes?
Hi John! I don't have any other deli meat recipes, but thanks for trying this one! I hope you liked the results!
Michael
Hello Lisa,
Would this process work when using a Buffalo Chicken dry rub? One of my sons prefers buffalo chicken sandwich’s and while the other prefers peppered turkey and want to give this a try. Thanks in advance and thank you for sharing.
Regards,
Michael
Hi Michael! Yes, you can absolutely use a buffalo chicken dry rub on the chicken before roasting it. Sounds like a delicious idea. Thanks for the question!
Joanna
Could you make this with turkey breast? I assume you'd just adjust the cooking time?
Hi Joanna! I have not made it with turkey breast, but I have other readers who have with successful results, and yes, they have extended the cooking time. Obviously, the most important step is to check the internal temperature to make sure it is done. Thanks for the question!
Mitch
Is there a reason you don’t use curing salt?
Hi Mitch! I don't use curing salt because this recipe is meant to use simple ingredients one would likely already have in their cupboard. Not many people have curing salt, but they will have regular salt. Thank you for the question!
Jayne Jares
Do you have an estimate of the sodium content for this recipe? Thank you.
Hi Jayne! Thanks for the question. I do not have an estimate for the sodium content for this recipe. There are likely websites where you can input the recipe and get the nutritional content to get the numbers, but they won't be able take into account the step of soaking the meat to desalinate it before roasting.
Jen
Have you ever tried this with a pork loin?
Hi Jen! I have not tried this recipe/method using pork as I don't think it would work. I think using pork/making ham has a more complicated process. Thanks for the question!
Judy
Pork spoils too quickly to be marinated that long.
Patti
May I ask why you soak the chicken breasts in cold water after marinating?
Hi Patti! Soaking the chicken breasts helps to desalinate them (or remove some of the salt) that was used in marinating so they aren't as salty in flavor. Thanks for the question!
Laura
Really yummy
Thanks, Laura!
miamiyogi
I've made this a dozen times. Because of health issues, trying to lower sodium and nitrites and nitrates. My daughter prefers this chicken in her sandwiches over the stuff they sell at deli counter. When we run out of the chicken she begs for me to make more.
Super simple to make most of the time is hands off. I usually roast with a lemon pepper rub I make at home. But I have made variations with a dry Chimichurri rub. Dry rubs are the way to go here.
Thanks for posting this.
Thank you so much! I'm so glad you and your daughter like the deli meat, and using a lemon pepper rub or chimichurri rub sounds delicious!
Canada Katrina
Doubling this recipe is not enough. My husband loves it. I follow the recipe exactly as written, and marinade for 48 hours. Thankfully I have a meat slicer, because I make this in big batches and freeze 400g (0.5 lbs) portions for easy lunch meat. Rubbing the marinade on is not the easiest...the honey wants to stick to everything except the chicken, but it eventually works. It's worth it!
Thanks so much, Katrina! So glad you and your husband like it, and I bet having a meat slicer makes the slicing so much easier, too, especially if you make a lot!