This buckwheat bread is not only soft and delicious, it's also incredibly easy to make! It is perfect for sandwiches, and slices also toast up beautifully for topping with butter and jam...or avocado! You can be gluten-free and still get to enjoy delicious homemade bread!
If you are gluten-free and have been subjecting yourself to dry tasteless gluten-free breads because you miss bread so much...don't torture yourself any more!
I can understand how it might feel like there are no good gluten-free bread options and how it may just seem hopeless.
But I've got a recipe to restore your faith!
This buckwheat bread is soft and delicious, and even better is that it's very easy to make!
How To Make Buckwheat Bread
Ingredients
I like to break down my recipes into the dry ingredients and wet ingredients that then get brought together to make bread magic!
Dry Ingredients: You'll need buckwheat flour, brown rice flour, tapicoa starch, xanthan gum, ground flaxseed, active yeast, and salt. (Check the Recipe Notes below regarding buckwheat flour color.)
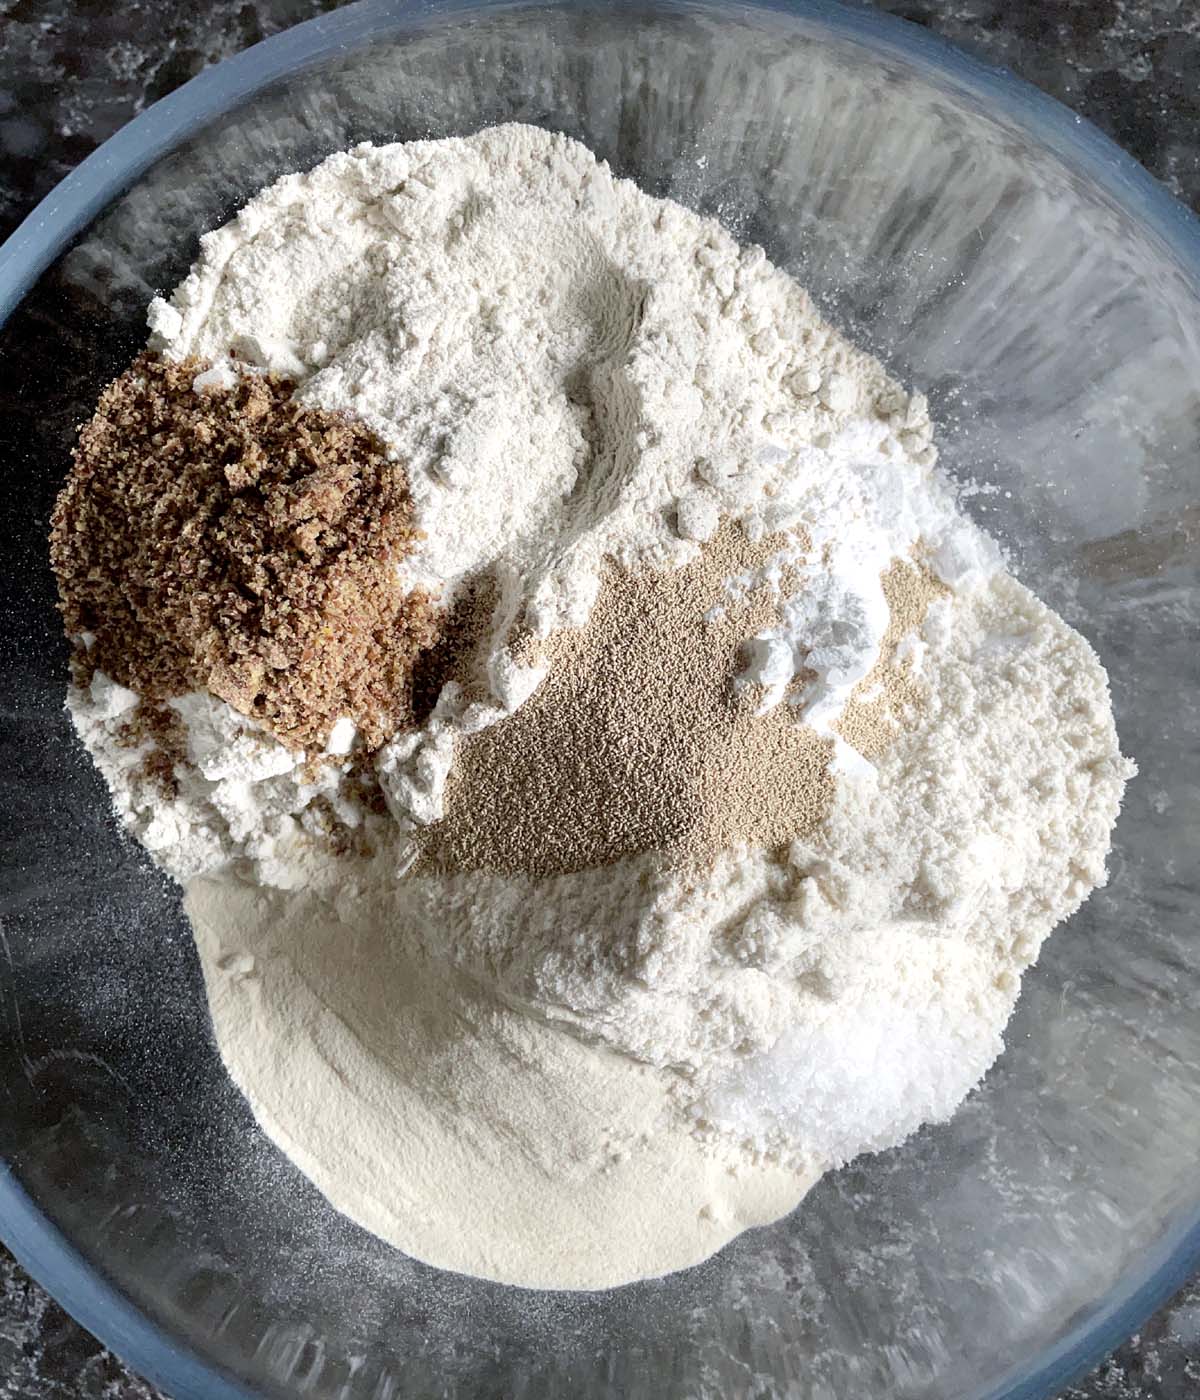

Wet Ingredients: You'll need water, oil, eggs, and honey.
You can't get much simpler than that, right?
And putting all those ingredients together to make the bread is just as simple.
*There is no kneading required and it only needs ONE proof. Repeat that a few times to yourself, let it sink in for a moment...and let's get baking!
How To make Buckwheat Bread
Combine all your dry ingredients in a bowl and whisk together. Set aside.
In a mixing bowl, combine your wet ingredients and beat with a mixer or whisk until well-combined.
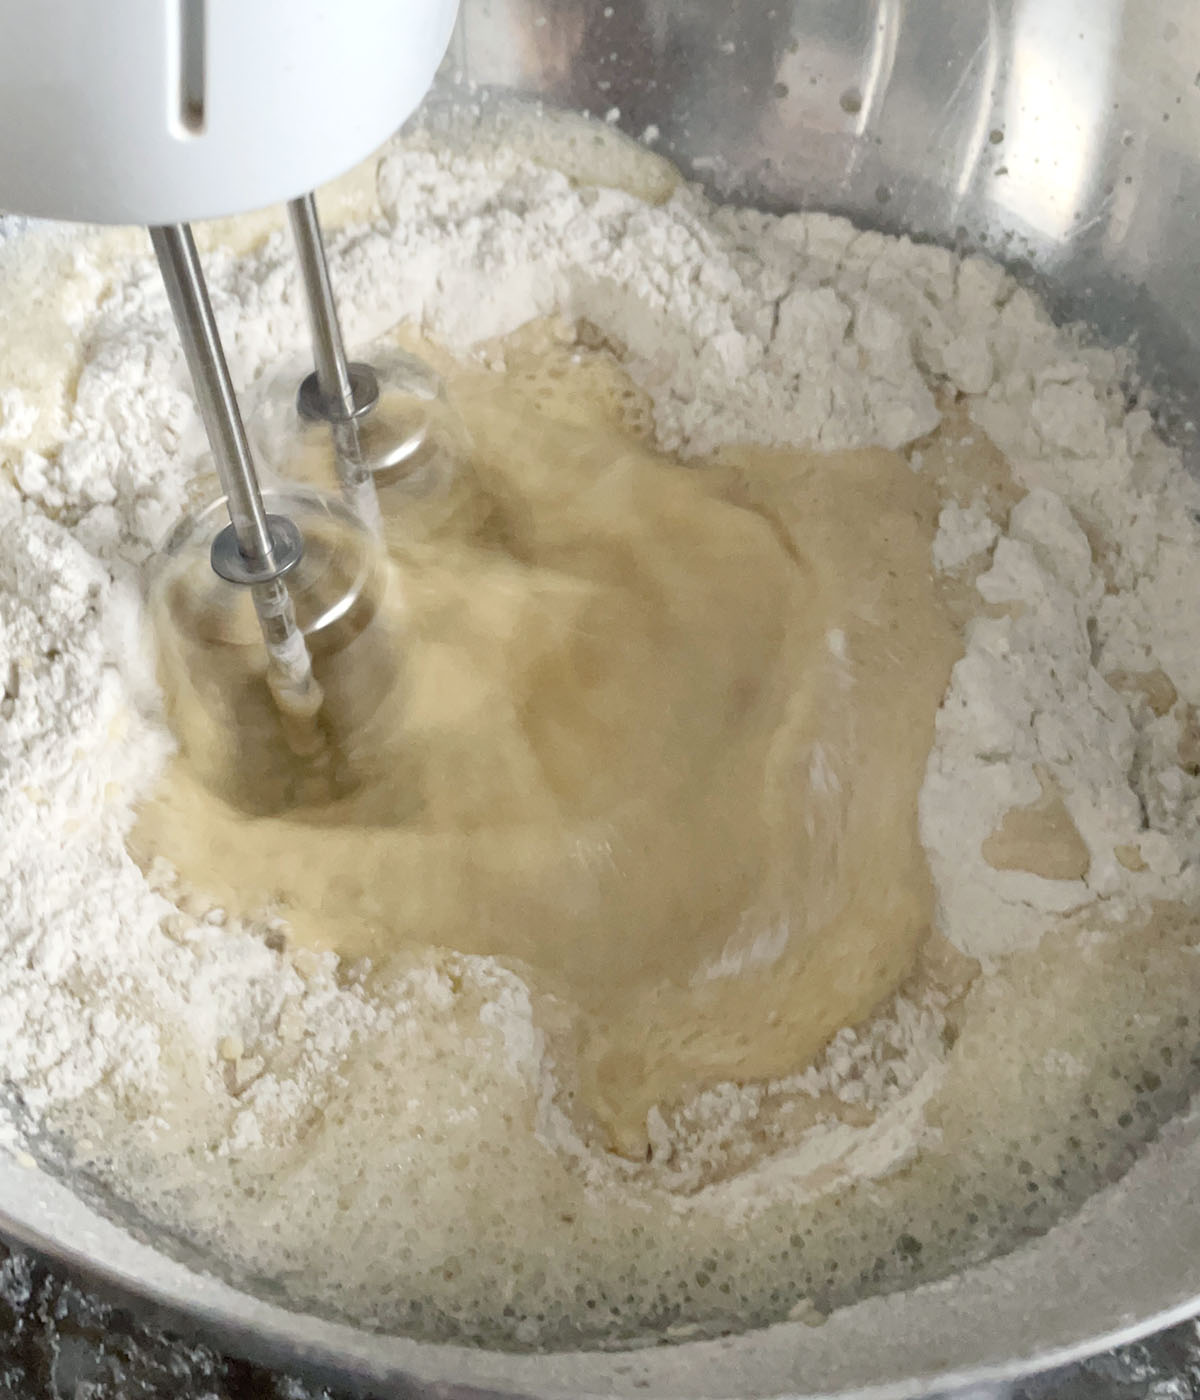
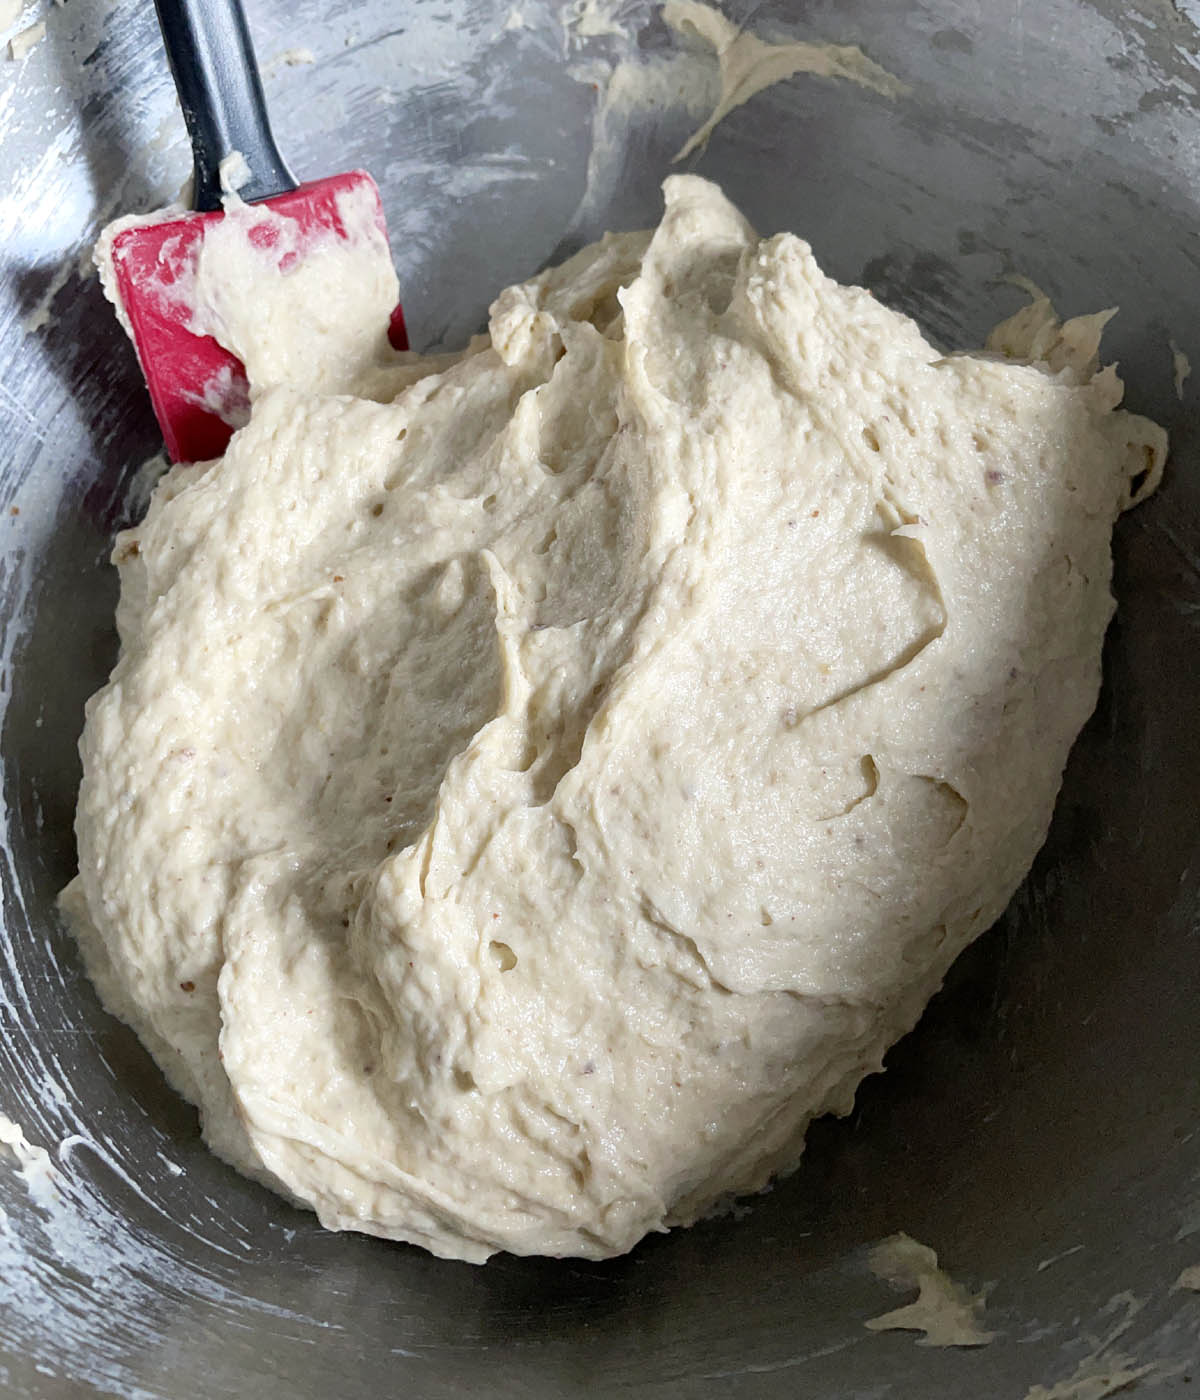
Add the dry ingredients to the wet and beat well for 1-2 minutes, scraping down the sides of the bowl halfway through.
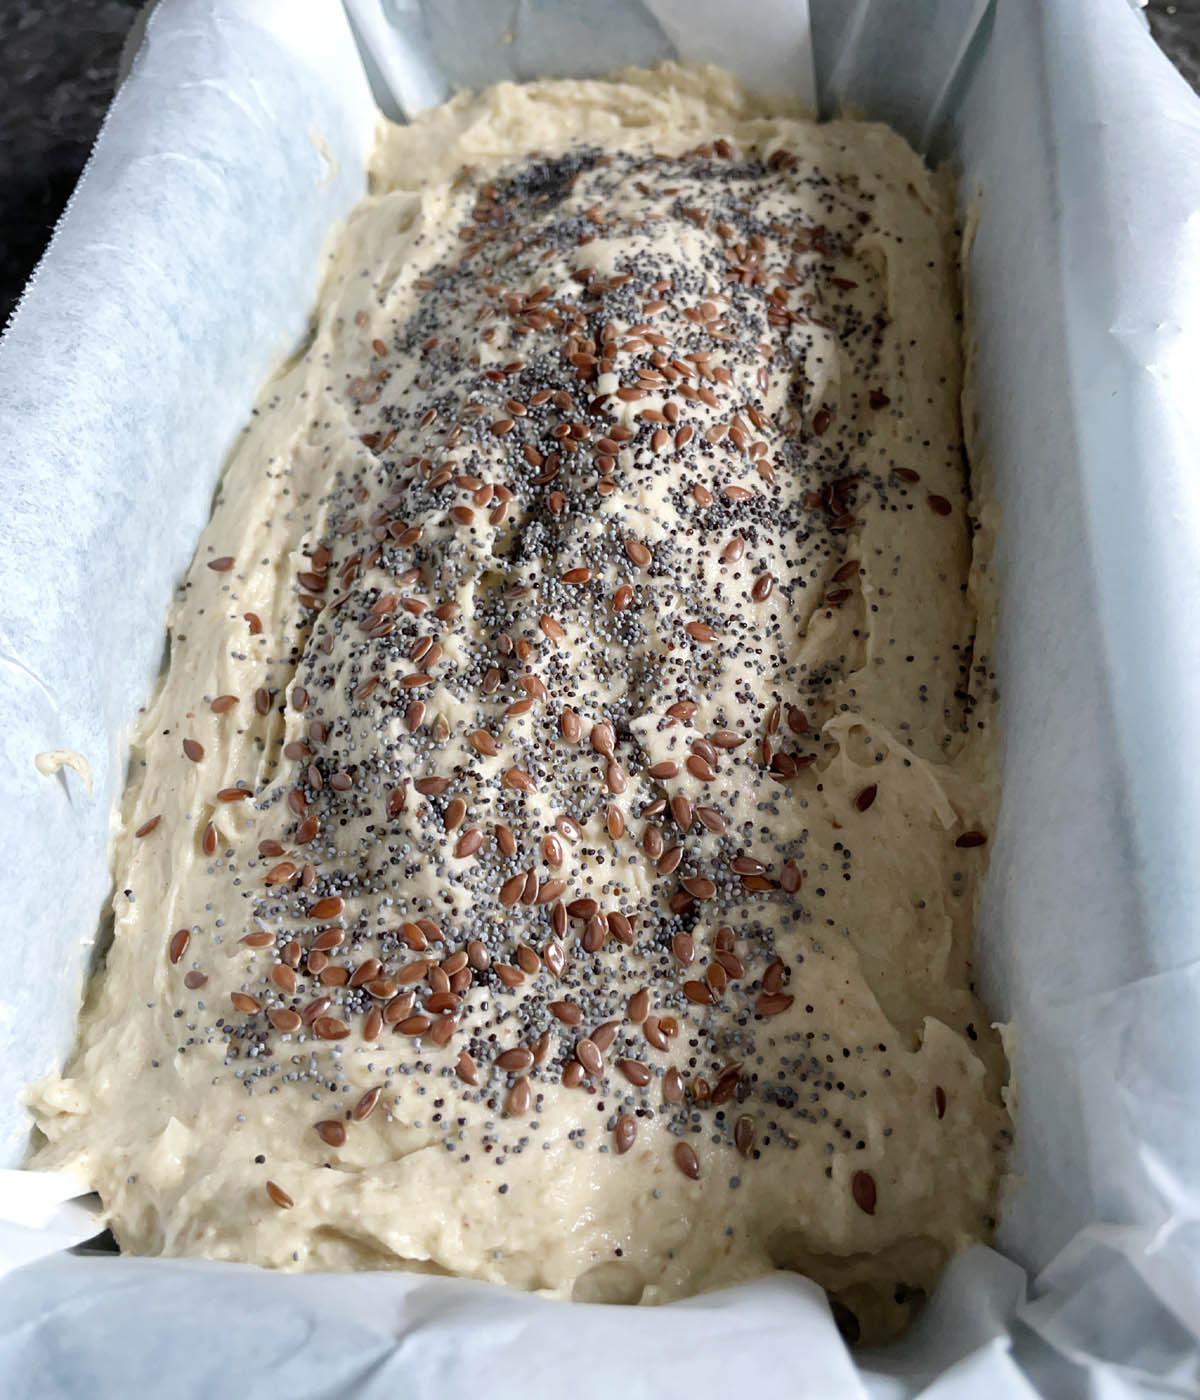
Scoop the bread batter into a parchment-lined loaf pan, spreading the batter to fill the corners. I like to shape the batter so it's domed in the middle, but it's not necessary.


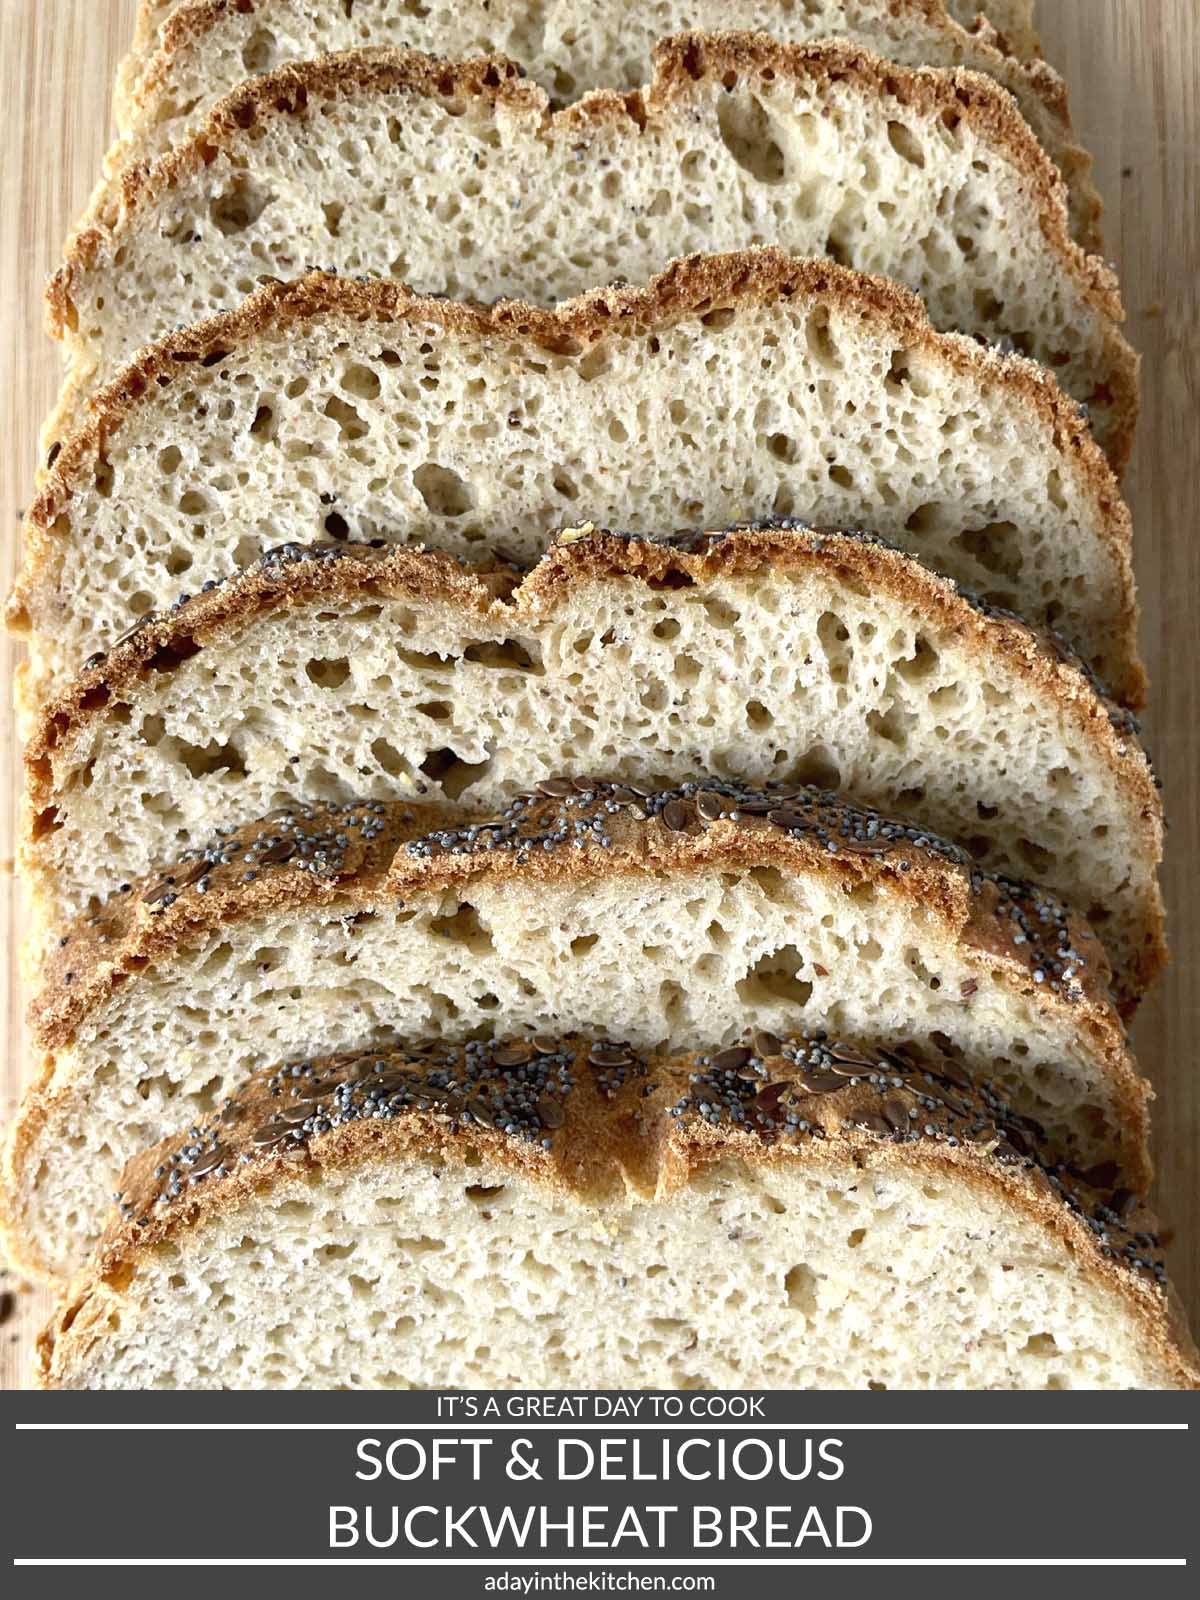
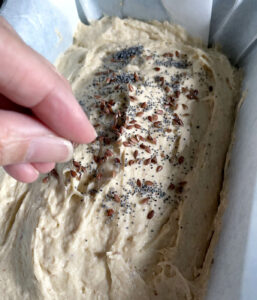
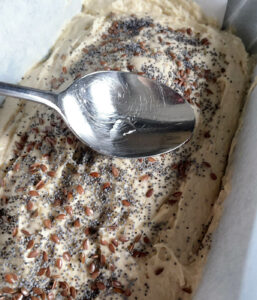
As an optional step, you can sprinkle whole flax seeds and poppy seeds on top of the batter, just to give the bread a bit of a decorative top. Use dampened fingers or a spoon to gently press the seeds into the bread batter.
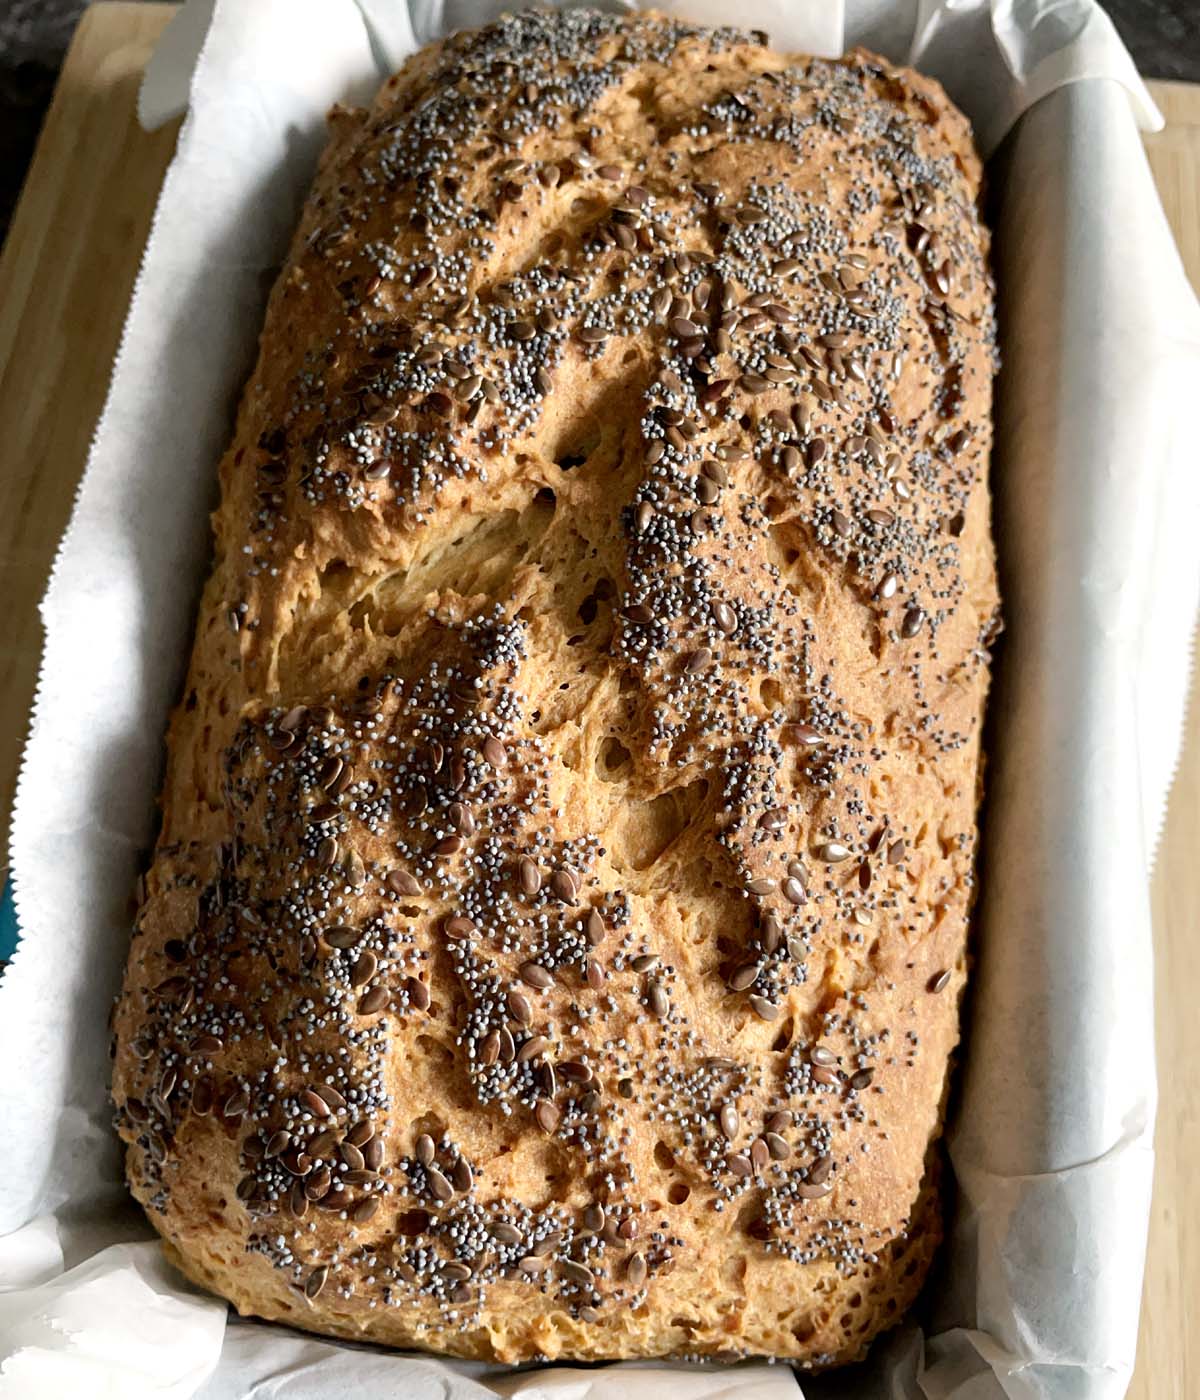
Set the loaf pan aside and allow the bread to proof/rise until it is just above the edge of the pan.

As I mentioned above, making this bread or any of my gluten-free bread recipes is so easy because it only has to go through one proof/rise. Traditional wheat bread usually involves allowing the dough to rise, punching it down, shaping it, and allowing it to rise again before baking. But not gluten-free bread! No kneading needed and only one proof before baking! If that isn't easy, I don't know what is!
Bake the bread for 50-60 minutes, until the bread is browned and an instant-read thermometer inserted into the middle registers least 200F/93C. Remove from the oven and allow to cool in the pan 5-10 minutes before using the parchment paper to transfer the bread to a cooling rack.
Enjoy "Real" Bread Again!
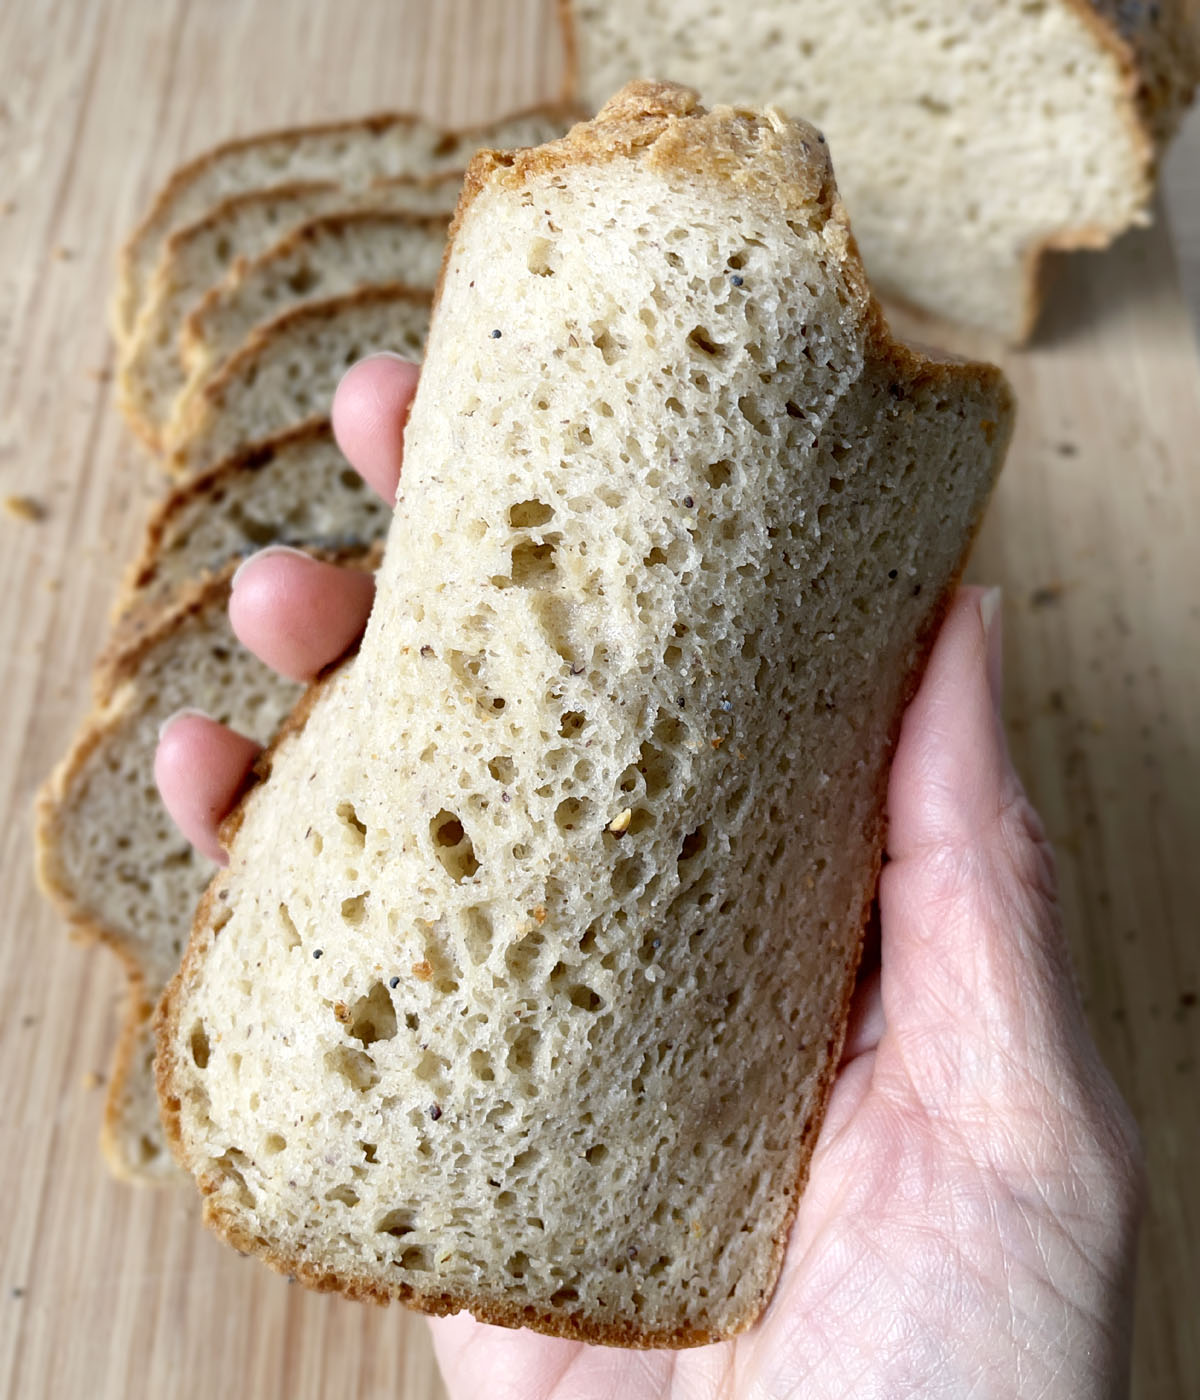
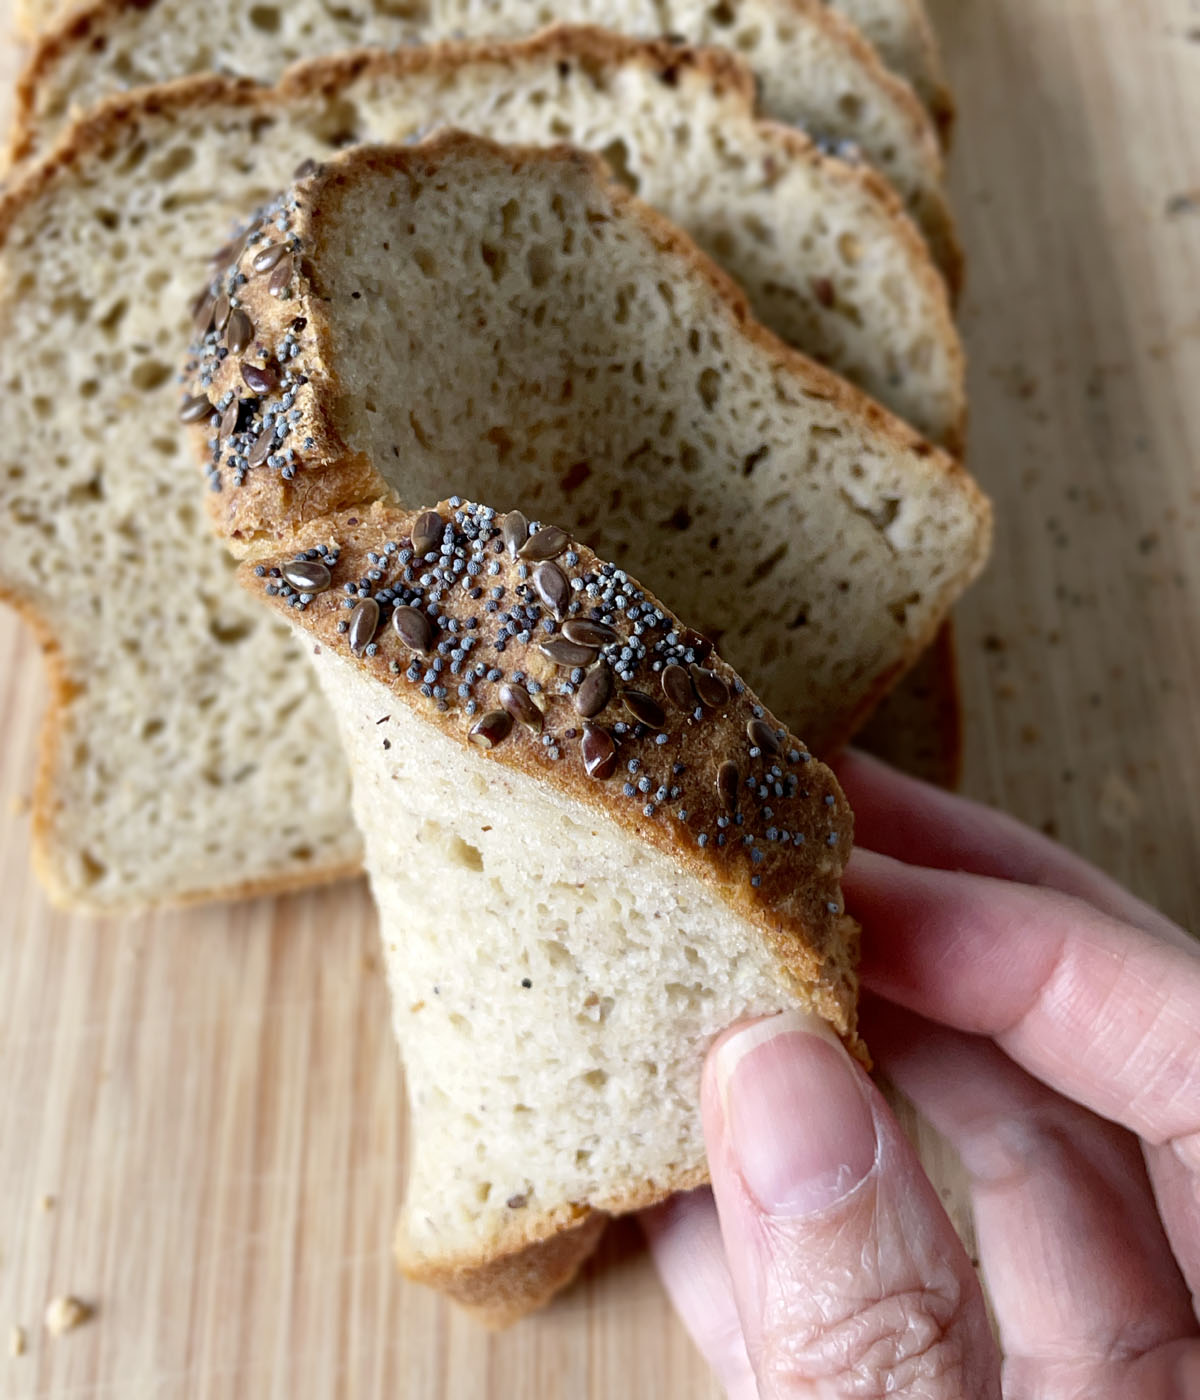
As tempting as it might be, it's important to let the buckwheat bread cool completely before slicing. If you slice it too soon, it will be too gummy inside and you won't get nice slices of bread!
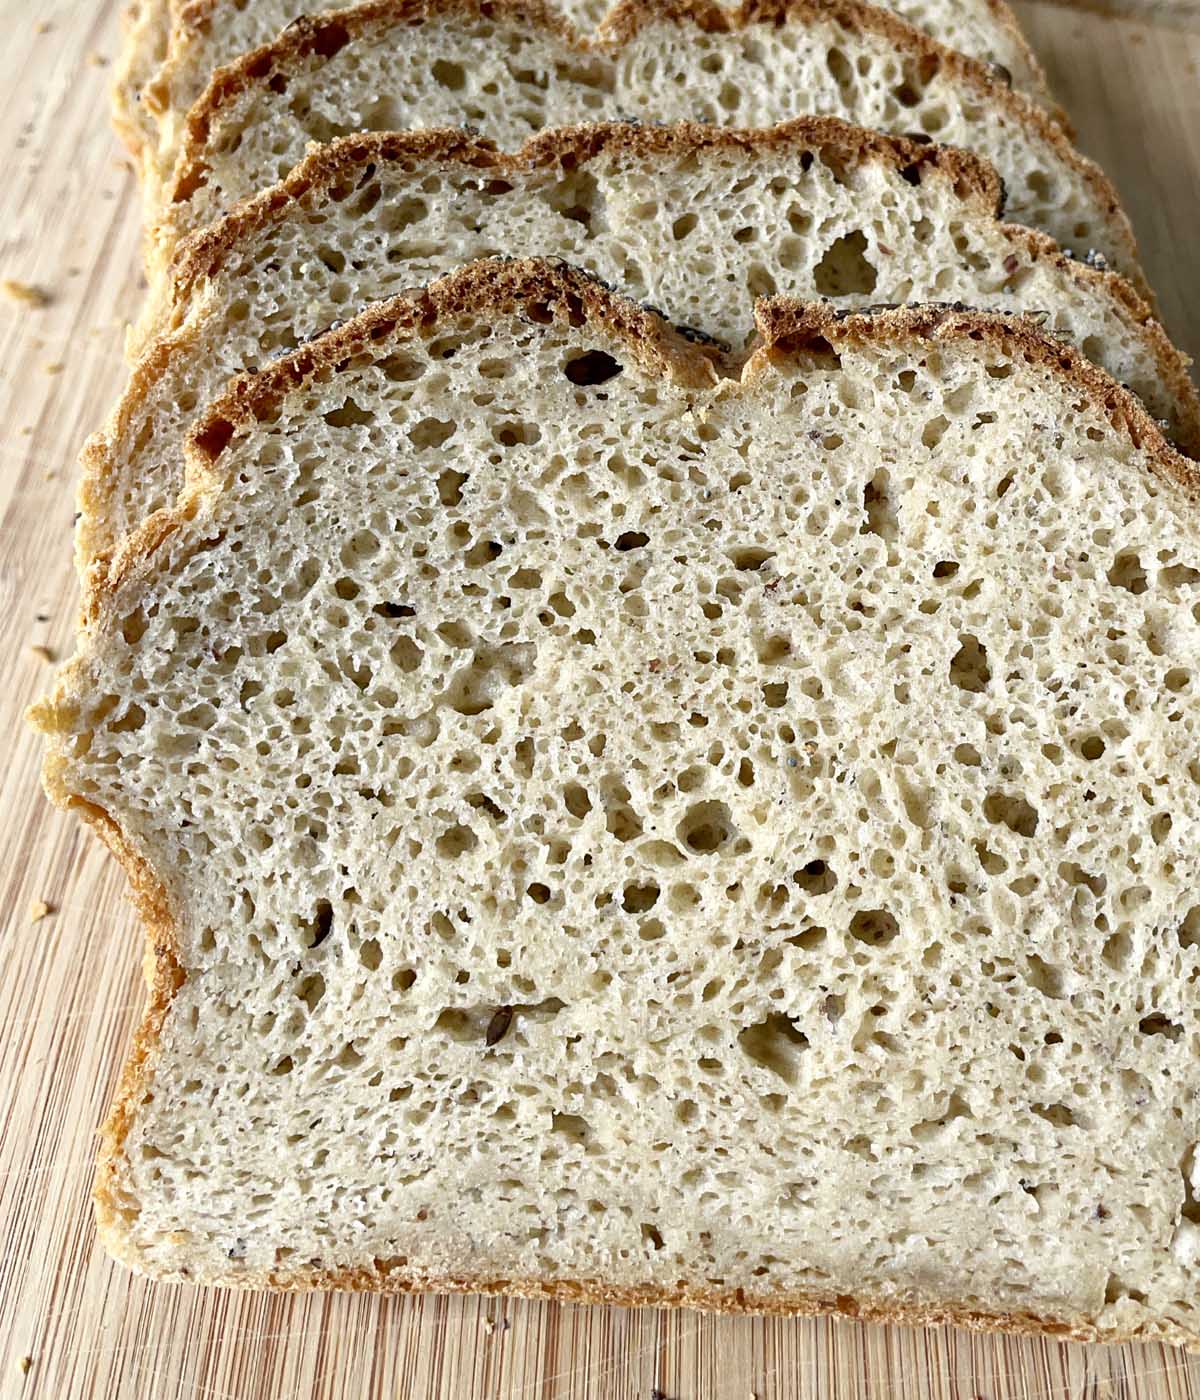
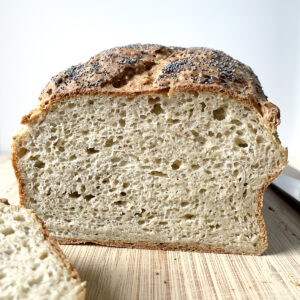
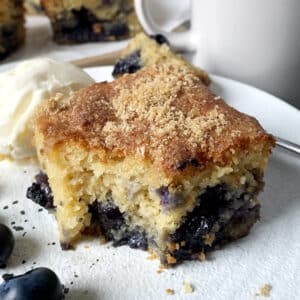
Once you do make those first slices into the loaf, you are going to love what you see! The bread is SOFT, and the crumb has varying air bubbles, just like REAL bread.
Check out how this bread bends! These photos prove how soft it is! No more stiff dry bread slices that look (and taste) like cardboard!
Sandwiches made with this fresh buckwheat bread are soooo good. Stuff your favorite fillings between two slices and you are going to be in sandwich heaven!

Toasting the Bread
So something I found with gluten-free breads I had purchase in the past was they never seemed to brown in the toaster. It was really weird and, again, not seeing browned toast, no matter how long I toasted the slices, just didn't seem right.
Well, check this out!
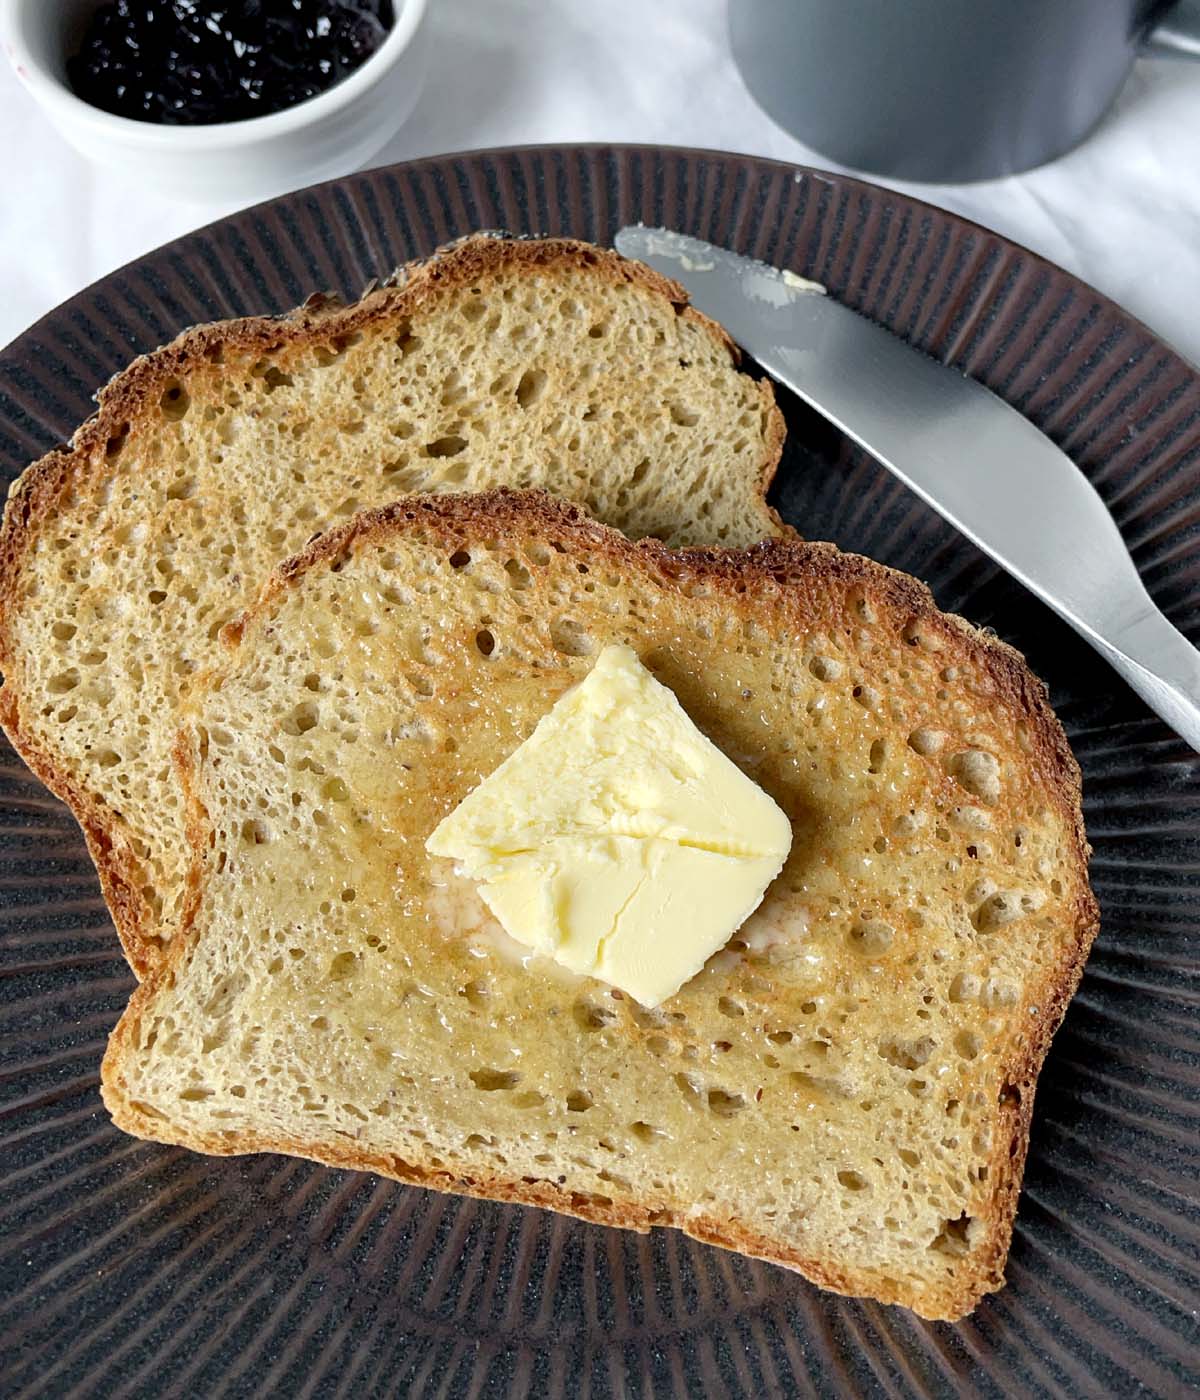
Slices of the buckwheat bread toast up beautifully! Slather on some butter and jam, or top it with some avocado!
Commonly Asked Questions
The bread will taste best the same day you make it. Store any leftover bread in a resealable bag on the counter for a day or in the refrigerator.
Yes! If you want to freeze the bread, I would slice the entire loaf first and then store in a resealable freezer bag, squeezing out the excess air.
When you want to eat a slice or two, regardless of whether the bread has been on the counter overnight, in the fridge, or in the freezer, pop it into the toaster, or wrap the slice in a slightly damp paper towel and microwave it for 10-20 seconds to warm it through if you want to eat it soft.
Looking for More Gluten-Free Bread Recipes?
This buckwheat bread recipe is one of my most popular! I have spent a lot of time developing and refining gluten-free bread recipes so that the end result don't make you hate being gluten-free. Check out these other bread that are all slightly different but totally soft and delicious!
Soft Gluten-Free Sandwich Bread
Soft Homemade Gluten-Free Bread (dairy-free)
Gluten-Free Honey Oat Nut Bread
Now you can be gluten-free and have your bread, too! Happy baking!
~ Lisa.
Watch How To Make It!
Soft and Delicious Buckwheat Bread
Ingredients
Dry Ingredients (volume measurements in Recipe Notes below):
- 175 grams tapioca starch (same as tapioca flour)
- 120 grams buckwheat flour
- 105 grams brown rice flour (white is fine)
- 1 tablespoon xanthan gum
- 1 tablespoon ground flaxseed
- 2 ¼ teaspoons active yeast (one packet)
- ½ teaspoon salt
Wet:
- 1 ¼ cups warm water (about 110 deg F)
- ¼ cup light olive oil
- 3 eggs, room temperature
- 2 tablespoons honey
Topping (optional):
- ½ teaspoon whole flax seeds
- ½ teaspoon poppy seeds
Instructions
- Combine all dry ingredients in a bowl and mix well with a whisk. Set aside.

- Combine all wet ingredients in a large mixing bowl and beat with a mixer until combined.
- Add the dry ingredients to the wet and beat with mixer until well combined.
- Scoop bread batter into a parchment lined bread loaf pan and smooth out with a spatula.
- Sprinkle whole flax seeds and poppyseeds on the top of the bread batter, keeping the topping away from the edges.
- Using a dampened spoon, gently press seeds into the bread batter so they stick.
- Place loaf pan in a warm, draft-free area to rise until dough is no more than ½" above the edge of the pan, about 1 hour.
- Preheat oven 350 deg F (180 C).
- Bake for 50-60 minutes, until an instant-read thermometer inserted into the middle of the loaf reads at least 200F, ideally 210F.
- Let bread rest in the pan about 5-10 minutes before lifting out from the pan.
- Let cool completely before slicing.


Notes
- Volume Measurements:
- 1 ¾ cup + ¾ teaspoon tapioca starch
- 1 cup + 1 ½ tbs buckwheat flour
- ¾ cup + 2 tbs brown rice flour
- Please note that gluten-free recipes work best with weight measurements because they are more precise than volume measurements. Gluten-free baking requires more precision and can be less forgiving than baking with regular all-purpose wheat flour.
- These volume measurements were made from spooning each of the flours into the measuring cups/spoons (so they are not packed) and leveling them off.
- The volume measurements are approximate. Make slight adjustments to the recipe as needed, adding a bit more water or a bit more tapioca starch or brown rice flour to achieve the correct dough consistency.
- Variations in buckwheat flour color: buckwheat flour can be either light in color or have a slightly darkened grayish hue. The light flour is made from hulled buckwheat, the grayish flour is unhulled and has dark flecks from the hull. Using either type for this recipe works.
- You cannot overwork gluten-free bread batter, so do not worry about over-mixing. You should mix the dry with the wet for about a minute to make sure it's well combined.
- The bread will stay fresh in a bag on the counter for a day, or in the fridge for a few days.
- To freeze, slice the bread and store the slices in a resealable freezer bag, squeezing out most of the air.
- To soften the bread, microwave for 10 seconds, either wrapped with a damp paper towel or not.
- Slices brown in the toaster nicely.
This recipe was originally published January 20th, 2019 and republished August 14th, 2022 with new photos and writing.


Teal
Do you have a comparison somewhere of your three bread recipes ? I’d like to try them but not certain where to start.
Hi Teal! I'm not exactly sure what you mean by a comparison, but I'm guessing you're wanting to know which one might be easiest to start with? Really, I'd say they are all very similar in terms of method and ease, but you could try the buckwheat bread or soft gluten-free bread as your first attempts and see what you think. Thanks for the question and I hope that helps!
Barbara
I wanted to print the recipe, but … I don’t have google, facebook, or pinterest, and don’t want to use them / get an account with them.
I will just hand write the recipe.
I would appreciate it if this could be re-vamped so that folks could print it who don’t have only those formats.
Thanks.
Barbara
Oops! I’m so embarrassed!!
I apparently tapped on “pin”, not print! My bad - and my apologies.
It printed fine!
No worries, Barbara! I'm glad you figured it out!
mars
Could you sub 1 for 1 Gluten-free flour (with xantham gum) for the tapioca starch and brown rice flour?
Hi Mars! Yes, you can try substituting the brown rice flour and tapioca starch with an equal amount of a gluten-free flour blend and see how it turns out. If your flour blend already contains xanthan gum, omit the xanthan gum in this recipe. I do not know how the final result will be affected with the substitution, but it's definitely worth a try. Thanks for the question!
Mars
Thanks for the speedy reply & all of your posted recipes. It helps a lot with my gluten sensitivity issues:)
JS
I substituted rice flour as I didn’t have any and the bread turned out well. Thanks a lot Lisa for this recipe, it’s easy to make and tastes so good !
Thank you so much for trying the recipe and for letting me know that using rice flour to substitute the buckwheat flour worked! I'm so glad you liked it!
Sue
Can I make this in a bread machine? I couldn't use the sesame seeds, unless I mixed them in.
Hi Sue! I have had readers make the recipe in a bread machine with success. Just be sure that it only goes through one proof before baking, and you can omit the seeds. Thanks for the question!