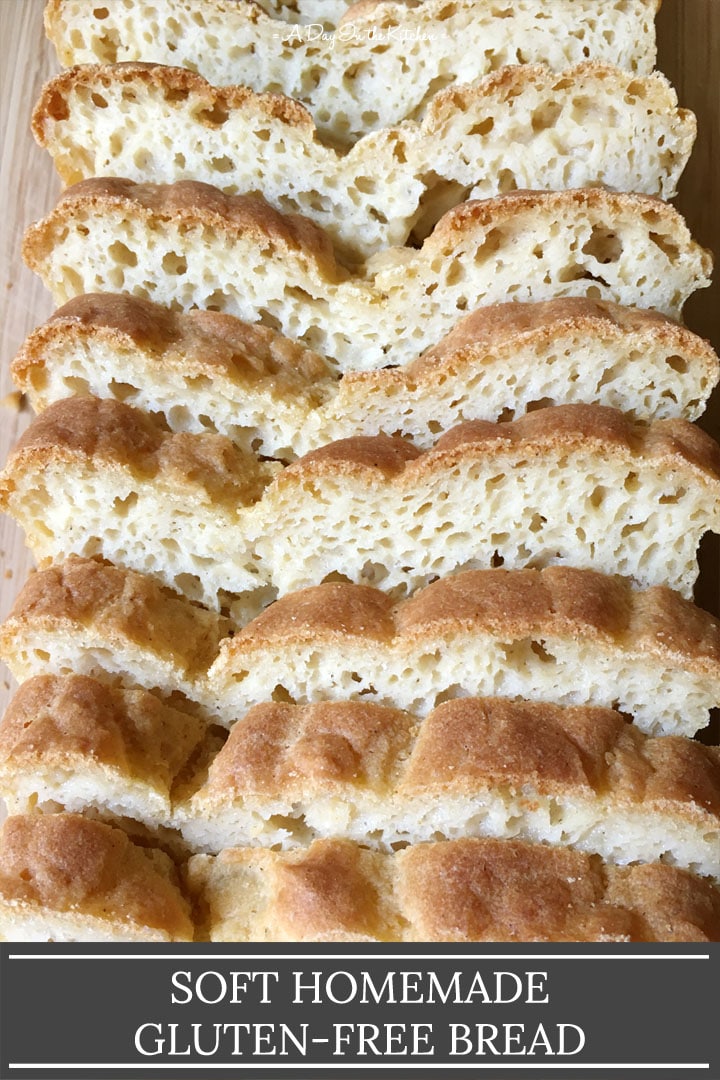
Soft homemade gluten-free bread is easier to make than you think! Simple and delicious, you'll love it in a sandwich or with some butter and jam. Most importantly, you'll be amazed that this bread is gluten-free!
Believe it or not, I still have trouble convincing some people that gluten-free bread can actually be good.
Crazy, right?
I've been doing gluten-free baking for a long time...
...and if you know me, you know I won't actually post a recipe unless it ticks all the boxes.
For bread, it's got to be SOFT...
...and delicious...
...and good enough and close enough to "real bread" that you don't realize it's gluten-free.
Bonus points if it's also easy to make!
Well, this bread recipe ticks all the boxes and is just another example of how good gluten-free bread can actually be!
The Dry Ingredients
I like to keep the ingredients fairly simple, and this bread recipe is no exception. The dry ingredients are made up of rice flour, tapioca starch, sorghum flour (which can be substituted with buckwheat or oat flour), xanthan gum, and salt. That's it! The rice flour provides the bulk, the tapioca starch provides the moisture, and the sorghum flour gives the wheat-like smell and taste. The xanthan gum acts as the "glue", if you will, giving the bread that chew that we want from bread.
I prefer not to use pre-made gluten-free flour blends as they often contain other ingredients that I do not want, so I like to create my recipes from scratch with the core ingredients. However, be rest assured that the gluten-free flours I use are commonly found and affordable, so anyone can make these recipes.
Now on to the other dry ingredient...yeast.
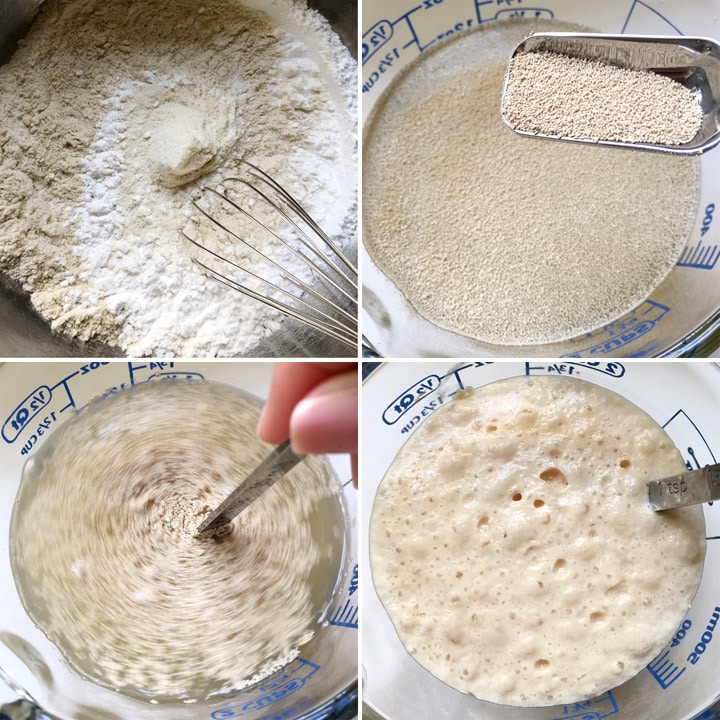
Contrary to common thinking, you do not have to proof yeast before adding it to the rest of the ingredients. If you are confident that the yeast is active (or if you want to live life on the edge!), you can simply add it dry to the rest of the dry ingredients. I have done this and the bread has always worked out without any issue. Keep in mind that I also store my yeast in the fridge to facilitate it staying active longer.
If you aren't sure if your yeast is active, or if you just want to make sure it is before you combine it with all the other ingredients, there is nothing wrong with proofing it first. For proofing the yeast for this recipe, I simply take ¼ cup of the required amount of warm water, mix it with the 2 tablespoons of honey, and add the yeast.
Creating the Batter
Yes, I said batter.
One major difference from regular wheat bread is that gluten-free bread dough is more like a batter and doesn't require any kneading. It is as simple as mixing all the wet and dry ingredients together with a mixer, pouring the batter into a pan and letting it rise once before baking. In that respect, making a gluten-free bread is much simpler than wheat bread!
The wet ingredients are also very straightforward, being composed of eggs, honey (which you may have already used for proofing your yeast), warm water, oil, and apple cider vinegar.
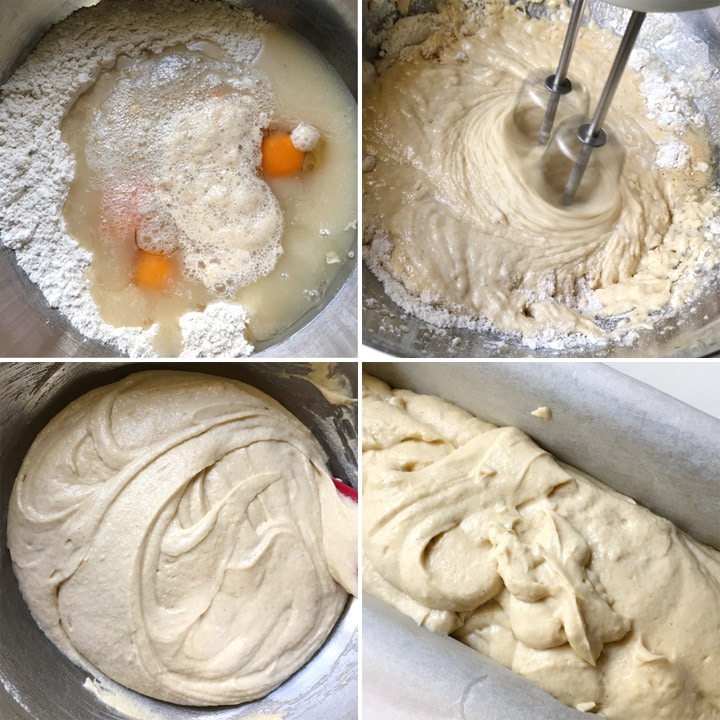
The dry, the wet, and the yeast mixture (if proofing ahead of time) all get combined into a mixing bowl. Whether you are using a stand or hand mixer, it only takes about a minute for the bread batter to come together.
The Rise
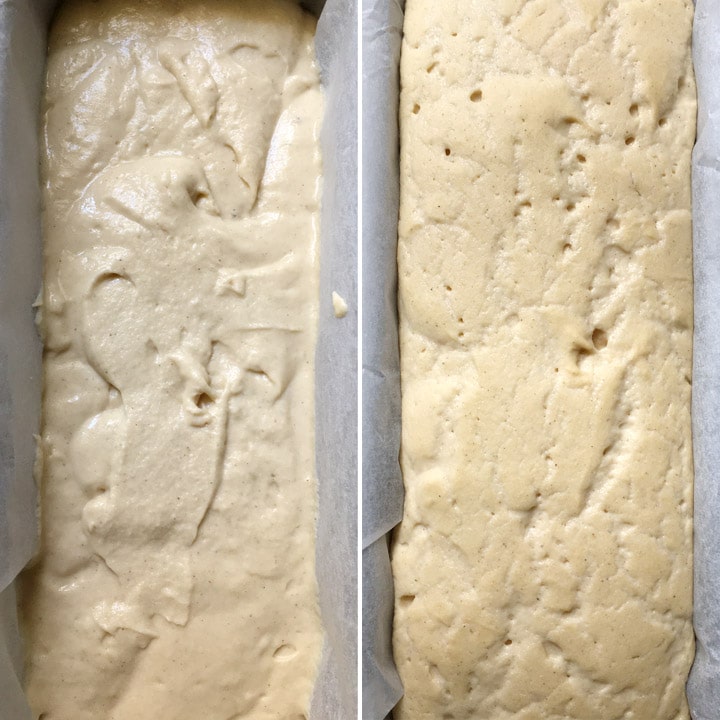
Scoop the bread dough batter into a parchment-lined loaf pan and now you just have to let it rise. (See Recipe Notes below regarding pan sizes.) If my kitchen is already warm (like during the summer months), I will simply leave it on the counter. Otherwise, during the colder months, I will often put the bread pan in the oven with just the oven light on and that creates a perfect warm environment for the bread to rise.
Once the bread is no more than ¼" above the edge of the pan, it is ready to bake. I know it may be tempting to let it rise just a *little* bit more until it reaches, what you think, is the perfect height. However, take it from someone who has done just that...don't. 🙂
The bread batter continues to rise a bit once it goes into the oven and that can result in your bread having a "ledge" or, even worse, the batter may spill over the edge of the pan. So err on the side of being conservative.
Bread Magic
After the bread dough has risen, it's time to bake and let the heat do its magic. Before you know it, the wonderful aroma of fresh baked bread will be wafting through your home! In 45 minutes, you'll have a beautiful loaf of bread..that looks and smells like "real" bread!
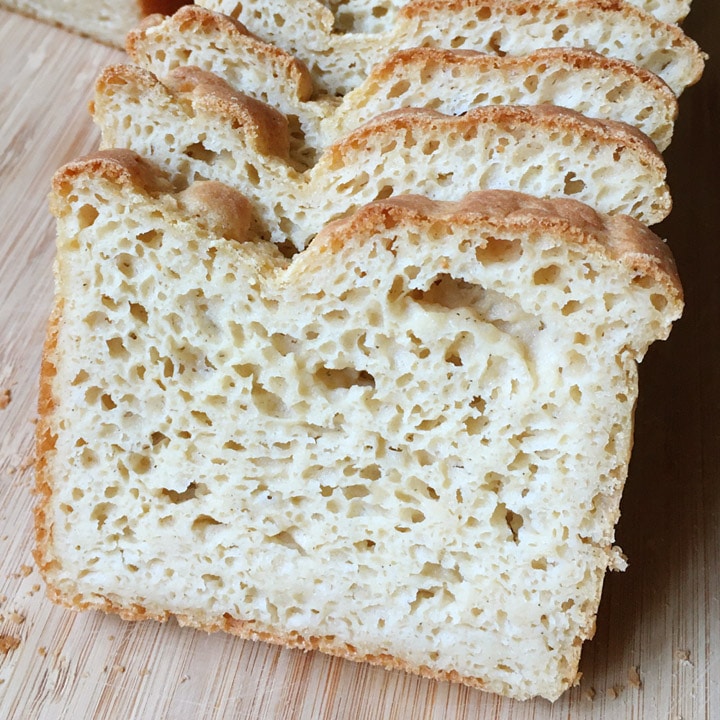
I know it will be difficult, but it's best to let the bread cool completely before slicing. Your patience will be rewarded when you make those first slices, see the beautiful airy bubbles, and take your first bite!
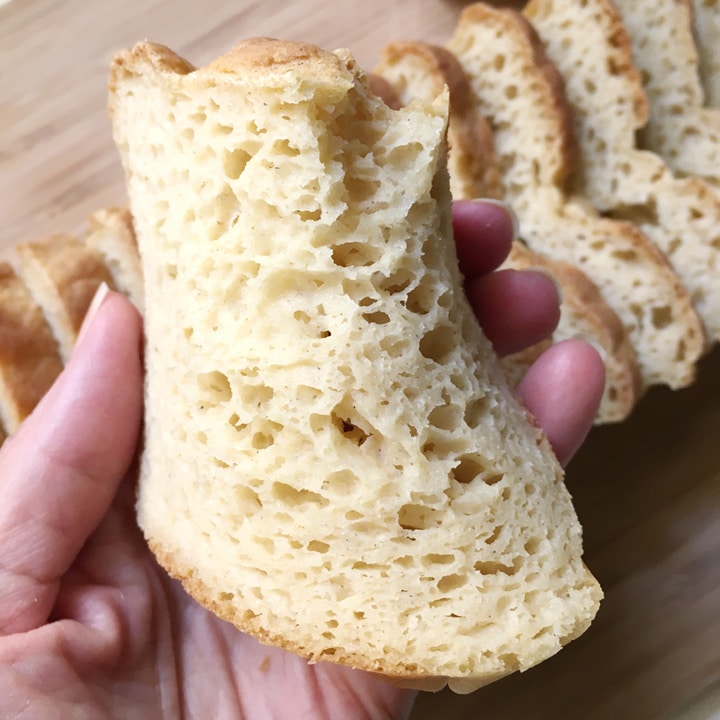
And of course, no gluten-free bread recipe of mine is complete without a shot of the "bend" test! It's softness you can see!
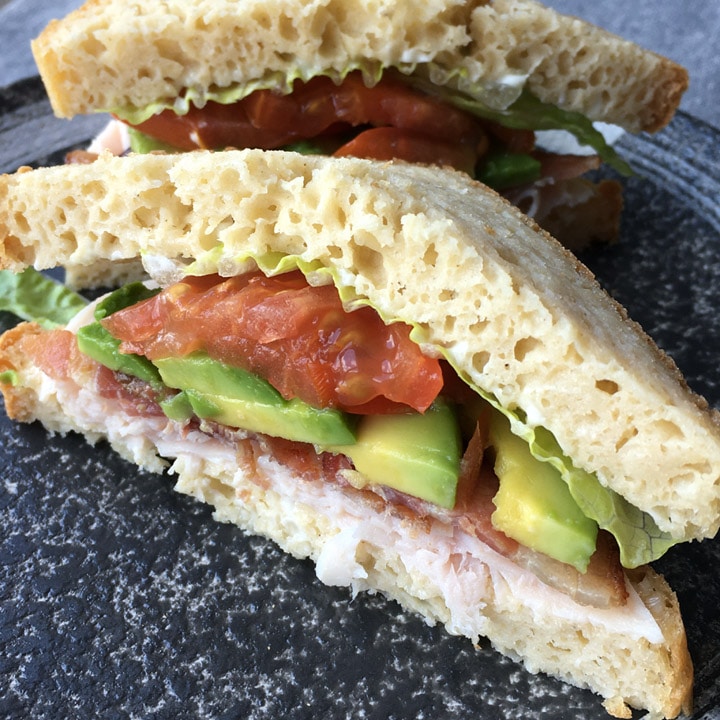
Did I mention this soft homemade gluten-free bread makes awesome sandwiches?? Get your favorite fillings, like my Easy Homemade Sandwich Deli Meat, and pack them between two slices…there's something incredibly satisfying about making fresh sandwiches with your very own homemade bread!
As I mentioned above, I have been baking gluten-free for a long time. So it would only make sense that I have a few gluten-free bread recipes!
They're all slightly different, and each delicious in their own way. It's definitely worth trying any, or all of them to see which one you like best! If you're like my family, we actually love all of them, and I find having the different recipes a nice way to have some variety.
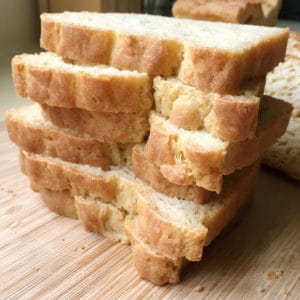
So back to this recipe, just as the name says, it's soft. It has a tender crumb, good structure, lots of air bubbles, just the right amount of moisture, and it is just plain GOOD. It is also very easy to make...what's not to love?
~ Lisa.
Soft Homemade Gluten-Free Bread
Ingredients
(Volume measurements in Recipe Notes below, but weight measurements are highly recommended)
Proofing the Yeast (see Recipe Notes below):
- ¼ cup warm water (about 100F/37C)
- 2 tbs honey
- 4.5 grams active yeast
Dry Ingredients:
- 260 g rice flour (white or brown is fine)
- 80 g tapioca starch (same as tapioca flour)
- 60 g sorghum flour (can substitute with buckwheat or oat flour)
- 4.5 grams xanthan gum
- 2 grams salt
Wet Ingredients:
- 3 eggs room temperature
- 1 tbs apple cider vinegar
- 1 ¼ cup water (about 100F/37C)
- ¼ cup light olive oil (or any neutral flavored oil)
Equipment
Instructions
- Combine ¼ cup warm water with 2 tbs honey and stir well. Mix in the yeast and let sit for 10 minutes to proof.
- Combine all dry ingredients in large mixing bowl and whisk together well.
- Add yeast mixture, 1 ¼ cups warm water, ¼ cup oil, eggs, and apple cider vinegar to the dry ingredients.
- Using a hand or stand mixer, beat mixture for 1-2 minutes, scraping down sides of the bowl halfway. Dough will be like batter.
- Scoop bread batter into parchment lined loaf pan and tap pan on the counter a couple of times to help the dough fill the corners.
- Place bread dough in a warm location to rise for approximately 1 hour, checking after 45 minutes. The center of the loaf should be no more than ¼" above the edge of the loaf pan. (See note below.)
- Preheat oven 350 deg F (180 C).
- Bake uncovered for 45-60 minutes, until internal temperature taken with an instant-read thermometer registers at least 200F/93C.
- Let bread rest in the pan for 5 minutes before transferring to a cooling rack. Let cool completely before slicing.
Notes
- Volume Measurements for Dry Ingredients:
- 1 ½ teaspoons active yeast
- 1 ½ teaspoons xanthan gum
- 2 ¼ cups + 2 tbs brown rice flour
- ¾ cup + 2 tbs + 1 teaspoon tapioca starch
- ½ cup + 1 tbs + 1 teaspoon sorghum flour
- ½ teaspoon salt
- Please note that gluten-free recipes work best with weight measurements because they are more precise than volume measurements. Gluten-free baking requires more precision and can be less forgiving than baking with regular all-purpose wheat flour.
- These volume measurements were made from spooning each of the flours into the measuring cups/spoons (so they are not packed) and leveling them off.
- The volume measurements are approximate. Make slight adjustments to the recipe as needed, adding a bit more water or tapioca starch or brown rice flour to achieve the correct dough consistency.
- Can this be made in a bread maker?
- Yes! Be sure to check the manual for your bread maker as it may come equipped with a gluten-free setting. The most important thing is that the dough only go through ONE proof/rise before baking.
- This recipe works in different sized loaf pans: 5 x 9, Pullman tall style pans, 4 x 11.5 long pans.
- Depending on your environment, the dough may take longer than an hour to rise. In this case, simply monitor how high the dough has risen in the pan, making sure that the center of the loaf does not rise more than ¼" above the edge of the pan.
- For the tall Pullman style pans, let the bread proof until doubled in size. Because the Pullman pans have much taller sides than standard loaf pans, do not let it rise above the edge of the pan.
- Depending on your environment, the dough may take longer than an hour to rise.
- It is not necessary to proof the yeast. You can also simply add the dry active yeast to the dry ingredients and whisk together and simply add the 1 ½ cups warm water and the honey to the bowl with the rest of the wet ingredients. I have done it both ways without any issue.
- Millet, buckwheat or oat flour can be used in place of sorghum flour.
- I have used sparkling mineral water in place of regular water, but have found that both yield similar results. You can use whatever you prefer!
- It is important to not let the bread rise too much before baking it. It is best to bake it when the rise looks just less than the "perfect" height, otherwise the dough may end up spilling over the edge.
- Keeps well in a sealed bag or container on the counter for a couple of days, in the refrigerator for a few days (if it lasts that long!). If you refrigerate the bread, the slices taste better toasted.
- Freeze slices of the bread in a resealable freezer bag. Remove only the number of slices you will be eating. Toast in the toaster, or wrap a slightly damp paper towel around the slice(s) of bread and microwave for 10-20 seconds to soften.
- Nutritional info is approximate and based on a serving of one slice, assuming you can get about 12 slices from a loaf.
Nutrition
**Recipe notes were updated March 14th, 2023 regarding proofing the bread dough, bread pan sizes, and volume measurements for dry ingredients.


:yn
I have been looking for a bread recipe for a very long time that actually looks and feels like wheat bread. I made it yesterday and I was so pleased! Thank you so much for bread that doesn't remind me it's gluten free! It tastes great! Since I am the only one that eats gluten free in our house, I slice the bread and put wax paper or parchment paper pieces between the slices and put it in an airtight container and freeze it. The paper makes it easy to pull just one slice out without it sticking together and the bread keeps for a whole lot longer when it's frozen. I will either toast it or wrap it in a damp paper towel and microwave it for a few seconds and it comes out like it just came out of the oven.
Thank you so much for your comments! I'm so glad that you like my bread recipe, and I love the tips on how to freeze the slices so they don't stick together...I'm going to try that myself!
Clare
Hi will rhis work in a bread machine?
Hey Clare. I have not tried, but if you try this recipe in the bread maker, I would make sure to let the bread only do one rise before baking.
Helen Prather
OMG! My granddaughter came in unexpected from out of town because of lots of issues cannot have gluten. I was really worried because I didn’t have all the ingredients I had to use a flour that said it had all the ingredients needed. I also read you don’t use this but with no other options I tried anyway! DRUMROLL...... IT WAS DELICIOUS!!!!! Definitely making more for her now! Thank you for such a SOFT DELICIOUS BREAD!
Hi Helen! Thanks so much for trying this bread recipe and for your comments! It's great to know that the recipe does, indeed, work with a prepacked GF flour mix, and I'm so glad that the recipe came to rescue when you needed it! I hope you and your granddaughter continue to enjoy it!
Annie Wilson
Your recipe states 175 g tapioca starch and 105 rice flour. Is this not the tapioca being more than or dominant over the rice? I would think that your recipe with tapioca starch at 175g being half the weight of total flours of 225 flours would make the loaf gummy or too soft. oops too much starch makes a dry loaf my mistake anyway most websites state 1 part starch : 3 parts .Rice Flour
Hi Annie! The numbers you mention do not actually pertain to this particular bread recipe which has different proportions of dry flours to starch. If you are actually referring to my Soft Gluten-Free Sandwich Bread, then yes, the starch to dry flour ratio is greater, but it does work. The bread is, indeed soft (thus the name), but it is not gummy, and it has been made numerous times by me and many readers. If you prefer, you can try the bread recipe on this page and see how you like it...it is also a delicious gluten-free bread! Thanks for the question.
Heather
How would you recommend that I freeze the loaf? I made it to take on vacation and my hubby forgot to pack it in our cooler. I was thinking of calling my father-in-law and asking him to put it in the freezer so it won’t go to waste!😊
Hey Heather! What I do is I slice the bread and then put the slices in a ziploc bag, squeezing out as much air as I can. Then I just pull out slices as I want to eat them, warming/toasting them being the best way to eat them after being frozen. Hope that helps, and I hope you have a good vacation!
Sangita Jain
Your bread looks interesting. I want to bake it. Could you please give egg substitute.thanks
Thanks, Sangita. Unfortunately, I don't know what you can use to replace the egg. I have read about flax or chia eggs, but I don't know how they would affect the final result.
Pat. Junko
I’m not gluten sensitive but bake for a friend who is both gf & dairy free. I don’t want to buy all the different flour items for only occasional baking so have Better Batter all-purpise gf flour. How much of this flour should I use? I can add the amts of dry ingredients you give but don’t know if that works. Please tell me how much all-purpose gf flour to substitute.
Hi Pat! For the all-purpose GF flour, I would use the equivalent amount in total weight of the brown rice flour, tapioca starch, and sorghum flour. If the GF flour mix already contains xanthan gum, then omit what I have in the recipe. Good luck and I hope it works out!
Luigi
Hi Lisa,
is that possible swap the apple vinegar for rice vinegar ? I think it will be tough to find appel vinegar in my hometown, thank you!
Yes, rice vinegar or regular white vinegar should work, no problem. Thanks for asking, Luigi!
Sabrina
Wow, this is a great looking recipe. I’ll be sharing with my dad who loves bread but has a severe gluten intolerance. Thank you 🙂
Thanks, Sabrina! I hope he likes it!
Sacha
Hi! I want to try this recipe this week but we just found out my husband is allergic to rice. Yes, rice. 🤨 What would you recommend to substitute for the rice flour? Thank you!
Oh wow... a rice allergy! My first go-to would be oat flour (certified gluten-free) as a substitute. You could also substitute with sorghum, millet, or buckwheat, but the texture in the finished bread might be affected. Thanks for the question, Sacha, and I hope that helps!
Natalie
Sacha did you end up finding a Rice Flour substitute that worked? My daughter is very sensitive to rice too. I have had some successes trying chickpea/fava but it's not my favourite still. Although I have yet to try them with this recipe and I'm so looking forward to making this!
Ginni @ginniskitchen
I could not believe it was gluten free - it really looks fantastic. Would love to try this, even though I am not really a baker. Lovely recipe!
Thanks, Ginni.
Laura
Always on the hunt for gluten free bread recipes and this looks delicious, can’t wait to try it. Also really appreciate your detailed instructions!
Thanks, Laura! I hope you like it!
Eliza
Hello,
Looking forward to trying our your great looking recipes! I’m wondering if I could substitute the Rice and/or Sorghum flours with Cassava flour? And still use the tapioca flour. Appreciate your response and opinion! Thanks Eliza.
Hey Eliza! Thanks for the question. I'm not sure if the cassava flour would work in this case to substitute for the rice and sorghum flours. Cassava flour and tapioca starch actually come from the same plant so I don't know if using them together would get you the right texture for the bread.
Grace C
I am a novice baker. This is an awesome recipe and I appreciate all the details like only filling pan to 1/4 level - I used an aluminum mini loaf pan for my 2nd try and after rising the bread was already the height of the pan and noticed it didn’t rise any more post baking. I made 1/4 of your recipe twice - testing with active dry yeast that required proofing and then with instant dry yeast. Interestingly, the yeasty odor much stronger with active dry yeast but I love the convenience of no proofing. I am going to make the full recipe eventually, I am an experimenter - wondering what would happen if I switched amounts for brown rice and tapioca, making brown rice dominant? Thank you for this amazing sandwich bread recipe!
Thanks for your comments, Grace...I'm so glad you like the recipe! I'm not sure what you mean about making the brown rice flour dominant as the bread is already mostly brown rice flour. If what you meant was to make the tapioca starch dominant, I would not suggest doing that as the texture will be quite gummy and the recipe may not work out.
Melissa
Thank you, i just tried it and came out perfect. Added some salt as per the comment above. I'm very happy to have found your site!
I'm happy you've found my website as well, Melissa! I have also amended the recipe with the addition of some salt. Thanks for your comments!
Sangita Jain
Hello Request you to give a substitute for vinegar. Can I use buttermilk or curd instead. Thanks
Thanks for the question, Sangita. You can omit the vinegar for this recipe.
Nikki Rogers
Just made this bread and it looks wonderful! The flavor is a bit off, so next time I'll add some salt. I used all brown rice flour, brown sugar instead of honey, and skipped the flax seeds. Thanks for sharing this recipe!
Thanks for the comment, Nikki! I'm glad you liked it!
Nicole
This recipe sounds wonderful! Is the xanthum gum absolutely necessary? I have all the ingredients except for that one
Hey Nicole! The xanthan gum is the "glue", so to speak, that helps give the gluten-free bread its "real" bread-like texture and squidginess that is associated with gluten-filled breads. You could try excluding it to see how it turns out, but the texture may be different. I haven't tried excluding it so I don't personally know how it will turn out. If you do give it a try, please let me know! You could also try making a "test" loaf by making a half recipe, or even 1/3.