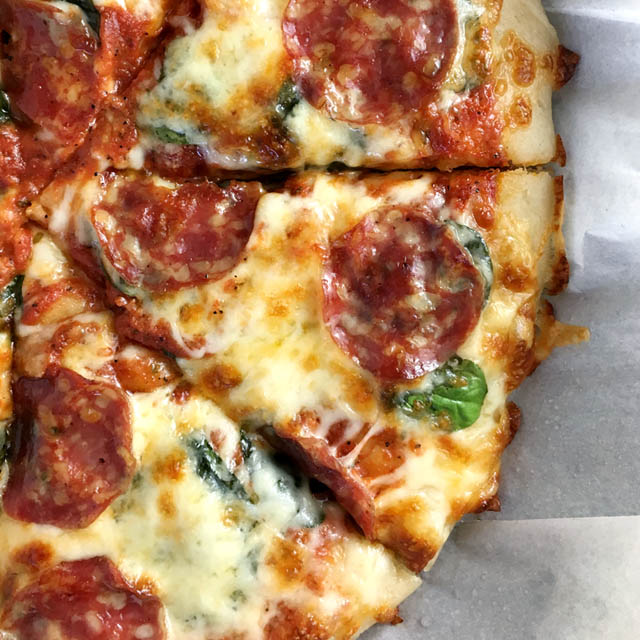
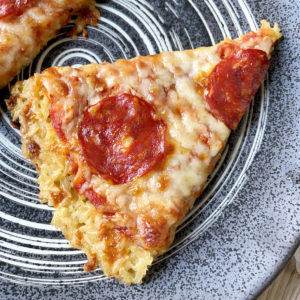
This pan pizza has a crust that's crisp on the outside and soft and tender on the inside. Topped with your favorite pizza toppings, it is hearty, delicious, and completely gluten-free!

There’s regular pizza. And then there’s pan pizza.
Pan pizza with its slightly crisper and thicker crust that makes each slice like its own meal.
And what if I said you could make this at home AND have it be gluten-free?
Crazy, right?
As you may already know, one of my goals is to demystify gluten-free cooking, especially gluten-free baking. And with this pan pizza crust, it’s yet another recipe that shows you that gluten-free breads don’t have to be dry and cardboard-like and chalky and just plain AWFUL.
So check this out…
The Batter
No, you’re not reading it wrong. This crust all starts with a batter because gluten-free flours don’t work the same as regular wheat flour. You’re not going to get a nice springy dough that you can knead and work and toss gracefully in the air to stretch.
You get a batter. And that’s totally okay!

You mix all you gluten-free dry ingredients together with yeast and then simply add warm water and oil. Mix it all with a whisk to make your batter.
(See Recipe Notes below regarding yeast and the absence of sugar in this recipe.)
The Pan and Shaping the Crust
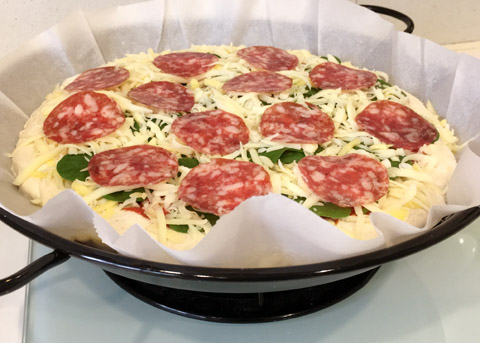
No one ever specified what kind of pan you had to us for pan pizza, so I use a paella pan! Certainly, you can use the most obvious choice…a cast-iron pan. But since I don’t own one, the paella pan was what I was going to use and it worked great!
An important note is that if you use any dish or pan that is not cast iron, you will need to line it with parchment paper because the gluten-free crust will stick to the surface. You can certainly scrape each pizza slice off the pan, but what fun is that?
Just like you would with a cast iron pan, you have to grease the parchment. The oil, in this case, is not to help with making the pizza not stick, but rather to give it that crisp “fried” crust that is characteristic of pan pizza.

Scoop the dough batter into the pan and using a spatula or the back of large spoon, spread the batter to the edges. You can spread it so it’s thicker around the edges, or you can just spread it evenly all around. Then all you’ve got to do is let the crust sit and rise. That’s it!
The Sauce and the Toppings
Once the crust has risen, there is no more handling, no more working, nothing. That’s one of the advantages of gluten-free breads…you let it rise once and don’t touch it again!
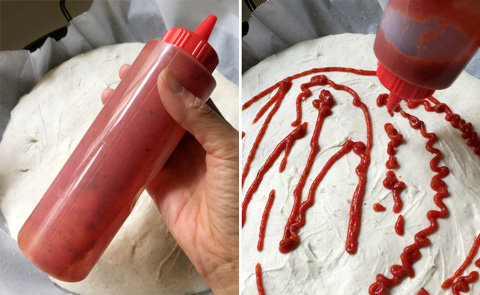
Spreading the sauce requires a bit of a gentle touch. Because the dough is not as robust as a wheat crust, you don’t want to push too hard on it as the surface can easily be ripped. So I splatter bits of sauce all around and use the back of a tablespoon to gently spread it. Alternatively, you can put the sauce in a squirt bottle and squirt the sauce all over the crust.

After you’ve got the sauce sorted, then comes the easy part of loading the pizza with your favorite toppings!
The Bake
Place the pan in a hot oven for about 10-15 minutes until hot and bubbly and you’ve got pan pizza!

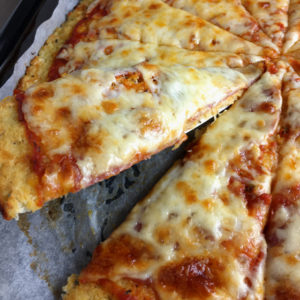
If thicker crispy crust pizzas are your thing, then you are going to love this pan pizza, whether you’re gluten-free or not!
A slice of one of these with a fresh salad is a perfect meal. Or if you've got hungry growing teenagers in the house like I do, this pan pizza is sure to fill them up quickly! If you happen to have any leftovers, these taste great cold from the fridge, or give them a quick warm up in a 400 deg F (200 C) oven for about 5-10 minutes.
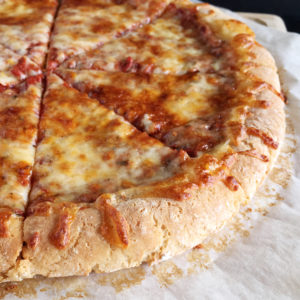
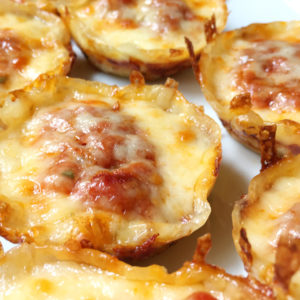
If you are looking for more gluten-free pizza ideas, check out my Easy Amazing Gluten-Free Pizza Crust that contains no yeast and uses only 7 ingredients! Or if you want to make a flourless pizza crust, check out my Rice Crust Pizza or Cauliflower Crust Pizza Crust. They are all worthy pizza options, each in their own right, and they are ALL gluten-free! You’re welcome!
~ Lisa.

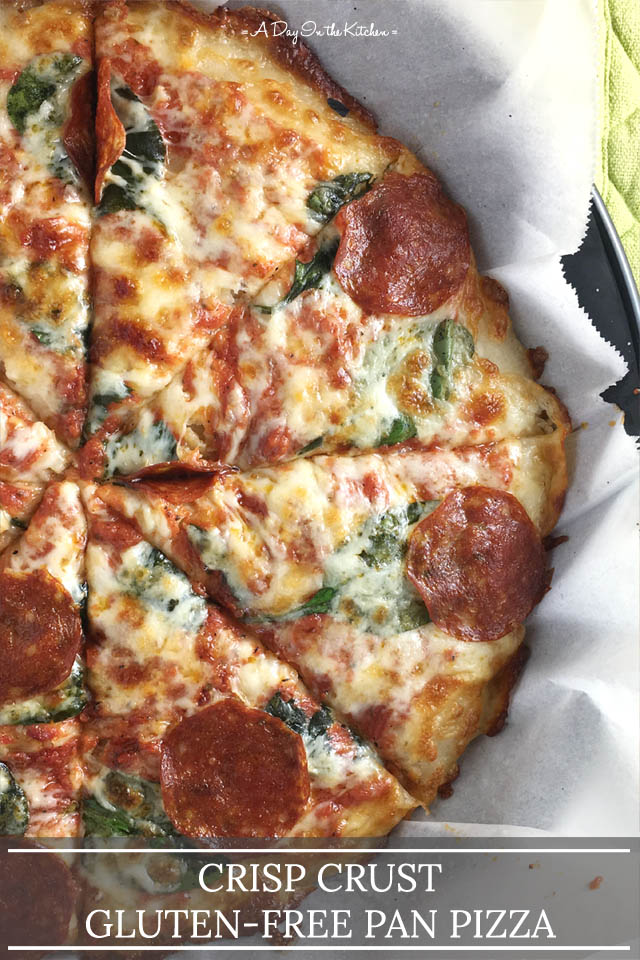
Crisp Crust Gluten-Free Pan Pizza
Ingredients
Dry Ingredients:
- 180 g brown rice flour
- 80 g sorghum flour
- 60 g tapioca starch
- 1 teaspoon active yeast
- 1 teaspoon sea salt
- ½ teaspoon xanthan gum
Wet Ingredients:
- 1 ¼ cup warm water, about 100 deg F (38C)
- ¼ cup light olive oil
- 2 tbs light olive oil, for greasing the pan
Sauce:
- ⅓ cup tomato sauce
- 2 tbs tomato paste
- ½ teaspoon Italian seasoning
- ½ teaspoon garlic powder
- ½ tsp onion powder
- ½ teaspoon sea salt
- ¼ teaspoon ground black pepper
Instructions
- Line your pan with parchment paper and brush with 2 tbs light olive oil, being sure to brush up the sides. Set aside. (see pan notes below)
- In a large bowl, combine all the dry ingredients.
- Add the oil and warm water and mix well using a whisk until well combined.
- Scoop the crust batter into the prepared pan and spread the batter with a spatula or spoon.
- Place the pan in a draft-free location and let rise for at least 30-45 minutes (depends on how warm the room is).
- While waiting for the crust to rise, combine all sauce ingredients in a bowl and stir well to mix. Set aside.
- Preheat oven 450 deg F (230C).
- Carefully spread the sauce on the crust, taking care to not push too hard to break the surface of the crust. (See sauce notes below)
- Top with cheese and your favorite pizza toppings.
- Bake for 10-12 minutes until the cheese is bubbly and golden brown.
- Remove from oven and let rest for 5 minutes before slicing.
Notes
- There is no sugar in the crust batter. Contrary to widespread belief, you do you not need added sugar for the yeast to activate and make the dough rise.
- Proofing yeast with warm water and sugar is a different story because that is to test to make sure the yeast is still active before you add it to the rest of the ingredients.
- If you want to add granulated sugar to your batter, you can add 1 teaspoon to the dry ingredients.
- A good place to let your dough rise is in your oven with the light on.
- The Pan: If you are using a cast iron pan, you most likely do not need the parchment paper. However, I do not own a cast iron pan, so I cannot say for sure. In any other pan, the crust will stick to the surface, no matter how much oil you use to grease it, so the parchment helps in that case.
- I would not recommend using traditional nonstick pans for this recipe because most are not meant for really high heat.
- If you don't have a round pan, use a rectangular baking pan!
- The Sauce: Take care when spreading the tomato sauce on the pizza dough because this is not as durable as one made with regular wheat flour. Spread the sauce gently, or alternatively, put the sauce in a squirt bottle and apply it that way. I have used this method and it works, too!

- If you like your crust a bit thicker, let it rise for 15-30 minutes more.
- Spread the dough batter so that it is slightly thicker around the edge for a thicker crust, or simply spread the batter evenly in the pan.
- As a completely optional step, you can place your pan on the stovetop over medium-high heat for 2 minutes before placing the pizza in the oven to bake. This will get the bottom of the pan to a high temperature quickly to cook the crust. Keep in mind that this should only be done with pans that are meant for the stovetop. Do not do this step with a regular baking pan or dish.

Nutrition
Ashley
Loved this recipe so much!! Replaced sorghum with buckwheat as suggested in the comments and it worked out perfectly. Any thoughts on prepping and freezing these? Do you think it would be best to freeze after parbaking the crust or freeze raw? I try to batch cook and freeze everything I make so I have something delicious at the ready.
Hi Ashley! Thanks for making the recipe and for trying the buckwheat substitution...I'm so glad that you liked it! As for freezing, I would try freezing the crust after it has been baked...definitely not when the dough is raw. I'm not sure how the crust will be when you bake it again after freezing, but please let me know if you try it!
Amanda
Any chance you have the measurements in cups for those that don’t have a kitchen scale? Tried doing the conversion myself and it was a total fail. 🙁
The outside got nice and crispy but the inside never cooked through.
Hi Amanda! Thank you for trying the recipe. The problem with volume measurements for gluten-free flours is that they vary too much for the results to be consistent and the flours are not as forgiving as wheat flour. Even if you use the same method to measure a cup of flour that I do, we will still end up with different amounts. That is why it's highly recommended to buy a digital kitchen scale, especially if you want to do any gluten-free baking.
Denise
This looks wonderful, so I made it. I was disappointed in the taste of the crust. Won't make it again. ☹
Hi Denise. I'm sorry you weren't happy with the results, but I do appreciate you making the recipe and for leaving your comments.
Monica
I'm not sure if I did something wrong or not - but I couldn't get my batter to rise really at all (left it covered on the countertop for nearly an hour, used new yeast), and to boot, the crust just DID NOT cook through. The edges cooked a little bit, but the center barely cooked at all. It was a soupy mess.
On top of it, the flavor just wasn't very good. So if you make it, I would recommend adding some salt to the batter.
Hi Monica! I'm sorry the pizza crust did not work out for you. It's really hard for me to know what went wrong, but thank you for trying the recipe. There is, by the way, salt already listed in the dry ingredients, but adding other seasonings, if desired, might also help if you don't like the flavor.
Lacey
This was a great recipe! I substituted corn starch for the xanthan yum (realized I didn’t have any when I started making this). I also used avocado oil instead of light olive oil - also another ingredient I thought I had. It turned out perfect. I would love to play with the flour mix a little to maybe make it a little less cakey and more chewy. Like increase the tapioca flour and maybe decrease one of the others. But I had no problems with it otherwise! Delicious!
Hi Lacey! The xanthan gum is what would help with giving the dough a more chewy texture...but I'm glad you still liked the pizza with the substitutions you made! Thanks so much for making it!
Tammy
Is there a substitute for the rice flour? I’m excited to try this crust. I miss pan pizza!
HI Tammy! You could try substituting with millet, sorghum, or buckwheat flour (or a blend of those). I don't know exactly what the final result will be like, but those are viable substitutions. Thanks for the question and I hope it helps!
Loree
What size pan do you use? Can't wait to try this out!
Hi Loree! My pan is 12" across. I hope you like the recipe!
Allyson
So delicious! I may pre bake a few minutes before I place the toppings next time! But totally the best GF pizza crust I have had!!
Hi Allyson! That's so awesome to hear...I'm so glad you liked it! Thanks for trying the recipe!
Emmy
Can the sorghum flour be replaced for other? If so, for which one?
Hi Emmy! The sorghum flour can be substituted with millet, amaranth, buckwheat, or more brown rice flour. I hope that helps!
Kathy
Can you just use a gluten-free flour blend?
Hi Kathy! Yes, you can try using a gluten-free flour blend...just use the total weight of the gluten-free flours used in this recipe (320 grams). If the gluten-free flour blend already has xanthan gum, omit the xanthan gum in the recipe. One thing to note is that not all gluten-free flour blends are the same and the results may differ, but it's definitely worth a try! I hope that helps!
DebS
Usually for gluten free pizzas, I have pre-baked the crusts before putting toppings on. This one doesn't require being pre-baked? It looks amazing!
Hi Deb! This one does not require pre-baking! I guess you could still do a pre-bake of the crust, if you wanted, but it's not necessary.
Pam V.
Made this today and it was delicious! Totally impressed. Used an iron skillet, let it rise extra, and it took 17 minutes. Cooked perfectly. Loved the flavor and texture. I am always on the lookout for a new pizza recipe and happened upon your site looking for GF pan pizza. Thank you so much for sharing. I’m going to check out your other recipes.
Hey Pam! I'm so glad that you tried the recipe and liked it! Thanks so much, and YES, please do check out the other recipes! 🙂
rjjs
Probably could have been a good pizza. Follwed your recipe to the letter but never got a rise. Then, After eating it , figured it out. In your recipe, you have NO
SUGAR. Yeast needs sugar to rise!
Actually, sugar is not required for yeast to rise. Sugar helps to "wake up" the yeast if you are proofing it to see if it is still active, but the yeast itself feeds automatically on the sugar and starches in the dough and doesn't require any additional sugar. Aside from that, there are a number of factors that could contribute to the dough not rising (yeast isn't active anymore, room temperature can affect length of time needed to rise, etc.). You could always use 1/4 cup of the warm water in the recipe and proof your yeast with 1/4 tsp of sugar to see if it is still active before using it. Thanks for your comments, and I hope you'll give it another try!