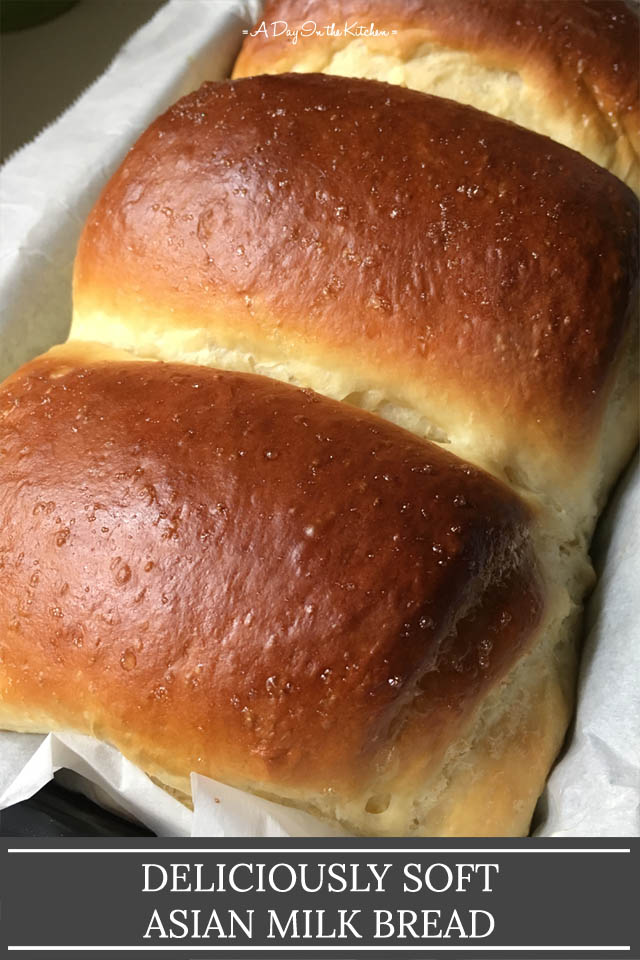
Amazingly soft with a delicious chew, Asian milk bread is wonderful to eat all by itself or as part of a very tasty sandwich. It's better than regular plain breads, and if you've never tried it, you don't know what you're missing!
If you've never heard of milk bread, you could very well be asking "What IS milk bread?"
If you already know what it is, you're probably thinking, "Oh my gosh, YES!"
Asian milk bread is actually that good that it can illicit that sort of response!
Reactions in my house to me making milk bread have been, "Yay! THANK YOU!" and "This is INSANELY good!"
Have you ever heard of such enthusiasm for ANY kind of bread??
So What Is Milk Bread?
Asian milk bread can also be known as Hokkaido milk bread, with Hokkaido referring to a region in Japan where their claim to fame is their milk! Asian milk bread may not necessarily use Hokkaido milk but the basis of the recipes are the same, yielding the same delicious bread. This recipe is based on Hokkaido Milk Toast from Christine's Recipes.
Milk bread has more flavor than regular bread. It is soft, but not dry. It is tender and "chewy" at the same time, and can almost melt in your mouth. It really is good enough to eat all by itself, requiring no butter or jams as they would simply interfere with the flavor.
Chinese bakeries are stocked full of wonderful baked treats where milk bread is used as the basic bread for many of their pastries. There is nothing like the smell of a Chinese bakery to put you in a trance-like state and pull you right inside to see what baked treasures they've got.
Just To Be Clear...
...this is NOT a gluten-free recipe. Unfortunately, there is no way I have found (at the moment) to make a gluten-free version that reproduces all the qualities that makes Asian milk bread so amazing. It doesn't mean it's not possible and that there isn't a solution...I just haven't found it yet! This just happens to be a recipe for a bread that is one of hundreds of food memories that relates to my childhood and my Chinese culture that I really wanted to be able to share.
Another point to make is that this recipe requires time and work. If you have a stand mixer with a kneading attachment, your work will be simplified dramatically. I, unfortunately, do not have a stand mixer. So I did all the working of the dough by hand, which just goes to show that making this bread IS possible without the appliance and you can still get amazing results!
With all that being said, let's get on with it!
Making the Dough
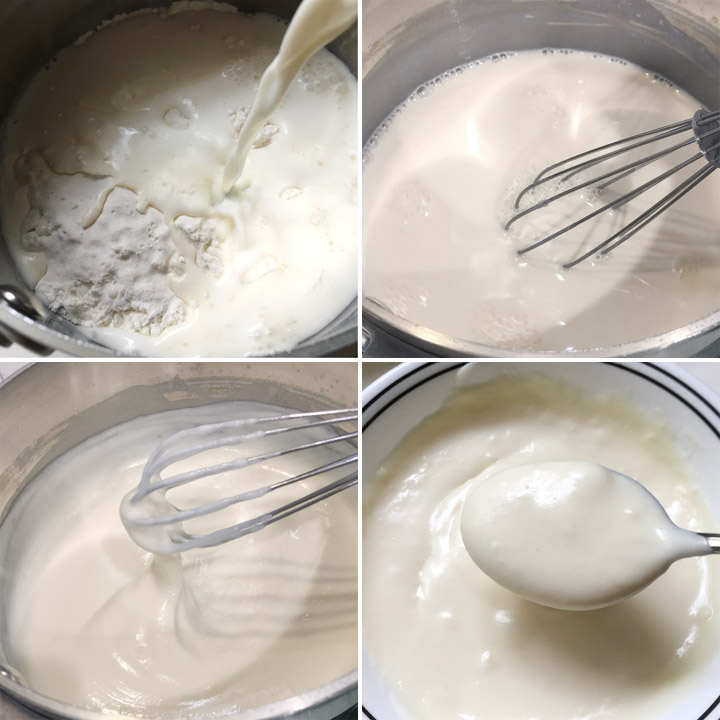
An important part of milk bread is the tangzhong roux, which is basically flour and milk that have been heated together and made into a sticky paste. This sticky mixture ends up making the dough sticky as well, but it's also the magic that contributes to the chew and softness that makes milk bread so amazing.
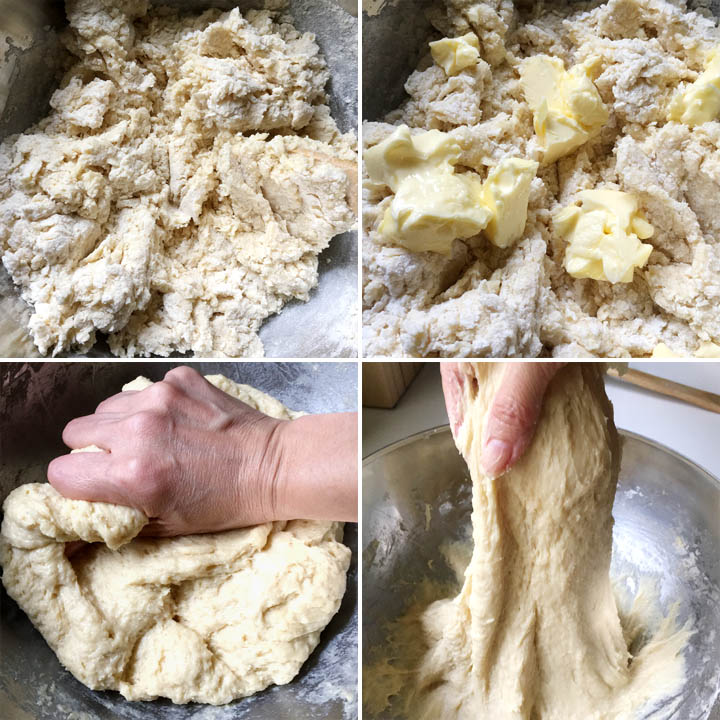
Besides the tangzhong roux, the ingredients for this bread are straightforward. A mixture of all-purpose flour, caster (or very fine) sugar, milk powder, yeast and salt gets combined with warm milk and eggs. Once you've got the basic dough put together, then you add in the softened butter and get to work kneading the dough.
If you've got a stand mixer with dough attachment, this will be a breeze. You just let the mixer have at it for 15-20 minutes. You can even let it go longer, it won't hurt it.
If you're mixing by hand, it's going to start to get a little messy! But never fear! Just dive into and start working the dough and butter. The longer you work it, the less sticky and slimy it will get, believe it or not, and the dough will actually start pulling away from your hands. Keep kneading/working the dough for 15-20 minutes (you'll get the best workout!) and don't skimp on that time. Go longer if you can!
When you start kneading the dough, if you were to pull the dough, it would break easily. After kneading the dough for 15-20 minutes, if you pull the dough, it will stretch and pull and not break off that easily. THAT is what you're looking for! All that kneading of the dough is what builds the gluten and the stretchiness and chewiness of the bread that you want.
Once you're done working the dough, now it's time to let it rest. Shape it into a ball and placed in a lightly greased/buttered bowl and cover with plastic wrap or a towel. Let it hang out for about an hour, until it has doubled in size.
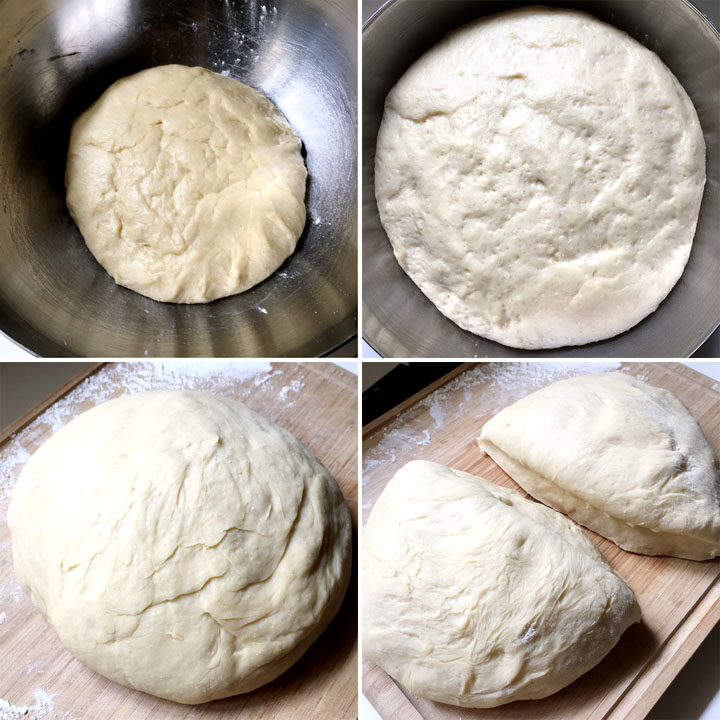
For this recipe, I cut the dough in half and use one portion to make a loaf of bread, and the other half to make rolls. You can use both portions to make two loaves of bread or a whole pan of rolls if you want. You can also easily halve this recipe to make one loaf of bread or one batch of rolls.
To Make A Loaf of Bread
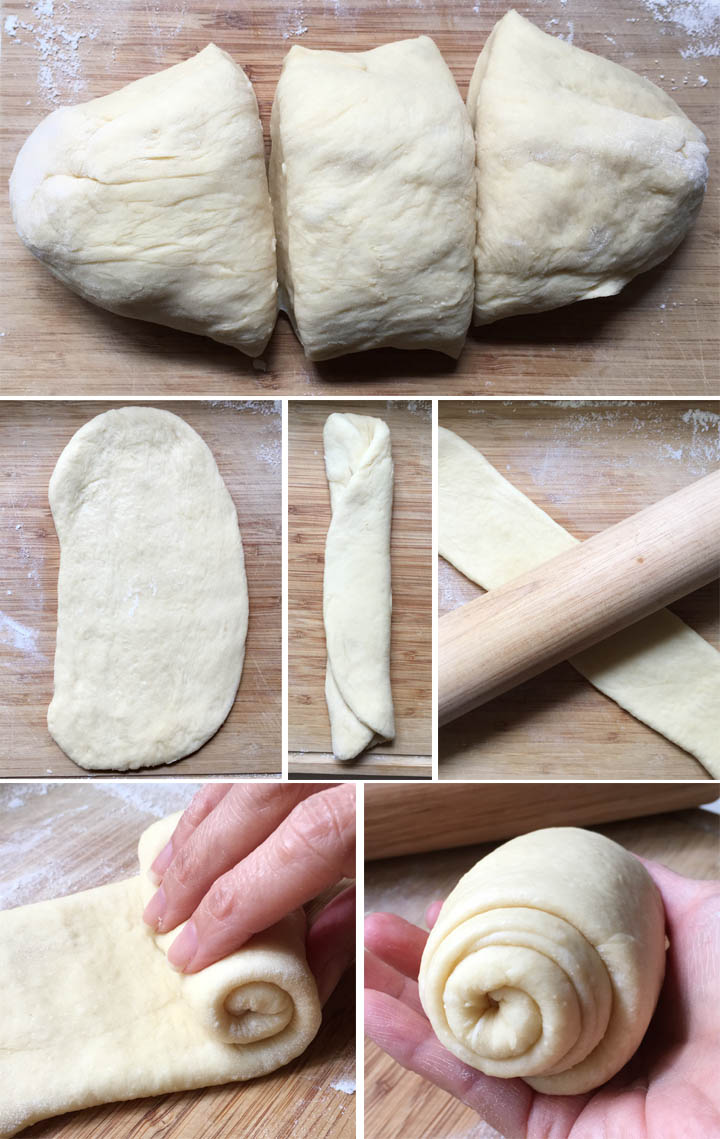
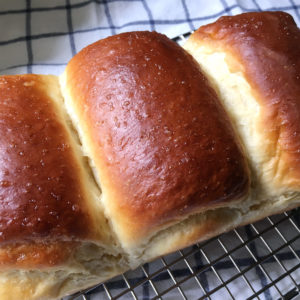
A loaf of milk bread is really three small loaves put together, which is kind of cool in itself. And each small loaf is basically a section of dough that has been rolled out, folded over a couple times, and then, literally, rolled up like a jelly roll!
Repeat this with each piece of dough, place them in a baking pan and let them rise. Brush with egg wash and bake and you've got bread!
This recipe makes two full loaves of bread, or you can do like I do and make one loaf of bread and also make rolls!
To Make Rolls
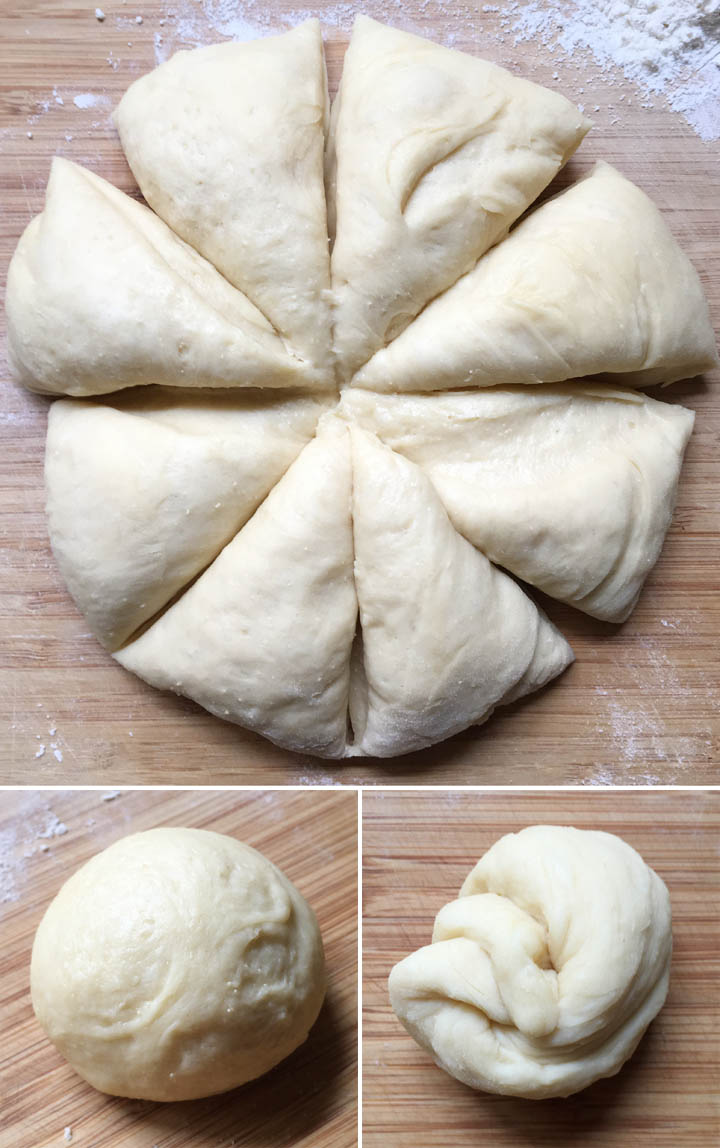
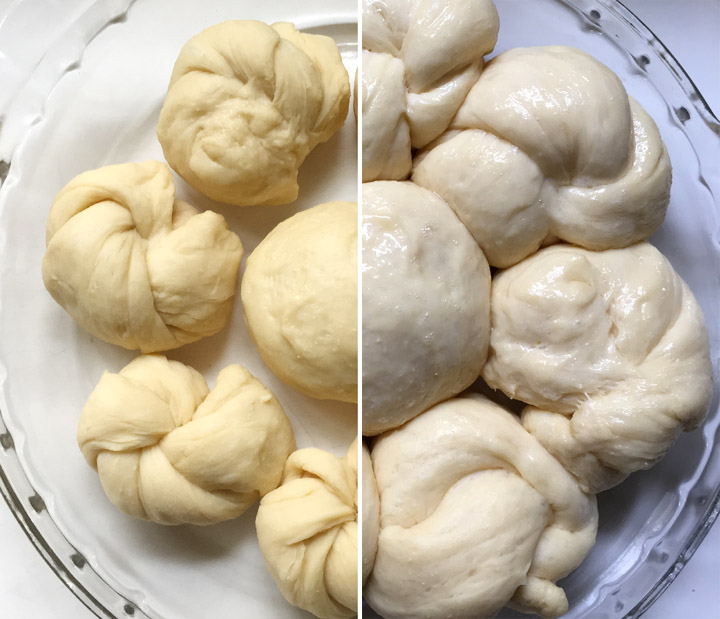
For the rolls, if using a half portion of this recipe, I cut the rolls into 8 equal pieces. You can simply shape them into balls and placed them in a greased dish, or if you want to make them look a little fancier, you can roll each piece out, twist them, tuck the "tails" underneath, and place it in the dish.
I place the rolls in a round Pyrex dish, and just like the loaf of bread, put aside the rolls to let them rise before baking. If you use this entire recipe for rolls, you can fill a rectangular baking pan with them so you have a pan-full to feed a crowd.
And that's it! As I mentioned above and as you can see from all the instructions, this recipe entails some time and work. However, your efforts will be rewarded ten-fold when you finally get to bite into this bread!
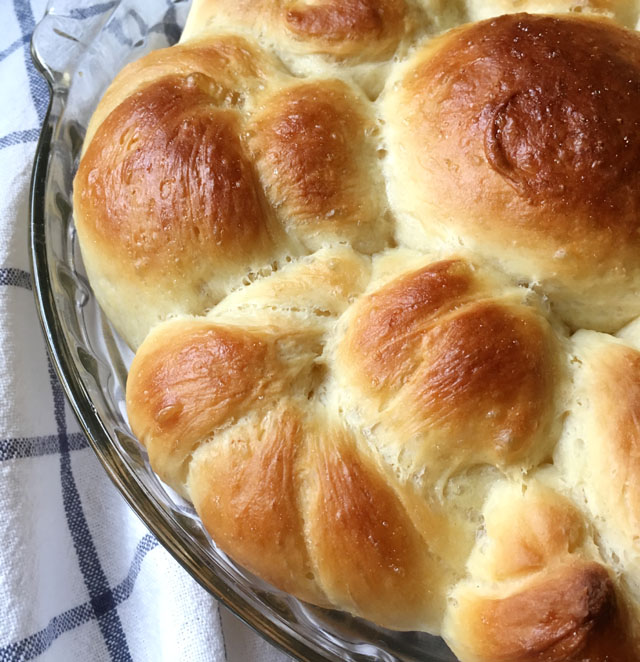
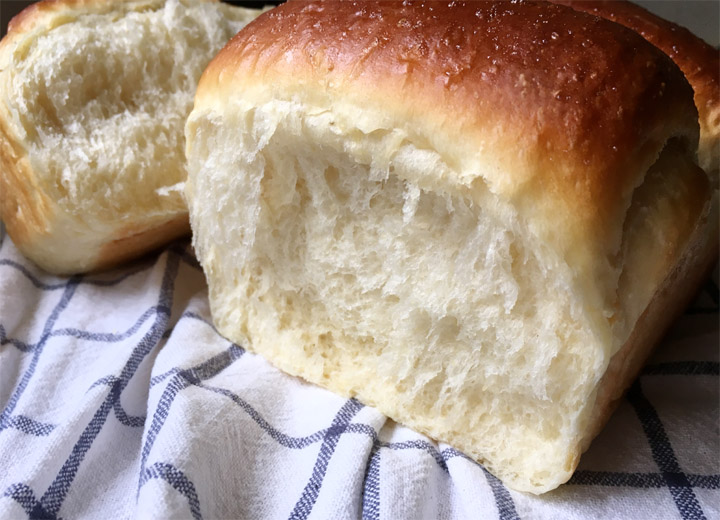
Whether you bake loaves or rolls, you will love how they bake up.
And the smell! The delicious smell as they bake will blow your mind...it will be difficult to wait for it to cool down to eat it!
This smell and taste of this bread brings me back to my childhood, and oddly enough, it is something that makes me happy to be Chinese. It's like a treasure that you don't really know about unless you're Asian or have immersed yourself in Asian food culture. And while living in Hong Kong means I can find milk bread in just about every bakery here (and there are A LOT of them!), being able to make my own means I can have this bread no matter where we live.
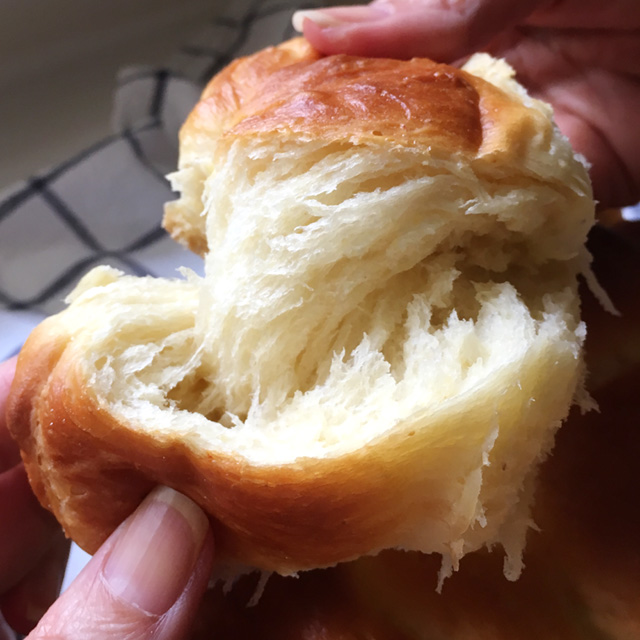
When you finally do rip off a chunk of bread and take a bite (and I highly recommend this as the way to enjoy it....forget the knife!), you will discover what the hype is around milk bread and agree that it was worth the effort. And hopefully, you'll want to make it again!
~ Lisa.
Deliciously Soft Asian Milk Bread
Ingredients
Tangzhong Roux:
- 40 g all-purpose flour
- 1 cup whole milk
Dry Ingredients:
- 540 g all-purpose flour
- ½ cup caster sugar
- 6 tbs milk powder
- 4 teaspoon instant or active yeast
- 2 teaspoon salt
Wet Ingredients:
- 2 eggs room temperature
- ½ cup warm whole milk about 100 deg F (38 C)
- 6 tbs butter room temperature
Egg Wash:
- Egg whites separated from 1 egg
- 1 teaspoon water
Equipment
- 2 Loaf Pan or
Instructions
Tangzhong Roux:
- Combine milk and flour in a small pot over low heat.
- Stirring frequently, heat the mixture until the texture becomes like a thick pudding.
- Remove the roux from heat and transfer to a bowl. Cover and allow to cool to room temperature.
Stand Mixer Method:
- Add all the dry ingredients to the mixing bowl, sifting through a metal sieve to work out any large lumps.
- Combine the room temperature roux, eggs, and warm milk and mix together. Add to the dry ingredients in the mixing bowl.
- Using the dough hook attachment for your mixer, mix the ingredients for about a minute.
- Add the softened butter to the bowl and scrape down the sides with a rubber spatula.
- Turn the machine back on and let it mix on low speed for about 15-20 minutes until bread becomes smoother, scraping down the sides of the bowl as necessary.
Hand Kneading Method:
- In a large mixing bowl, sift together all the dry ingredients.
- Combine the room temperature roux, eggs, and warm milk and add to the dry ingredients.
- Mix the wet into the dry using a spoon until mostly combined.
- Add softened butter and start kneading it in with your hands. Dough will be very sticky.
- Continue to work and knead the bread for 15 minutes at least until dough becomes smoother and more cohesive.
Shaping the dough for a loaf:
- Shape dough into a ball and cover with a cloth or plastic wrap. Allow to rise for about 1 hour until it has doubled in size.
- Transfer the dough to a floured work surface. Cut into 2 equal portions and work with only one portion at a time. Place the other dough section aside.
- Cut dough into 3 chunks.
- Using a rolling pin dusted with flour, roll one dough portion into a rectangle on a floured work surface.
- Fold the rectangle into 3rds lengthwise. Flip it over so the seam side is down.
- Flatten with rolling pin again. Flip the dough over so the seam side is now up.
- Starting from a short end, snugly roll the dough until you end up with a roll.
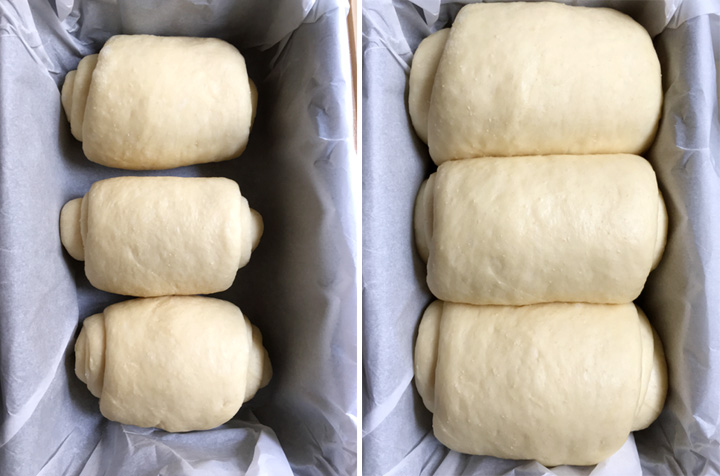
- Place the roll into a parchment lined loaf pan, seam side down. Repeat with the remaining two dough chunks.
- Cover loaf pan with a towel or plastic wrap and let rise about an hour, until dough has expanded to fill the pan.
Shaping the dough for rolls:
- Cut dough into 8 equal portions.
- Roll into a log about 10-inches (25 cm) long. Fold it in half.
- Starting from the folded end, twist the dough.
- Tucking the tails in, roll snuggly into a round shape. Place on a greased baking dish. Repeat with remaining dough.
- Cover rolls with a towel or plastic wrap and let rise about an hour.
Baking:
- Preheat oven 350 deg F (180C).
- Brush bread dough with egg wash.
- Bake for 25 minutes.
- Let cool 15 minutes before serving.
Notes
- You can use bread flour instead of all-purpose flour for this recipe. Bread flour has slightly higher protein and will give the bread slightly more chew than all-purpose. Both flours work.
- If you do not have caster sugar, you can process regular sugar in the food processor for about a minute to make it fine like caster sugar. Alternatively, regular sugar will also work in a pinch if you don't have any other options.
- Do not use icing sugar. It is too fine and will not give the bread the right texture. It is also often mixed with cornstarch to prevent clumping.
- I have not tried it, but if you choose to use a non-dairy milk, choose one that contains more fat like a nut milk or coconut milk. Note that it may affect the flavor of the bread.
- If you do not want to fuss with making 3 separate mini rolls for the loaf of bread, simply shape the dough into a cohesive ball, or roll it into one big roll and set it right in the loaf pan. Keep in mind that rolling or braiding the dough is what gives it that "stretching" quality when you pull it apart, however the bread will still be delicious just the same!
- If you are using a stand mixer to work the dough, you will have a much softer, finer texture than if you work it by hand. However, from my own experience, working the dough by hand still yields delicious results.
- The dough will be very sticky when you first start working in the butter. Then it will become more tacky as it is worked longer, but not so sticky that you cannot get it off your hands or the dough hook. You can always sprinkle a bit of extra flour on the dough to help with working it.
- For a shiny glistening bun, brush the buns after they come out of the oven with either melted butter or a simple syrup, if desired.
Maureen Kleditz
Made this today, I think it turned out well. Not as symmetrical as yours but … will work on that! Taste is wonderful, soft and delicious!
Hi Maureen! Thank you so much for trying the recipe...so glad you liked it! Symmetry has no effect on taste!
AV
I’ve tried multiple milk bread recipes as they are a great way to use up excess milk as it approaches its expiration date. This one used a little more milk and butter than the other ones and it is definitely my favorite so far. I always use bread flour for the additional chew, but it’s still incredibly tender.
Hi AV! Thanks so much for making my recipe! I'm so glad that you like it and that it has become a favorite for you! The higher protein in bread flour definitely gives the bread more delicious chew!
Jacqui
I have been searching for a milk bread recipe for a long time now and decided to give this one a try. I followed the recipe to the “T” minus the egg wash prior to baking. These turned out amazing! So much so that they will be making their premiere appearance on my Thanksgiving table this year! When you pull them apart they are super soft as is the crust, perfect accompaniment to any meal. The directions were easy to follow. I used my KitchenAid mixer for the whole mixing process and the results were a hit with the family. If I knew how to upload a picture I would because they look beautiful!
Hi Jacqui! Thank you so much for giving my recipe a try out of all the ones out there. I hope it makes a good showing at your Thanksgiving dinner! If you have an Instagram account, you can share photos of your bread there and tag me @dayinthekitchen.
Lesa
How many pans will I need for this recipe?
Thanks
Thanks for the question, Lesa. This recipe will need two bread pans.