Garlic Herb Cheese Rolls.
What else is there to say?
Oh right….gluten-free! 🙂

Anyone who eats gluten-free, whether by choice or necessity, knows that finding breads and baked goods that don’t resemble cardboard in texture and taste is hard to come by. In terms of eating gluten-free, we are perhaps pickiest about breads and baked goods. We want them to be like the REAL thing in terms of texture, taste, and appearance….but without the gluten.
Luckily, we’ve come a long way from what was available a few years ago. Furthermore, I’ve made it a personal mission to make the relationship between gluten-free and baking a happy one!
Suffice it to say, these garlic herb cheese rolls are soft, tender, and so good that you don’t realize they’re gluten-free!
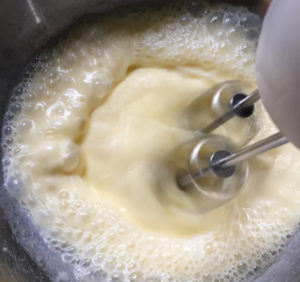
One great thing about gluten-free baking is the dough is not as stiff as regular dough and there is no kneading involved. You just mix it all together really well.
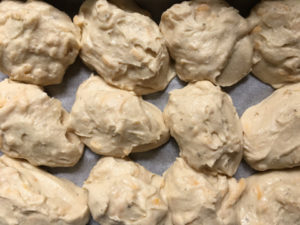
Another great thing is you only need to let it rise once before you bake it. And you let it rise IN the pan you’re going to bake it in. So easy!
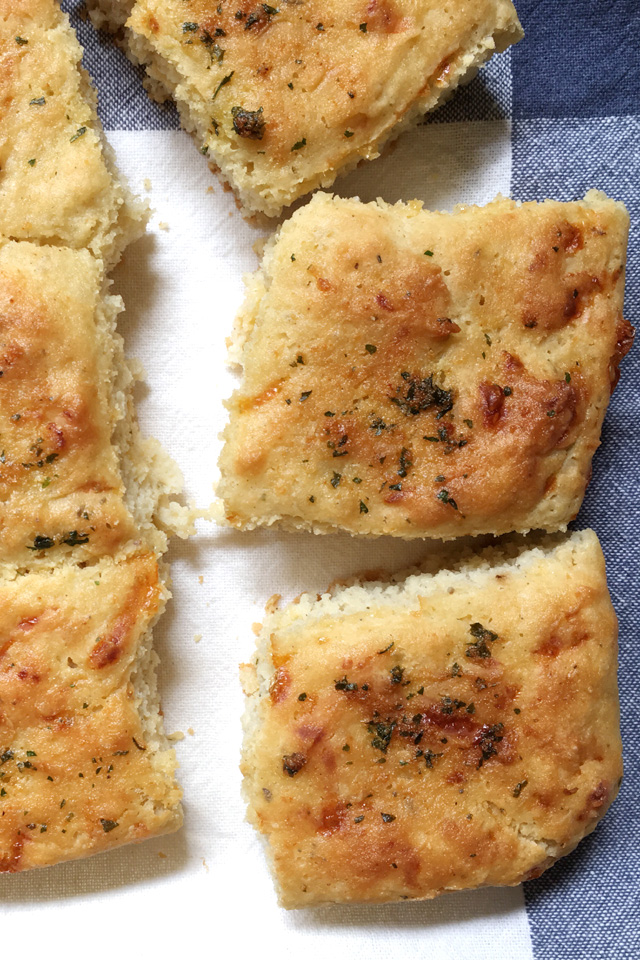
These rolls are pull-apart rolls, so there is no forming or shaping needed. Just drop scoopfuls of the dough into a pan, let it rise, then bake.
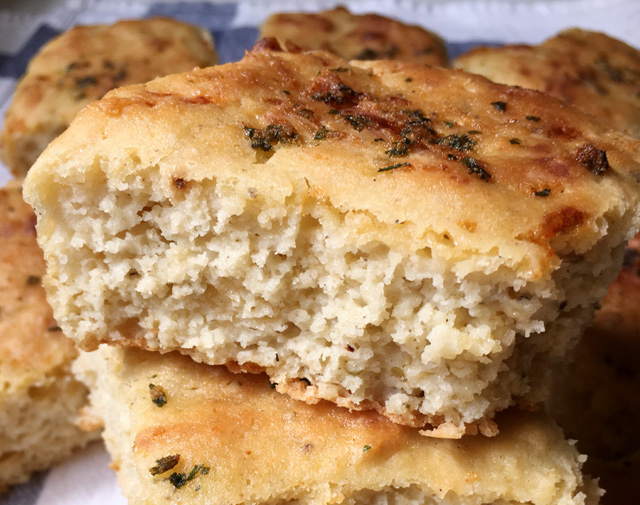
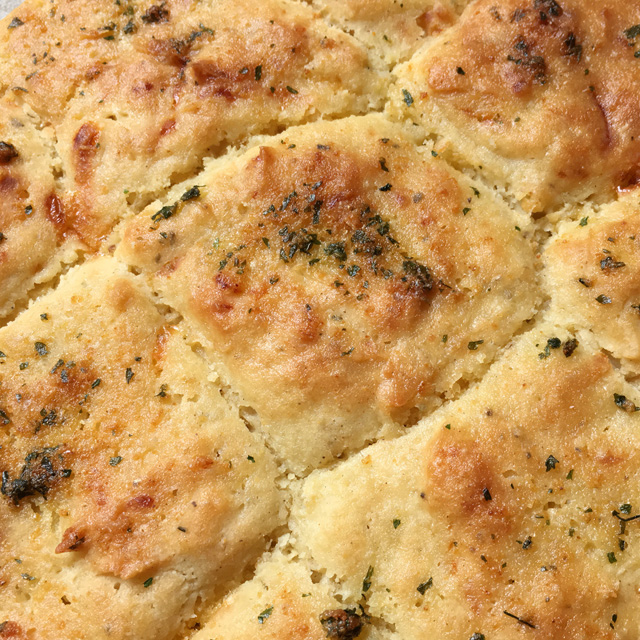
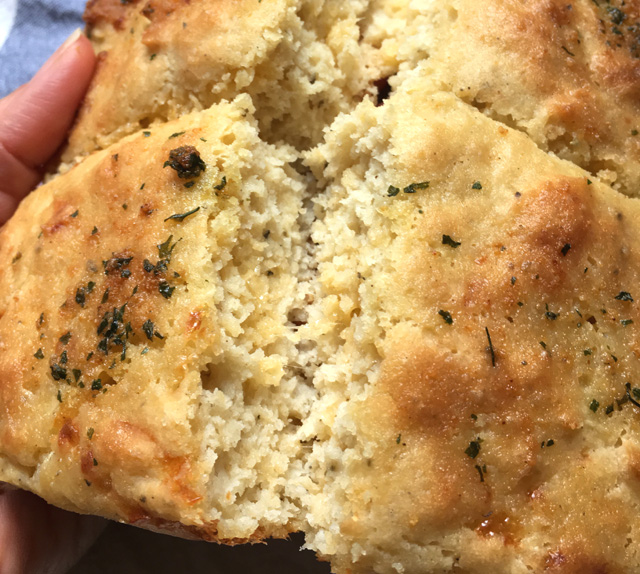
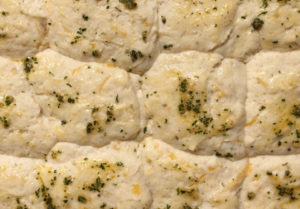
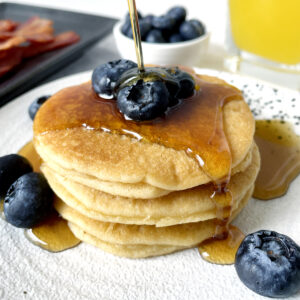
And then you get awesome rolls that look like this! These garlic herb cheese rolls are soft, have a tender crumb, and have nice air bubbles running throughout it.
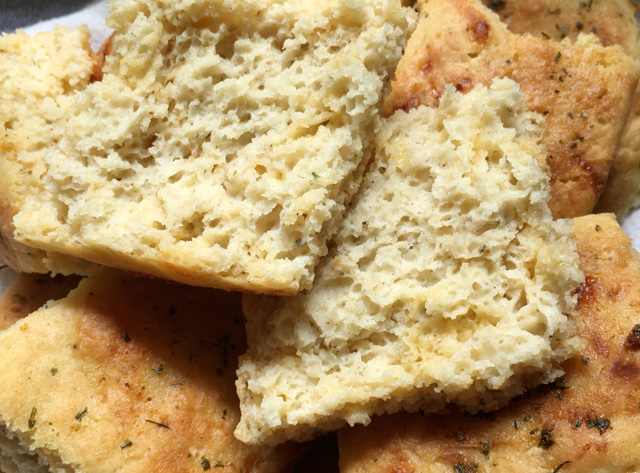
Oh, and they’re so tasty with all that garlic and cheese and herbs…did I mention that? They are the perfect side dish to your next meal. Just split a roll open and spread on some butter, or enjoy them as-is!
Whether you eat gluten-free out of necessity or by choice, you should consider giving this recipe a try. While I'm at it, another awesome bread recipe to try is my Soft Gluten-Free Sandwich Bread! I hope these recipes restore your hope in gluten-free breads!
~ Lisa.

Gluten-Free Garlic Herb Cheese Rolls
Ingredients
Dry Ingredients (volume measurements in the Recipe Notes below):
- 275 g brown rice flour
- 80 g tapioca starch
- 60 g sorghum flour (buckwheat flour will also work)
- 1 ½ teaspoon xanthan gum
- 1 tbs active dry yeast
- ½ teaspoon salt
- 2 teaspoon garlic powder
- 1 - 1.5 teaspoon Italian seasoning
Wet Ingredients:
- 3 eggs room temperature
- 1 cup warm milk
- ½ cup warm water
- 3 tbs melted butter
- 2 tbs honey
- 1 tbs apple cider vinegar
Stirred in:
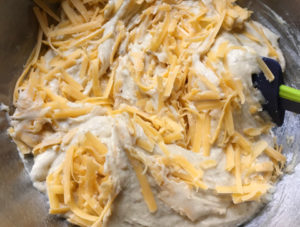
- 1 ½ cup grated sharp cheddar cheese
Brushed on before baking (optional):
- 1 tbs melted butter
- ½ teaspoon garlic powder
- ¼ teaspoon dried parsley
Brushed on after baking (optional):
- 1 tbs melted butter
Instructions
- Combine all dry ingredients in a bowl. Set aside.
- Add eggs, warm milk, warm water, melted butter, honey, and apple cider vinegar to a large mixing bowl. Mix until blended.

- Add dry ingredients to the mixing bowl and mix until well combined.

- Stir grated cheddar cheese into the dough.

- Scoop 12 large spoonfuls of dough into a parchment lined baking dish.

- Place in a draft-free warm location to rise, about 1 hour. Rolls should be at the height of the baking dish
- Preheat oven to 400 deg F (200C).
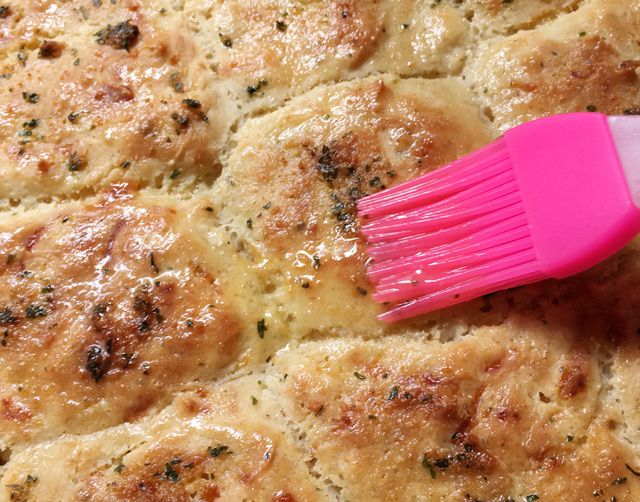
- In a small bowl, combine the 1 tbs butter, garlic powder, and dried parsley. Gently brush over the rolls.

- Bake for 25 minutes, until the internal temperature reaches 200 deg F (93C).
- Remove from oven and brush 1 tbs melted butter on hot rolls (optional).
- Using the parchment liner, lift the rolls out of the pan to move to a cooling rack. Let cool 15 minutes before serving.
- Tip: Use a fork to "perforate" the rolls so they pull apart easier.


Notes
- Volume Measurements:
- 2 ½ cups brown rice flour
- ¾ cup + 1 tbs + 1 teaspoon tapioca starch
- ½ cup + 1 tbs + 1 teaspoon sorghum flour
- Please note that gluten-free recipes work best with weight measurements because they are more precise than volume measurements. Gluten-free baking requires more precision and can be less forgiving than baking with regular all-purpose wheat flour.
- These volume measurements were made from spooning each of the flours into the measuring cups/spoons (so they are not packed) and leveling them off.
- The volume measurements are approximate. Make slight adjustments to the recipe as needed, adding a bit more water or tapioca starch or brown rice flour to achieve the correct dough consistency.
- You can substitute the melted butter in the dough with oil.
- You can substitute the milk with a non-dairy milk.
- If you don't want cheese, you can omit the cheese entirely and add more herbs.
- You can use dried or fresh herbs (whatever you happen to have on hand).
This recipe was updated on March 6th, 2019 with slight recipe tweaks, volume measurements for the flours, and additional recipe notes.

DebS
Hi Lisa,
Love your recipes! Just want to ensure I understand...you don't proof the active dry yeast before adding to the batter? You just add the active dry yeast to the dry ingredients as if it were instant dry yeast? Can you use instant dry yeast and if so, what would the quantities be?
Thanks for such great recipes and instructions!
Thanks so much, Deb! No, I do not proof the active yeast before adding to the batter. If you are unsure if your yeast is still active, then by all means, use some of the liquid in the recipe to proof it before adding it to the batter. If you're using instant yeast, substitute the same amount for the recipe. I hope that helps..and thanks so much for looking through my recipes!
Shoshi
Hi! If I wanted to pre-make the dough and then freeze is it better to totally bake it off and then freeze or mix everything together, freeze, and then bake off? Thanks!
Hi Shoshi! I haven't tried freezing these rolls myself, but if I were to, I would bake the rolls completely as per the recipe and then freeze them after cooling. Then I would defrost them and warm them up in the oven with a fresh brushing of melted butter before serving. If you try it, please let me know how they turn out!