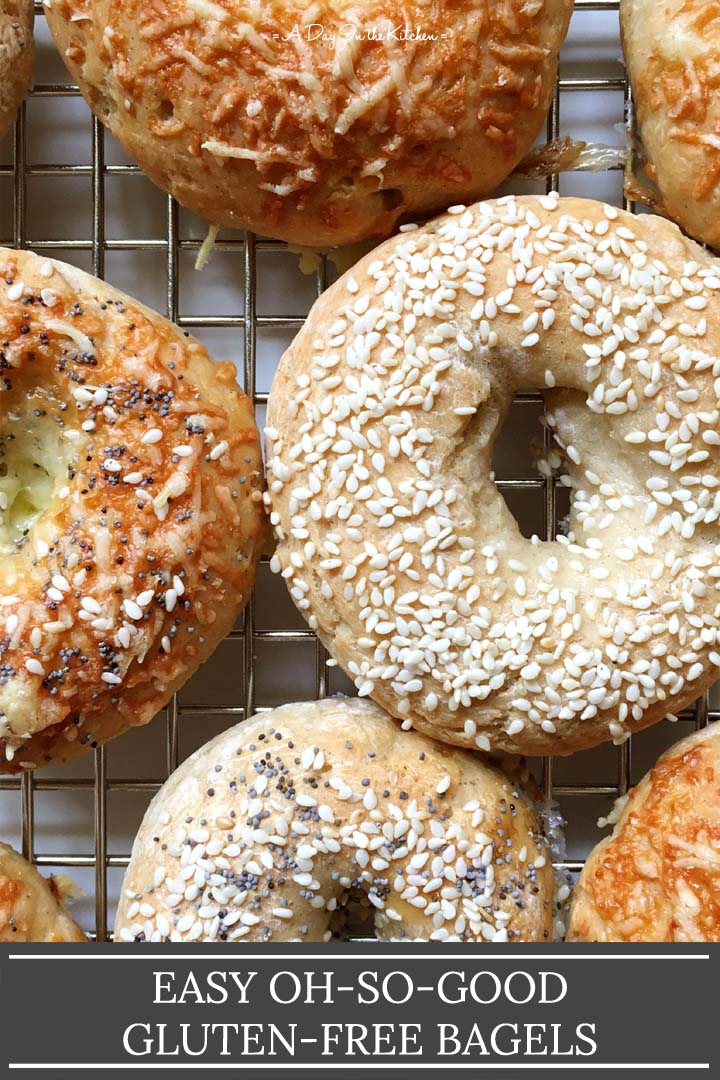
Have your gluten-free bagels and eat them, too! No yeast, no boiling, and they come together easily and in no time! You'll never guess they're gluten-free!
So you must have seen my recipe for Ridiculously Easy Homemade Bagels, yes??
Those bagels were so…well, ridiculously easy that I had to see if I could apply that ridiculous easiness to gluten-free bagels.
Well, guess what?? I could and I DID!
Cue the happy dance…!
Let me just start by saying that these gluten-free bagels are so good that my kids can’t tell the difference and love them just the same! They will easily devour 2-3 each in one sitting!
That, to me, is what I always strive for – when I can create a gluten-free baked good where you can’t tell that it’s gluten-free and it actually tastes good!
And of course, the gluten-free husband is happy, too! Actually, he was always clear in pointing out that he didn’t like bagels at all, gluten or not.
But since I developed these gluten-free bagels, he is now on the Bagel Train (at least my version of the Bagel Train!)! All aboard!
Just like the Ridiculously Easy Homemade Bagels, these bagels are held together by Greek yogurt. If you didn't already like Greek yogurt, now you have the perfect reason to love it!
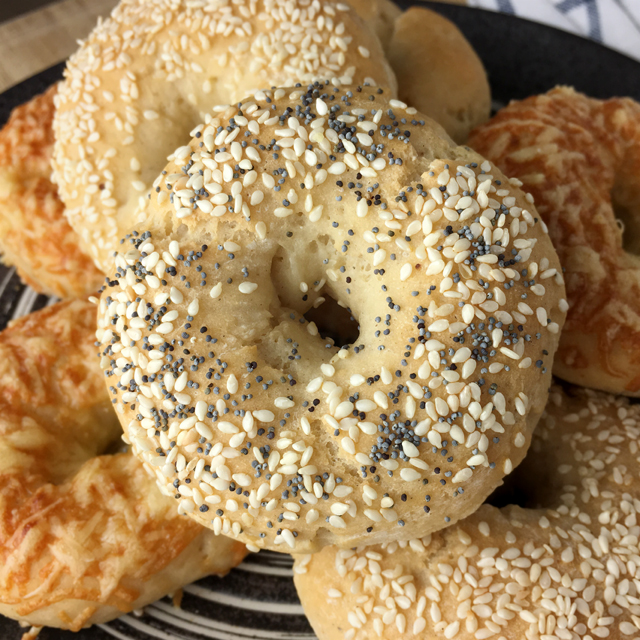
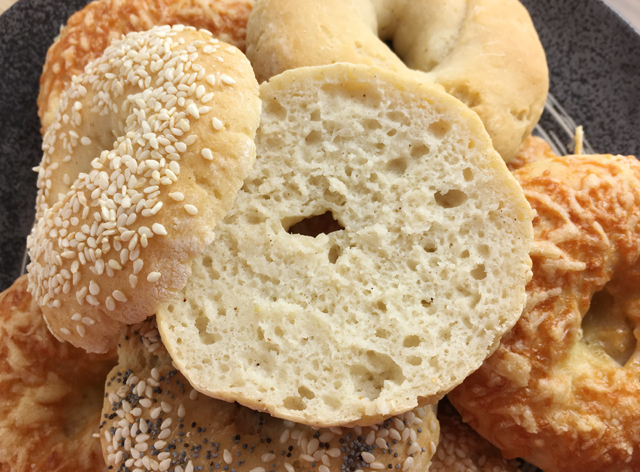
A simple blend of gluten-free flours and Greek yogurt and you’ve got amazeballs bagels to enjoy. Easy, soft, chewy, and just plain oh-so-good, these gluten-free bagels are a must!
~ Lisa.
Watch How To Make It!

Easy Oh-So-Good Gluten-Free Bagels
Ingredients
(Volume measurements in the Recipe Notes below):
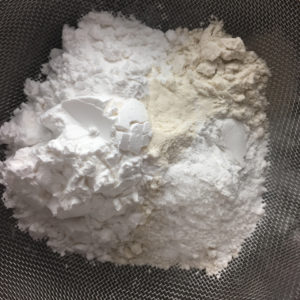
- 100 g tapioca starch
- 80 g sorghum flour
- 70 g brown rice flour
- 1 teaspoon xanthan gum
- 4 teaspoon baking powder
- ½ teaspoon salt
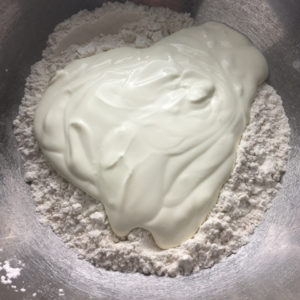
- 1 ½ cups full-fat Greek yogurt (low-fat should work fine as well)
Egg Wash:
- Egg white separated from one egg
- 1 teaspoon water
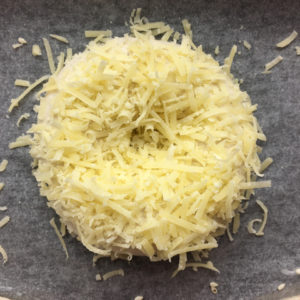
Toppings (optional):
- Sesame seeds
- Poppyseeds
- Grated Parmesan cheese
Instructions
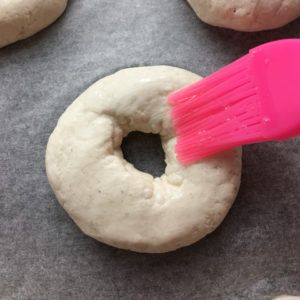
Egg Wash:
- Combine egg white and water and beat with a fork to loosen. Set aside.
Bagels:
- Preheat oven 375 deg F (190 C).
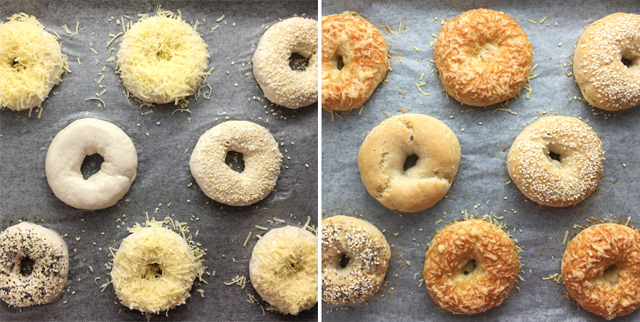
- If using toppings for your bagels, like grated Parmesan, prepare it now and set aside until ready to use.
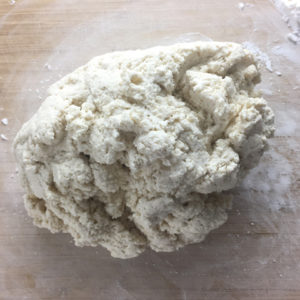
- Combine all dry ingredients together in a large bowl and stir together with a whisk to mix.

- Add Greek yogurt.
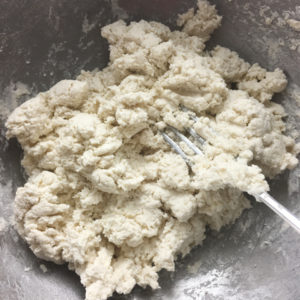
- Using a fork or mixing spoon, mix really well to combine all the dry and wet ingredients until a dough forms.
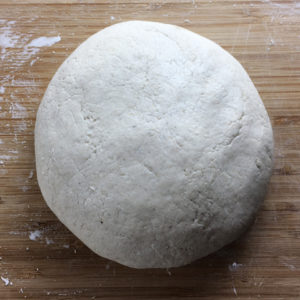
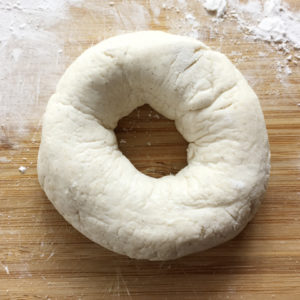
- Pour dough onto a work surface dusted with tapioca starch. Fold and knead gently a few times to form into a more cohesive dough.
- Work and shape dough into a flattened ball, using tapioca starch as necessary to prevent dough from sticking to your hands and the work surface.
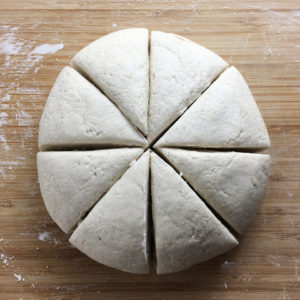
- Cut the dough into 8 equal pieces.
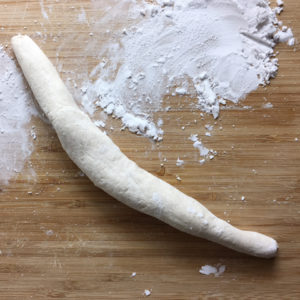
- Shape and roll each piece into a log.
- Shape log into a bagel, pressing ends together.
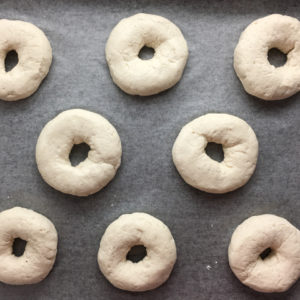
- Place bagel onto parchment lined baking sheet and repeat with remaining dough. Lightly cover baking sheet with a dry towel to prevent bagels from drying out.
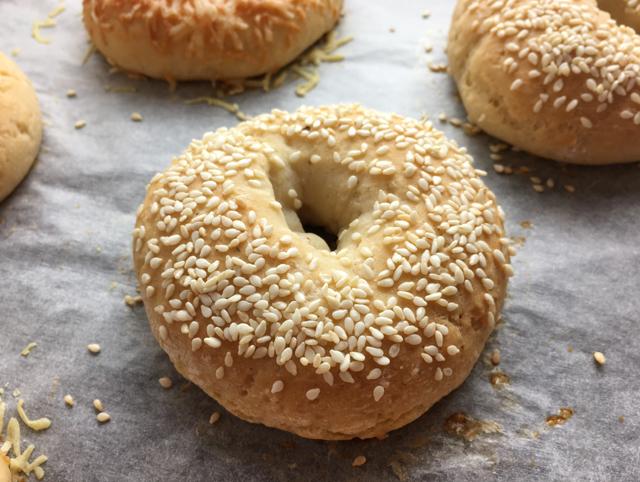
- Brush bagels completely with egg wash, smoothing any cracks you see in the dough. Be sure to brush the inside and outside edges.
- Top bagels with desired toppings, if desired.
- Bake in an upper rack of the oven for 25 minutes.
- Move bagels to a cooling rack. Let cool completely before slicing.
Notes
- Volume Measurements:
- ¾ cup + 1 tbs + 1 teaspoon tapioca starch
- ¾ cup + 1 ½ teaspoon sorghum flour
- ½ cup + 1 tbs brown rice flour
- Please note that gluten-free recipes work best with weight measurements because they are more precise than volume measurements. Gluten-free baking requires more precision and can be less forgiving than baking with regular all-purpose wheat flour.
- These volume measurements were made from spooning each of the flours into the measuring cups/spoons (so they are not packed) and leveling them off.
- The volume measurements are approximate. Make slight adjustments to the recipe as needed, adding a bit more Greek yogurt or a bit more tapioca starch or brown rice flour to achieve the correct dough consistency.
- Be sure to mix the dry ingredients and the yogurt really well so that everything is well incorporated.
- Keep in mind that this dough is not like wheat-based dough. It will be a bit sticky, so handle it gently and be sure to have tapioca starch easily accessible to dust your hands and the work surface.
- It's important to let the bagels cool completely before slicing to let them firm up properly.
- Bagels will keep for 2-3 days. Pop in the toaster to warm up and soften.
- The bagels toast up well!
- Great with butter and jam, cream cheese, and also perfect for bagel sandwiches!


Skim
Hi, my son has a severe wheat allergy, so I can't wait to try these for him! I was wondering if there was a substitute for the egg? He is also allergic to eggs.
Thank you!
Thanks for your comment, Skim! Brushing the bagels with regular milk or almond milk will work, as would melted butter or a bit of oil. I hope your son likes them!
Ally
Other bagels require a brief poach before baking. Do you think one could still poach these bagels for a minute before baking despite being gluten free?
Since this is not a traditional yeast bagel recipe and the dough is very different than that for a wheat bagel, I do not know how the dough would hold up to being poached or boiled, and I would be concerned about them falling apart. If you want to try poaching them, give it a try and let me know how it goes!
Jeannne
These are absolutely delicious! A real treat for
me. I topped them with Trader Joe’s Everything But the Bagel Seasoning Blend. They don’t last long in my house and I will be making another batch this weekend. Thank you for the recipe!
That's fantastic, Jeanne! So glad you liked them!
Tiffany
Is it possible to give the conversion in cups please? I would like to give these a try, really missing bagels.
Hi Tiffany. The cup measurements are written right into the recipe next to the weight measurements. And then just be sure to read the recipe notes about the volume measurements. Let me know how it works out!
Tiffany Brown
This helps. Thank you so much I’ll try them and let you know.
ame
I would appreciate a volume measurement for the bagels, if possible. Thank you.
Hi Ame. Thanks for your comment. I have updated the recipe with volume measurements. Please be sure to read the notes on Volume Measurement that I have included in the Recipe Notes at the end of the recipe.
Miriam Curtis
Hi Lisa,
First off your bagels look amazing! Can’t wait to make them. I am wondering, have you ever tried boiling them before baking?
I used to make normal bagels before my husband got diagnosed and they got boiled first wonder if the boiling makes a difference.
Miriam
Thanks, Miriam! I have never boiled these bagels before baking and am not sure how they would turn out. Granted, these gluten-free bagels do not have as thick or chewy a crust as regular bagels, but they still have a decent chew to them. If you do try boiling them, let me know how they turn out!
Lily {Gastro Senses}
Holy Mo. This looks amazingly airy and delicious!!!!
Thanks, Lily! They totally are and we love them!
Gabrielle @ eyecandypopper
These look amazing, and I can't believe it's gluten-free! I am pinning this to make later.
Thanks, Gabrielle! That's what my boys thought, too...they couldn't believe they were gluten-free!
Elaine
I can’t wait to try these, Lisa! I’ve found lots of success using sorghum flour so I’m ecxited to try these bagels! Thanks for all the clear instructions!
Thanks, Elaine! I find sorghum has some nice characteristics that make you think you're eating something like wheat. It makes for a great combination with the other flours. I hope you like the bagels!
Yvonne Langen
This recipe is so timely! I just picked up a bagel sandwich the other day and it was total torture for my Dad who was recently diagnosed with Celiac Disease. I will have to make these for him and he will be positively overjoyed - I think bagels are the thing he misses most
Thanks for the comment, Yvonne! I hope these bagels work out for your dad and then he won't feel like he's missing anything anymore!
Cathy
Your bagels look great! I appreciate that you've listed exactly which gluten-free flours you've used, because flours make a difference.
Thanks, Cathy! Flours definitely make a difference and I like figuring out what combination works best instead of simply using an all-purpose gluten-free flour mix from a bag. This took me a few attempts before I found the right blend!
Tracy
These look amazing. I can't wait to try this recipe. I love how you show each stage. It gives me the confidence to have ago at it.
Thanks, Tracy! I'm glad the process photos help! Let me know how they turn out when you make them!