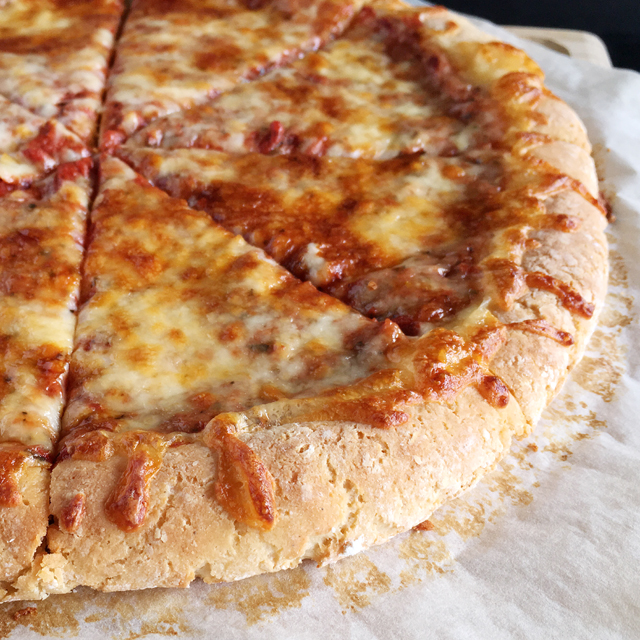
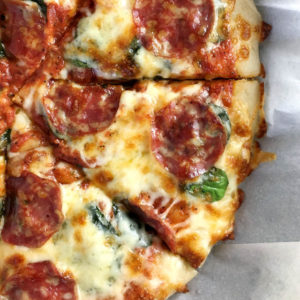
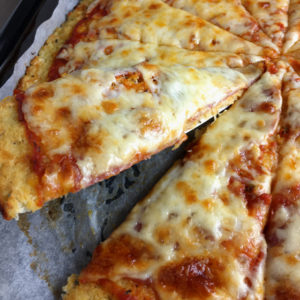
This gluten-free pizza crust is yeast-free and comes together lickety-split! It's ready for your favorite toppings in about 30 minutes! You can be eating pizza in an hour from start to finish! And the texture...amazing!
This gluten-free pizza crust is life-changing!!
Okay. I know. I've said it before about other recipes, too.
But this truly is life-changing!
And besides, no one ever said that you can't encounter more than one life-changing thing or event, right?
Seriously, though, if you are on a gluten-free diet, this gluten-free pizza crust truly is something to celebrate!
Not only is it gluten-free, it is insanely easy to make. You can be sitting down to homemade pizza in an hour!

This sounds like I'm off on a complete tangent, but do you know "I Can't Believe It's Not Butter"? It's the vegetable oil spread that looks and (supposedly) tastes just like butter and no one can tell the difference?
Well, that's I kept thinking when I was eating this pizza..."I can't believe it's not gluten!" 😉
If you have been following along with me since I started developing gluten-free recipes, you know that I am a stickler...STICKLER...for wanting to make gluten-free baked goods that are so close to their gluten-filled cousins that you can't tell the difference. I have purchased too many gluten-free products and made too many other gluten-free recipes that were so disappointingly bad that it's no wonder gluten-free has such a bad rap. I have always wanted show that it doesn't have to be that way by really working on developing good gluten-free recipes.
I can't tell you how excited I am about sharing this gluten-free pizza crust recipe. It is ridiculously easy to make, requires no yeast, and bakes up just like a gluten-filled pizza crust. My family is in love...LOVE...with this recipe and are so happy that this is now in my repertoire!
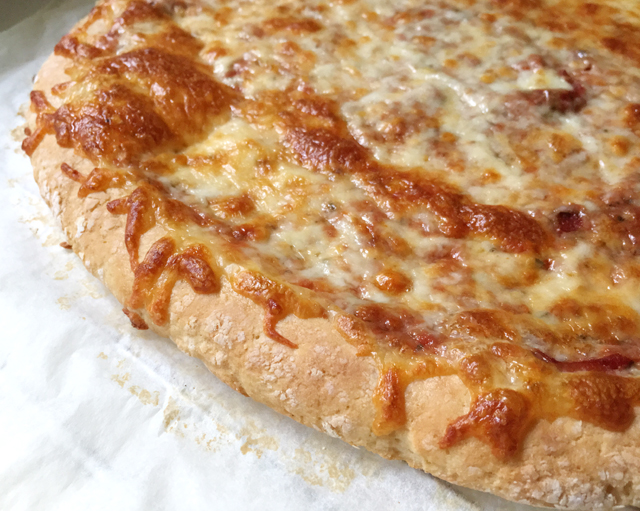
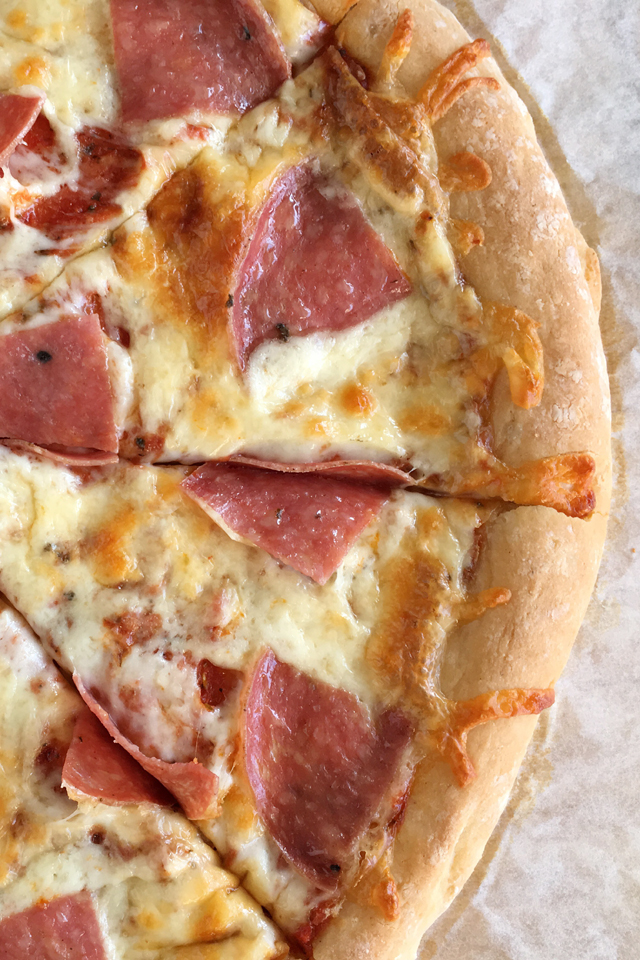
This pizza crust browns beautifully and has the perfect balance of chew and structure. Because you pre-bake the crusts before adding the toppings, you can make these crusts ahead of time, saving time when you need to cook up the pizza before you eat! You can make small individual sized pizzas or a big one to share. You can even prepare the dough ahead of time and keep it in a sealed bag in the fridge until you're ready to roll it out!
This is a game changer!
If you're gluten-free and have never been able to either buy or make a decent gluten-free pizza crust, look no further. I cannot rave about this recipe enough, and I encourage you to give it a try. You will totally fall in love with this recipe and will become a believer in really good gluten-free pizza again!
It will have you yelling, "I can't believe it's gluten-free!" 😉
~ Lisa.

Easy Amazing Gluten-Free Pizza Crust
Ingredients
Dry Ingredients (Volume measurements in Recipe Notes below):
- 100 g brown rice flour
- 100 g tapioca starch
- 50 g sorghum flour
- 4 teaspoon baking powder
- 1 teaspoon xanthan gum
- 1 teaspoon salt
Wet Ingredients:
- 1 ½ cups plain full-fat Greek yogurt
- 1 tbs olive oil
Pizza Sauce:
- ¼ cup tomato paste
- 2 tbs tomato sauce
- 1 teaspoon Italian seasoning
- 1 teaspoon garlic powder
- ½ teaspoon onion powder
- Salt and pepper to taste
Instructions
- Preheat oven 400 deg F (200 C).
- Combine all the dry ingredients in the mixing bowl and whisk together.

- Mix Greek yogurt and oil together. Add to dry ingredients in mixing bowl.
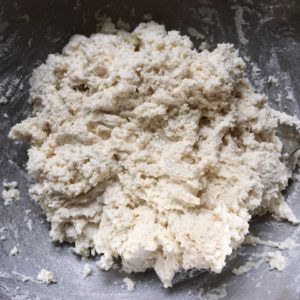
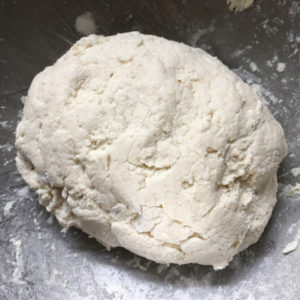
- Combine wet and dry ingredients with a fork until dough comes together. Dough will be sticky.
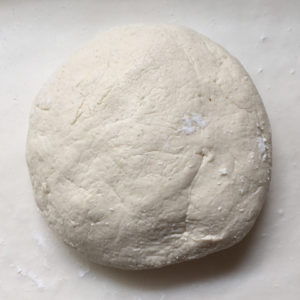
- Shape dough into a ball.
- Use tapioca starch to lightly dust a sheet of parchment paper large enough for the rolled out pizza crust. (The paper size should be about the size of your oven rack, wider than it is tall, if making one large pizza.) Place dough in the center of the parchment paper.
- Work dough a few times to smooth it out, dusting the parchment and your hands as necessary with tapioca starch so the dough doesn't stick.
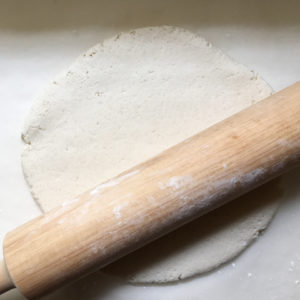
- Dust a rolling pin with tapioca starch and gently roll out the dough, dusting the rolling pin often.
- Use fingers to finish pressing out the dough. Roll up the edges for a crust, if desired. Again, dust your fingers with tapioca starch as necessary.
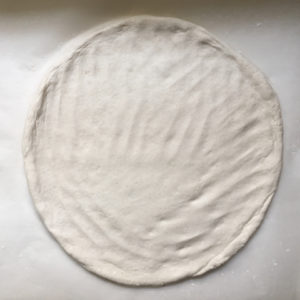
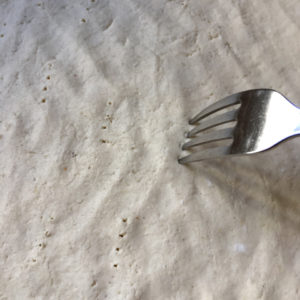
- Poke holes in the crust with a fork.
- Having a firm hold of the parchment paper, transfer the crust and parchment directly to an oven rack set in the upper part of the oven. Bake for 15 minutes.
- Carefully remove the crust from the oven by holding the parchment paper on the sides, just as you did when you placed the crust in the oven. (The parchment paper will be cool enough for you to handle with bare hands...just don't touch the oven itself!) Place on a cooling rack.
- (Once the crust is done, you can prepare the pizza right away with toppings or keep the crust available for using later.)
- Increase oven temperature to 425 deg F (220 C).
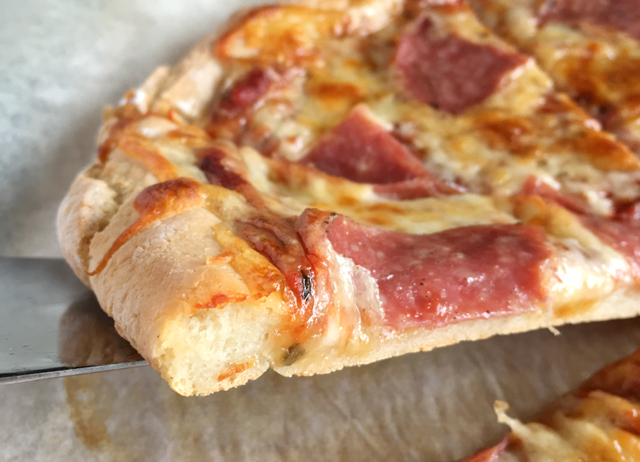
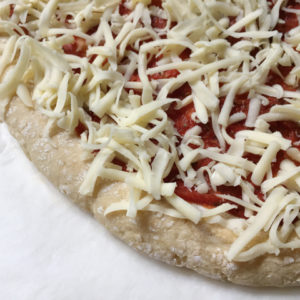
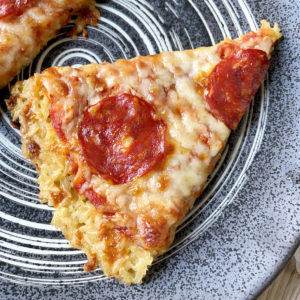
- Top pizza crust with sauce, cheese and your favorite toppings.
- Again, use the parchment paper to transfer the pizza directly to the oven rack. Bake for 10-15 minutes until cheese is gold and bubbly.
- Remove the pizza from the oven holding the parchment paper on either side of the pizza and transfer to a cooling rack.
- Let cool 5 minutes before slicing.


Notes
- Volume Measurements:
- ¾ cup + 2 tbs brown rice flour
- ¾ cup + 3 tbs + 1 teaspoon tapioca starch
- ⅓ cup + 2 ½ tbs + ½ teaspoon sorghum flour
- Please note that gluten-free recipes work best with weight measurements because they are more precise than volume measurements. Gluten-free baking requires more precision and can be less forgiving than baking with regular all-purpose wheat flour.
- These volume measurements were made from spooning each of the flours into the measuring cups/spoons (so they are not packed) and leveling them off.
- The volume measurements are approximate. Make slight adjustments to the recipe as needed, adding a bit more Greek yogurt or a bit more tapioca starch or brown rice flour to achieve the correct dough consistency.
- Bake the crust ahead of time for use later in the day, or even the next day!
- Brush the crust edge with olive oil, or seasoned olive oil for a more flavorful crust (garlic, salt, parsley, etc.)
- For an extra kick, mix ½ teaspoon chili pepper flakes into your pizza sauce before spreading on your pizza crust!
- If you want to reheat leftover pizza, reheat slices in the oven for about 5 minutes at 400 F (200 C). The crust will be just like it's first baked!
Nutrition
This recipe was updated on March 6th, 2019 with volume measurements for the flours and additional recipe notes.
Christine
I’m out of parchment paper— could I use foil or just grease the baking pan? Or is that cooling step crucial to the process?
Hi Christine. The purpose of the parchment is really to ensure that the pizza releases from the pan. I'm not sure how it would work with foil or greasing the pan as there might still be a bit of scraping involved to get the pizza to lift up. If I didn't have parchment handy, I would skip the foil and place it right on the pan (greased is up to you). That way, it's easier to wiggle a spatula underneath the pizza if it sticks a little bit and you won't get bits of foil that break off. I hope that helps.
Arnell
We love the yeasty flavor of yeast. Is it ok to add a bit of instant yeast to the dough?
Hi Arnell. I guess you could add a bit of instant yeast to the dough, but I'm not sure if that will also contribute to any rise in the crust. If you try this, let me know. I'm curious to know how it turns out!
Christy
This has become my family’s go to recipe for pizza night. It is by far the best gluten free crust I’ve ever had and it’s easy to do when you are short on time as well. Amazing! Thanks for developing such an amazing recipe. I have been a diagnosed celiac for 20 years and I have tried it all. This one is the ONE!
Wow Christy...thanks so much! I'm so glad this recipe has worked so well for you and that you keep making it!
Tessa
Can this dough be frozen prior to baking?
Hey Tessa! I have never tried freezing the dough prior to baking, so I'm not sure how it would turn out. I have, however, pre-baked a crust and refrigerated it to top and bake another day. You could probably freeze a pre-baked crust in the same way. I'm just not sure about freezing the dough, though.
Skyler
I trying to find a pizza crust recipe I can make without going shopping. Any ideas on what I can use instead of full fat Greek yogurt? I have regular yogurt and don’t know if it would act the same or if there is ANYTHING else I could try that would work. I am new to gluten free so I get nervous when trying things myself because I don’t know how it will react in gluten free recipes. Thanks so much for any answers or ideas you may have!!
Thanks for question, Skyler! You can use regular yogurt, but I would start with less than what the recipe states since regular yogurt is thinner. Start with 1 cup of regular yogurt and see how the dough comes together. If it's still too dry, add 1-2 tablespoons at a time, mixing it in after each addition. Depending on the yogurt you use, you may only end up using 1 1/4 cups in the end, but you just have to gauge how the dough holds together. I hope that helps!
Christy
I have tried this also with regular yogurt and it works perfectly but you do use less yogurt. Still comes out terrific!
Laila
Hi I can’t have rice flour due to intolerance. Is there a substitute?
Hi Laila! The closest substitute I can think of would be sorghum flour. I don't know exactly how it would turn out, but it's worth giving it a try. Thanks for the question.
Cameron
Hi there! My son’s girlfriend is gluten, dairy, egg free and also allergic to rice flour. Do you know what I could replace the yogurt with? I’m thinking of trying the coconut flour
Hi Cameron! Coconut flour is a completely different beast and can't be substituted for the rice flour., so I would not recommend using it. Better possible replacements can be millet, sorghum, or oat flour. As for the yogurt, I don't know if there are non-dairy yogurts you can try? You could also just use water, starting with only 1 cup of water, only adding more, a tablespoon at a time, if it's needed to help bring the dough together. I hope that helps!
Harmeet
I tried this pizza crust today and it was very delicious 😋 I finally found the one really close to regular pizza. I didn’t pre bake my pizza crust ,instead I put all the toppings and baked on 550 for 6 minutes and it was crispy just like thin crust Italian pizza. Thank you so much !
That's great that the pizza turned out well without pre-baking! I'm so glad you liked it, Harmeet!
Kelly
Can I use Bobs Red Mill gluten free 1 to 1 baking flour in this recipe? If so what dry ingredients do I still use in this recipe? Don’t know what to omit. Thank you
You still need to use the baking powder and salt and can omit the xanthan gum. Otherwise, you can try substituting equal amounts of the Bob's Red Mill GF flour for the total weight of brown rice flour, tapioca starch, and sorghum flour (250g). If you try it, let me know how it turns out!
KerriAnn Carroll
Hi Kelly. I'm wondering if you tried this recipe with the Bobs red mill 1 to 1 flour? That's what I have on hand and what I bake my goodies with. I was hoping I could avoid buying all of the other ingredients if you feel it turned out .Thank you! Kerri
Hey Kerri! Not sure if Kelly will get notified of your question, but I have read about instances where people simply substitute an all-purpose GF flour and the recipes seem to work out okay. It is worth a try, and as I mentioned in my answer to Kelly, just be sure to use the other dry ingredients required, such as the baking powder and salt (if your GF flour blend already contains xanthan gum, you can omit that as well..otherwise use the amount stated in the recipe). I hope that helps! 🙂
Lisa
My kids are dairy free, can I substitute the Greek Yogurt for a non dairy product and yield the same results?
I'm not sure if it would work with a non-dairy yogurt, but you can certainly give it a try. Whatever substitution you decide to use, I would start with slightly less than what the recipe says and see how the dough forms up before adding more. Thanks for the question, Lisa.
Taylor
Loved your recipe! You would never be able to tell it was gluten free, my kids loved it and were satisfied. No whining that it wasn't "regular" pizza!
Thanks for checking back in, Taylor! I'm so glad it was a hit with your kids...they can be some of the harshest critics!
Taylor Powell
How many pizzas does this recipe make? Like enough for just one person or enough to feed a family? I can't wait to try it!
Thanks for the question, Taylor. This makes one pizza that would feed 3-4 people, depending on how much each person eats. It's definitely for more than one person! I hope you like it!
Stephanie Foster
Amazing is right!! I have been gluten free for 20 years and I've been waiting for this recipe!! Made it tonight with King Arthur measure for measure gluten free flour by the volume measurements because I simply couldn't wait! It turned out super fantastic and so easy! The dough comes together like a dream!! I added some Italian seasoning and garlic powder to the dough for extra flavor, otherwise everything else as stated (besides the flour blend.)
Thank you so much for the fantastic recipe!!
I'm glad the recipe worked with the gluten-free flour mix, Stephanie! I'm sorry it took 20 years before you found this recipe, but I'm happy that you finally did! Thanks for your comments!
chinachef
This recipe is amazing, better than recipes I've used that require yeast and an egg! It's hard to believe that it contains neither but yields even better results. I did use Pamela's not xanthan, not gum in lieu of the xathum gum. Also, I did not pre-bake the crust before adding toppings. After adding toppings, I baked it for 15-20 min at 400, and it came out beautifully...just the right amount of softness and chewiness! Thank you, thank you!
That's great! Thanks so much for your comments...I'm so glad you liked it!