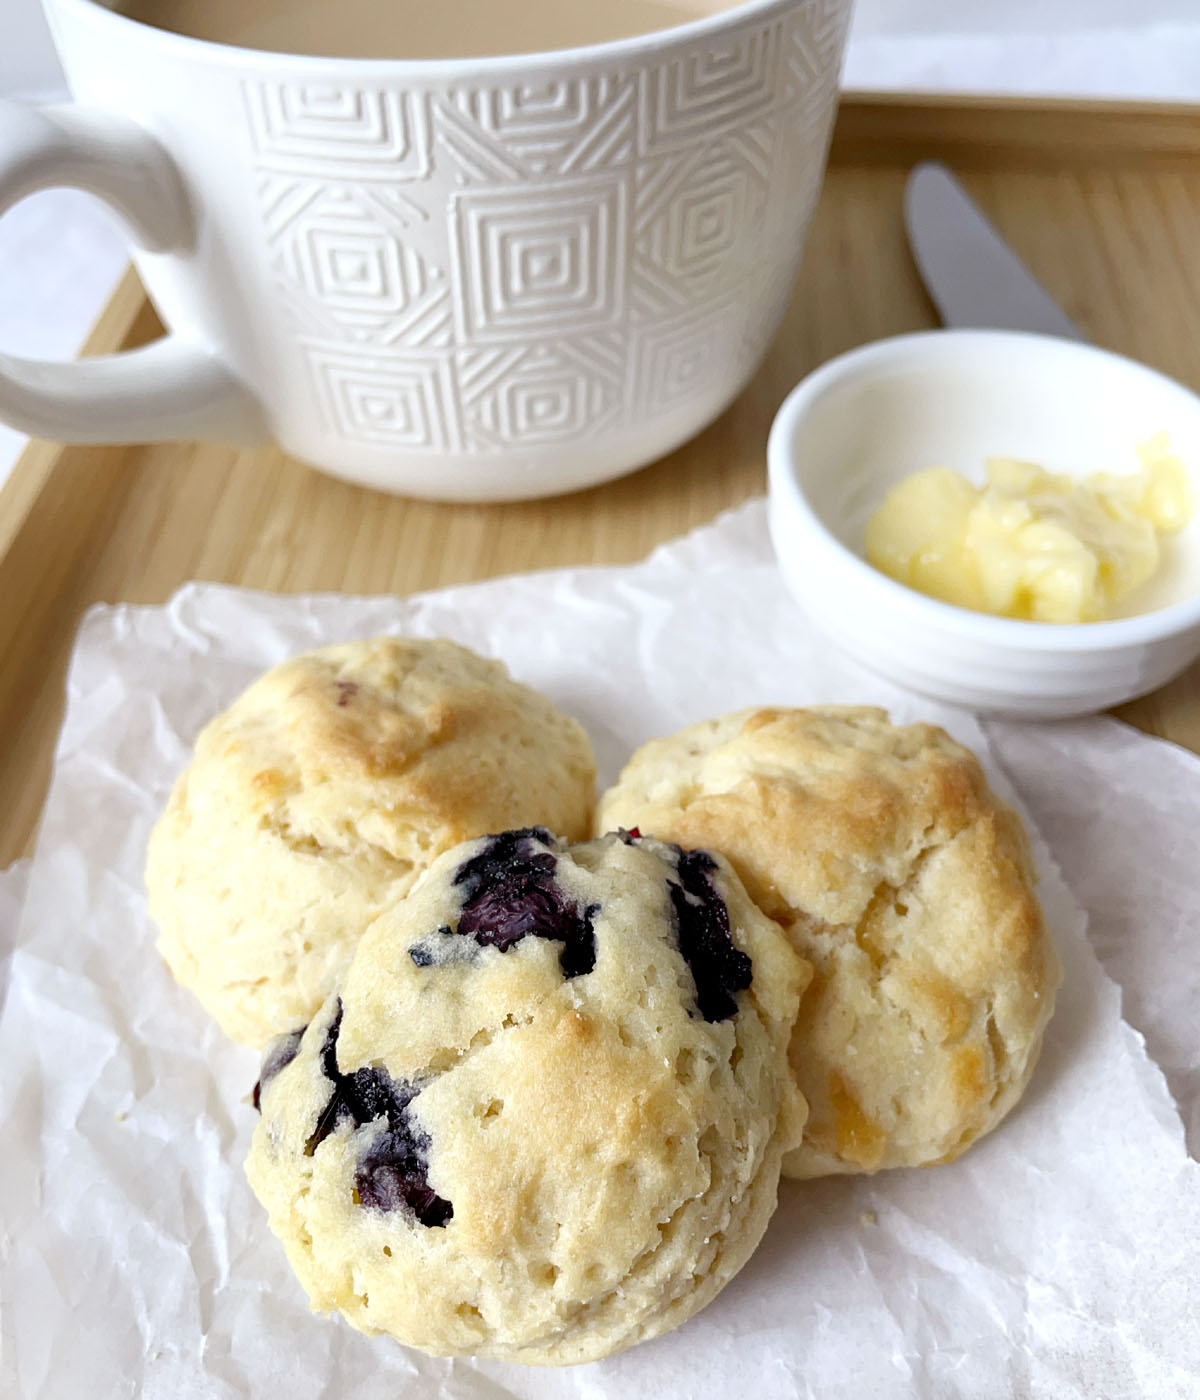
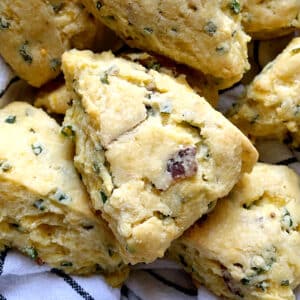
These melt-in-your-mouth buttery tea scones are so delicious that you won't believe they're gluten-free! Whether you make them plain or mix in your favorite scone fillings, they are sure to become a favorite that you'll make again and again!
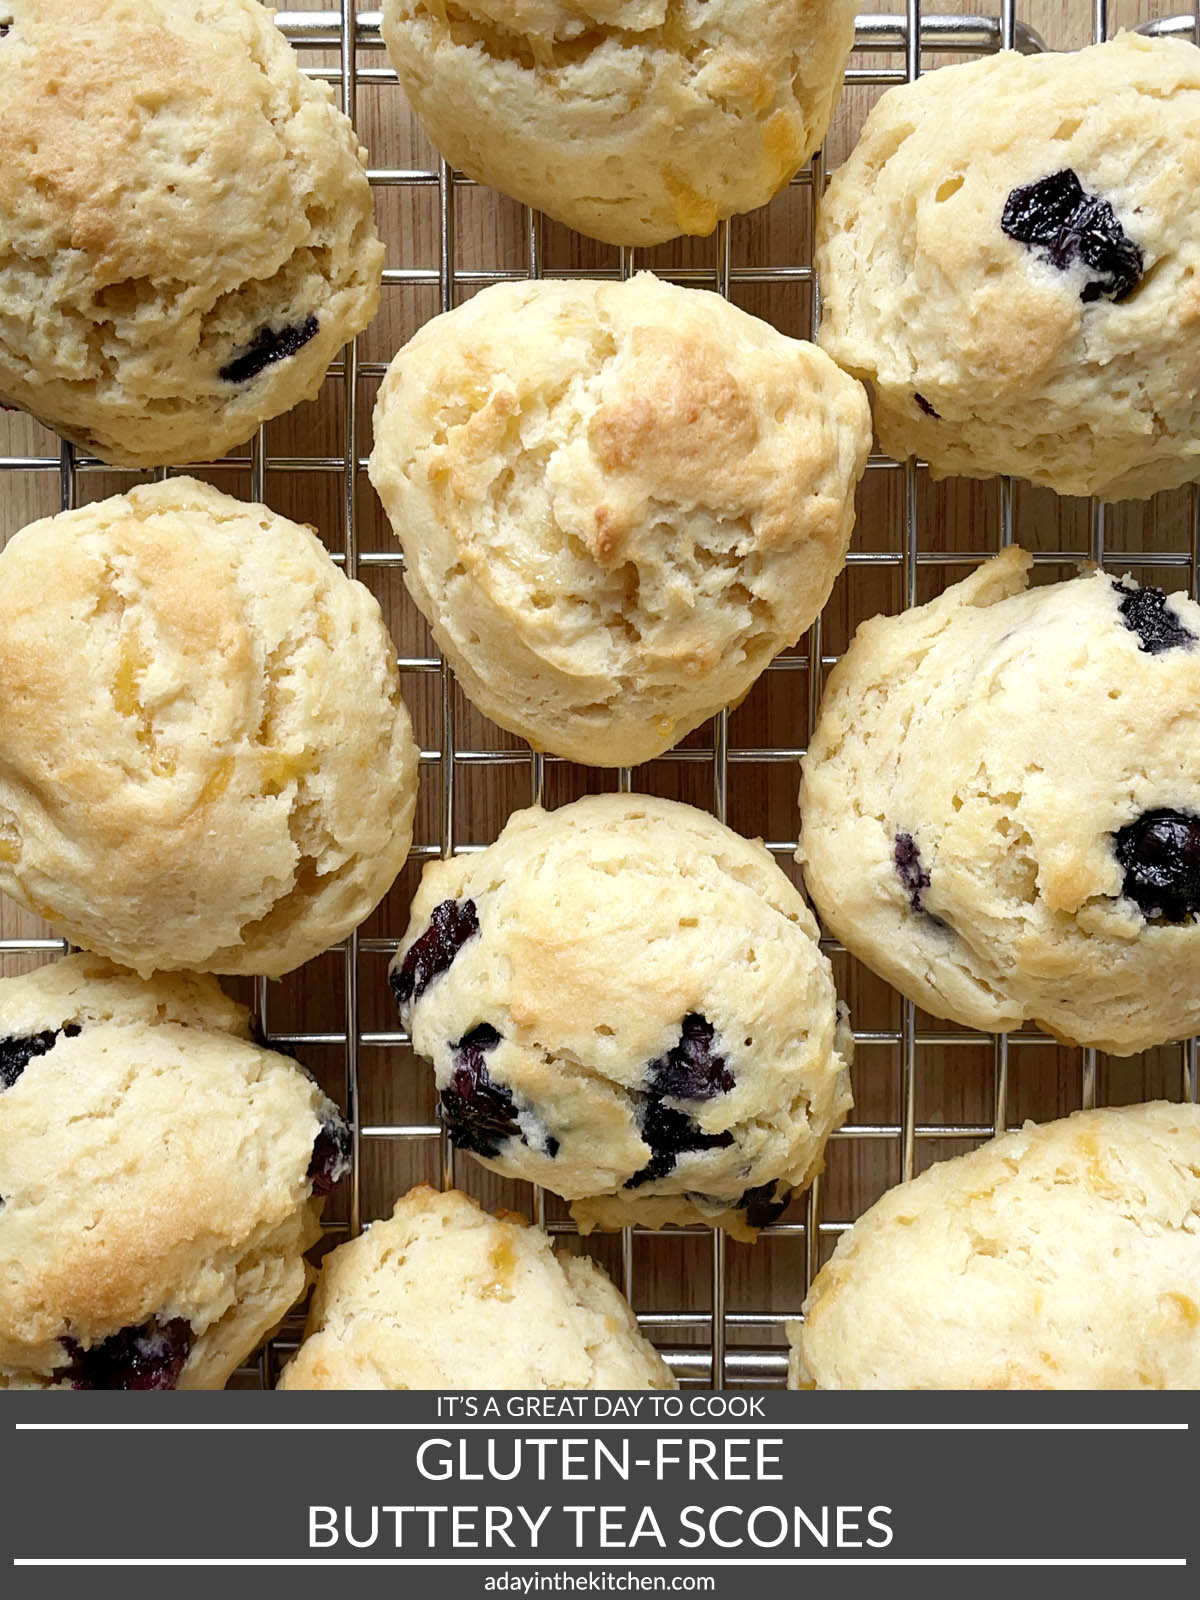
These may not look like what you would typically think of as scones, but their shape doesn't make them any less scone-worthy! This recipe is a gluten-free version of my UBC Tea Scones because you shouldn't have to miss out on these delicious treats just because you can't have gluten! And just like the UBC scones, this recipe is incredibly easy to make.
Ingredients
Dry Ingredients:
- Brown rice flour
- Tapioca starch
- Sugar
- Baking powder
- Xanthan gum
- Salt
Wet Ingredients:
- Milk
- Cold butter
- Egg
How To Make The Tea Scones
Making the Dough
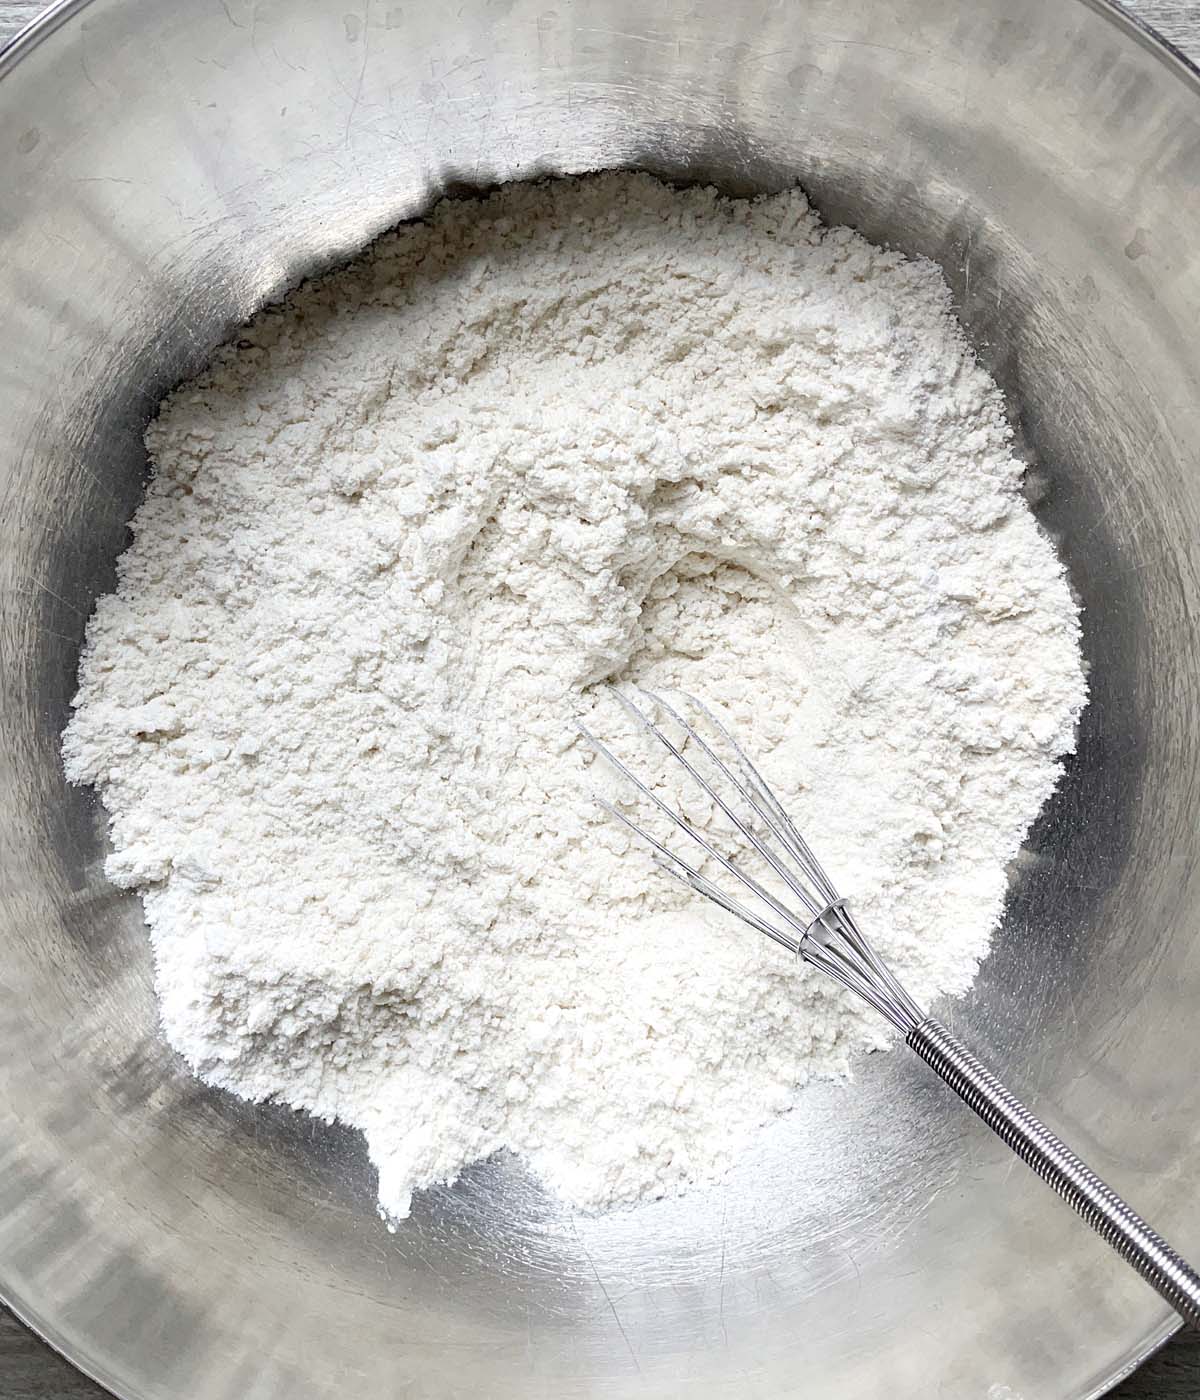
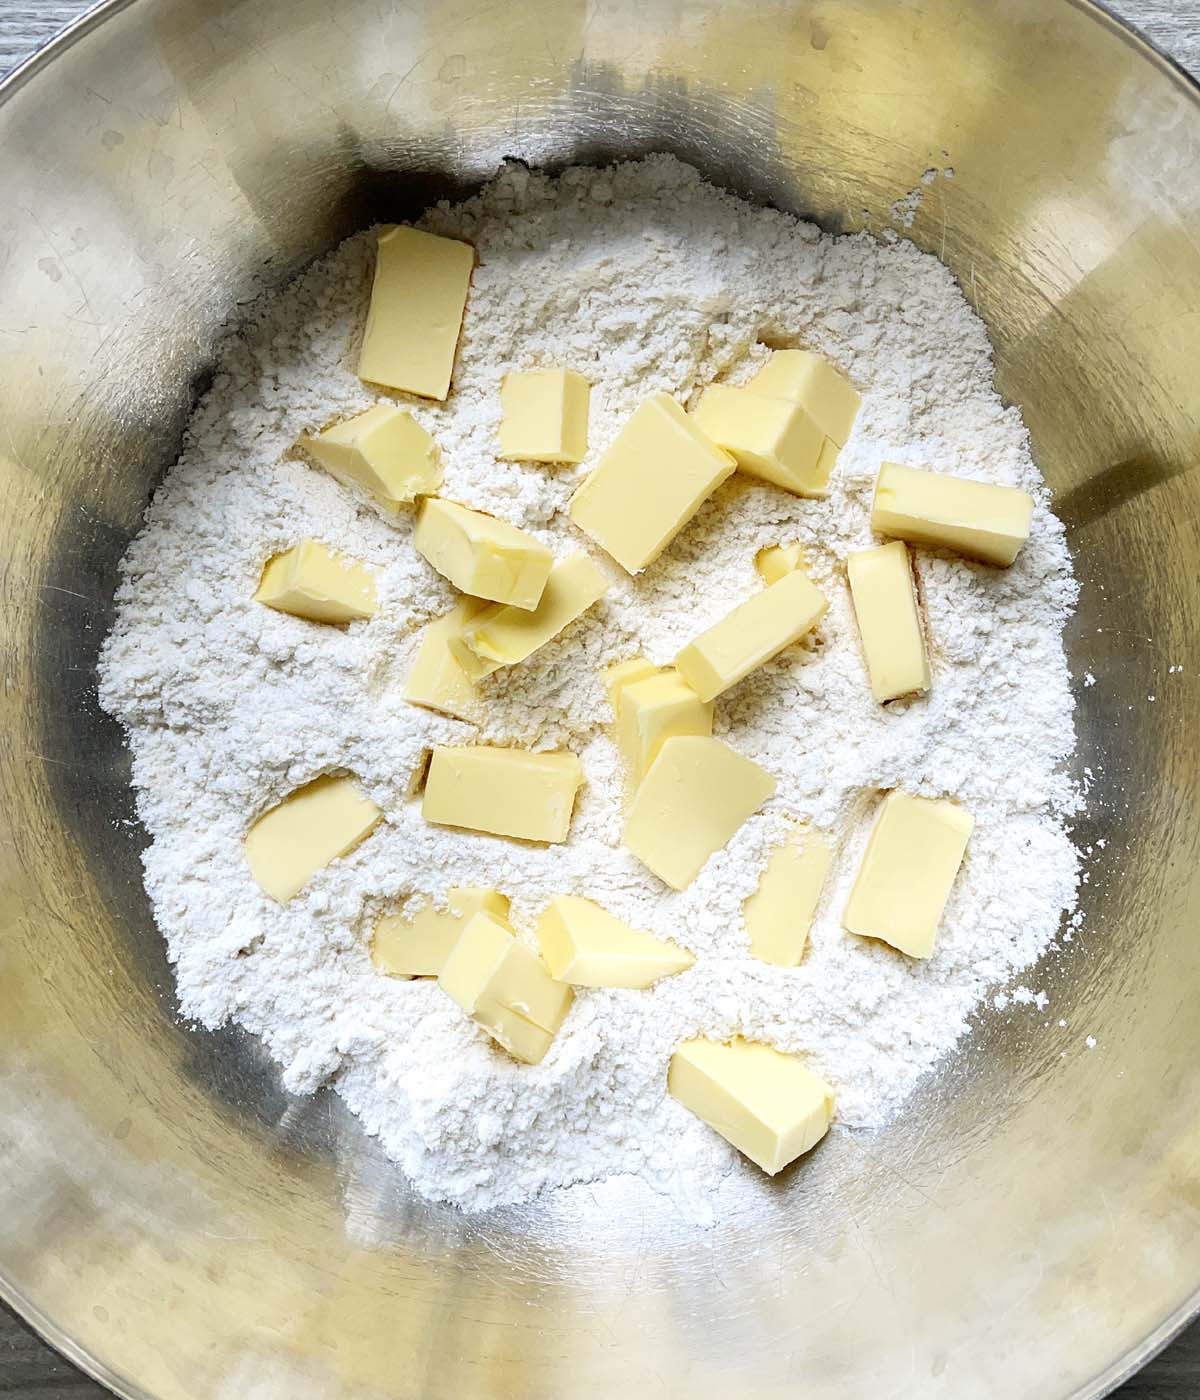
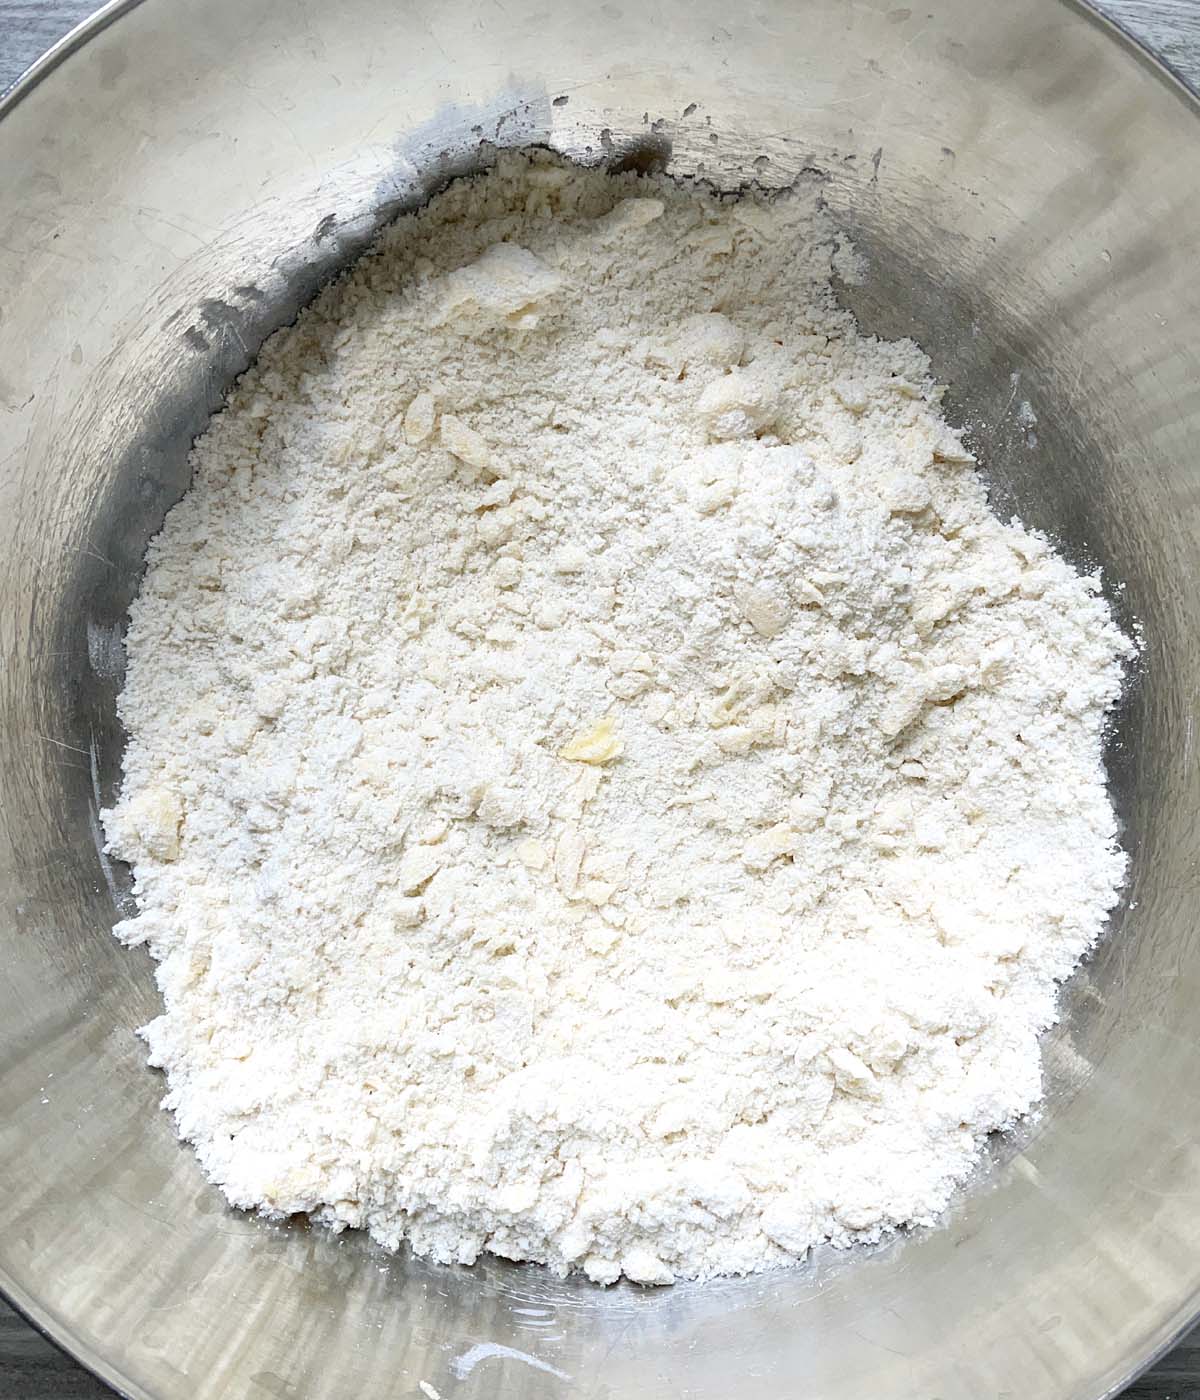
Combine the brown rice flour, tapioca starch, sugar, baking powder, xanthan gum, and salt in a mixing bowl and mix together with a whisk. Add the cold pieces of butter to the flour mixture.
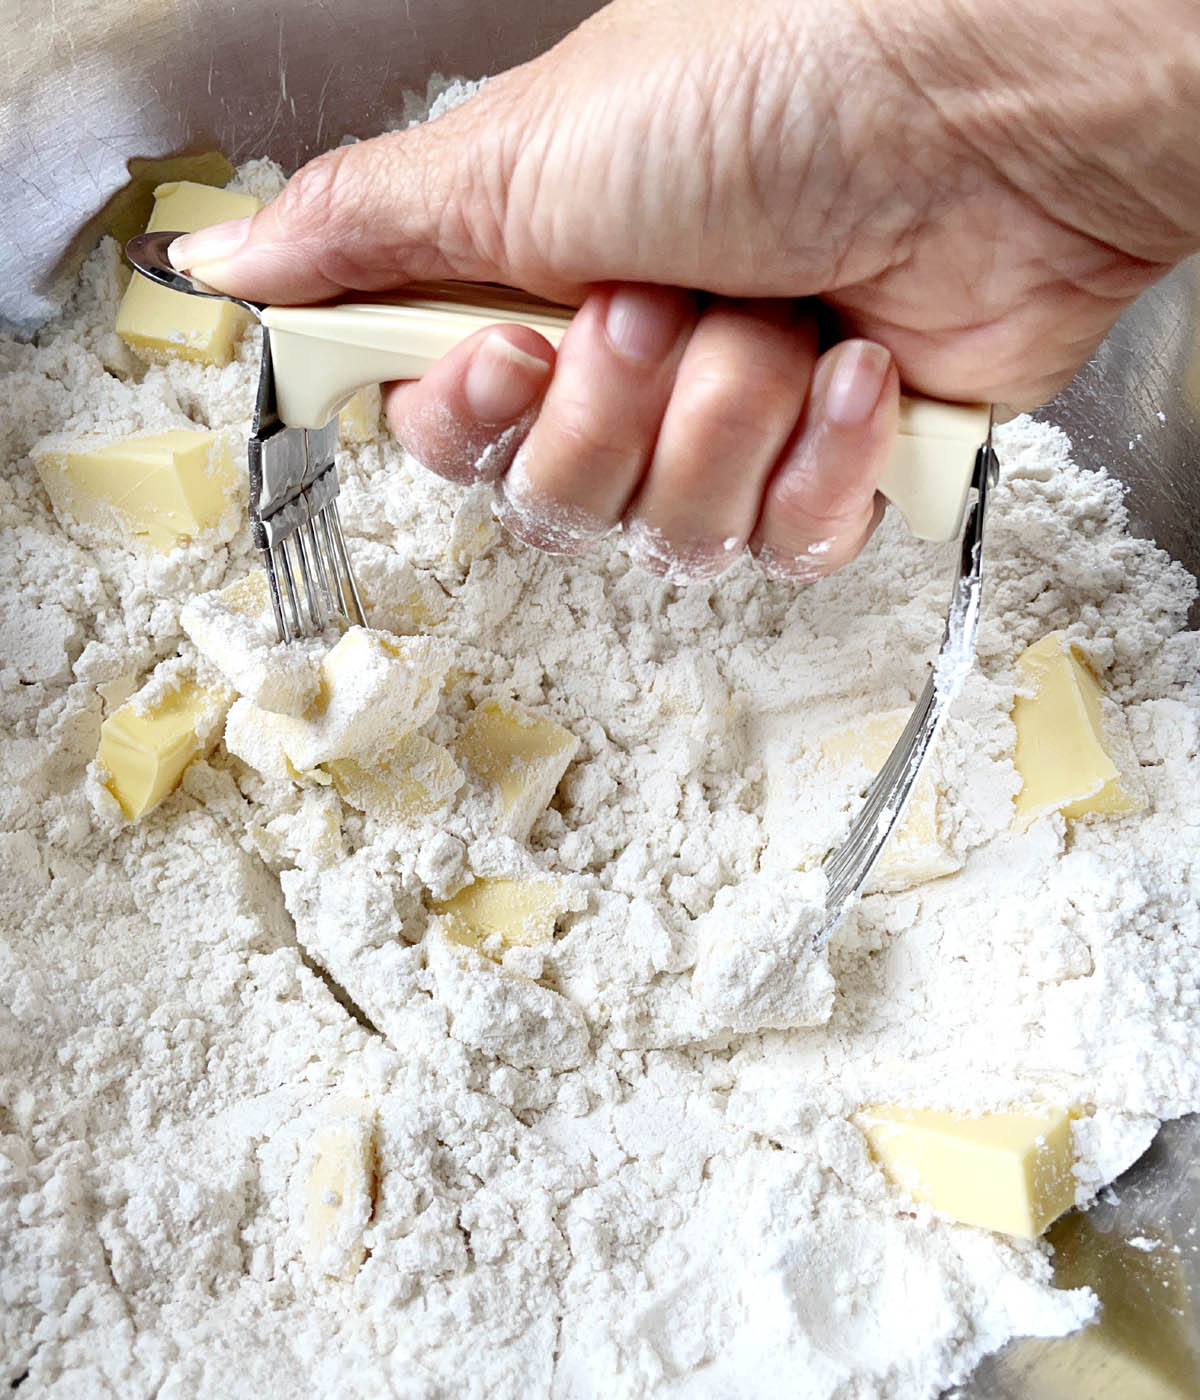
"Cut" the butter into dry ingredients and use a pastry cutter, a fork, two knives. The mixture should resemble coarse crumbs, with bits of butter dispersed in the flour mixture.
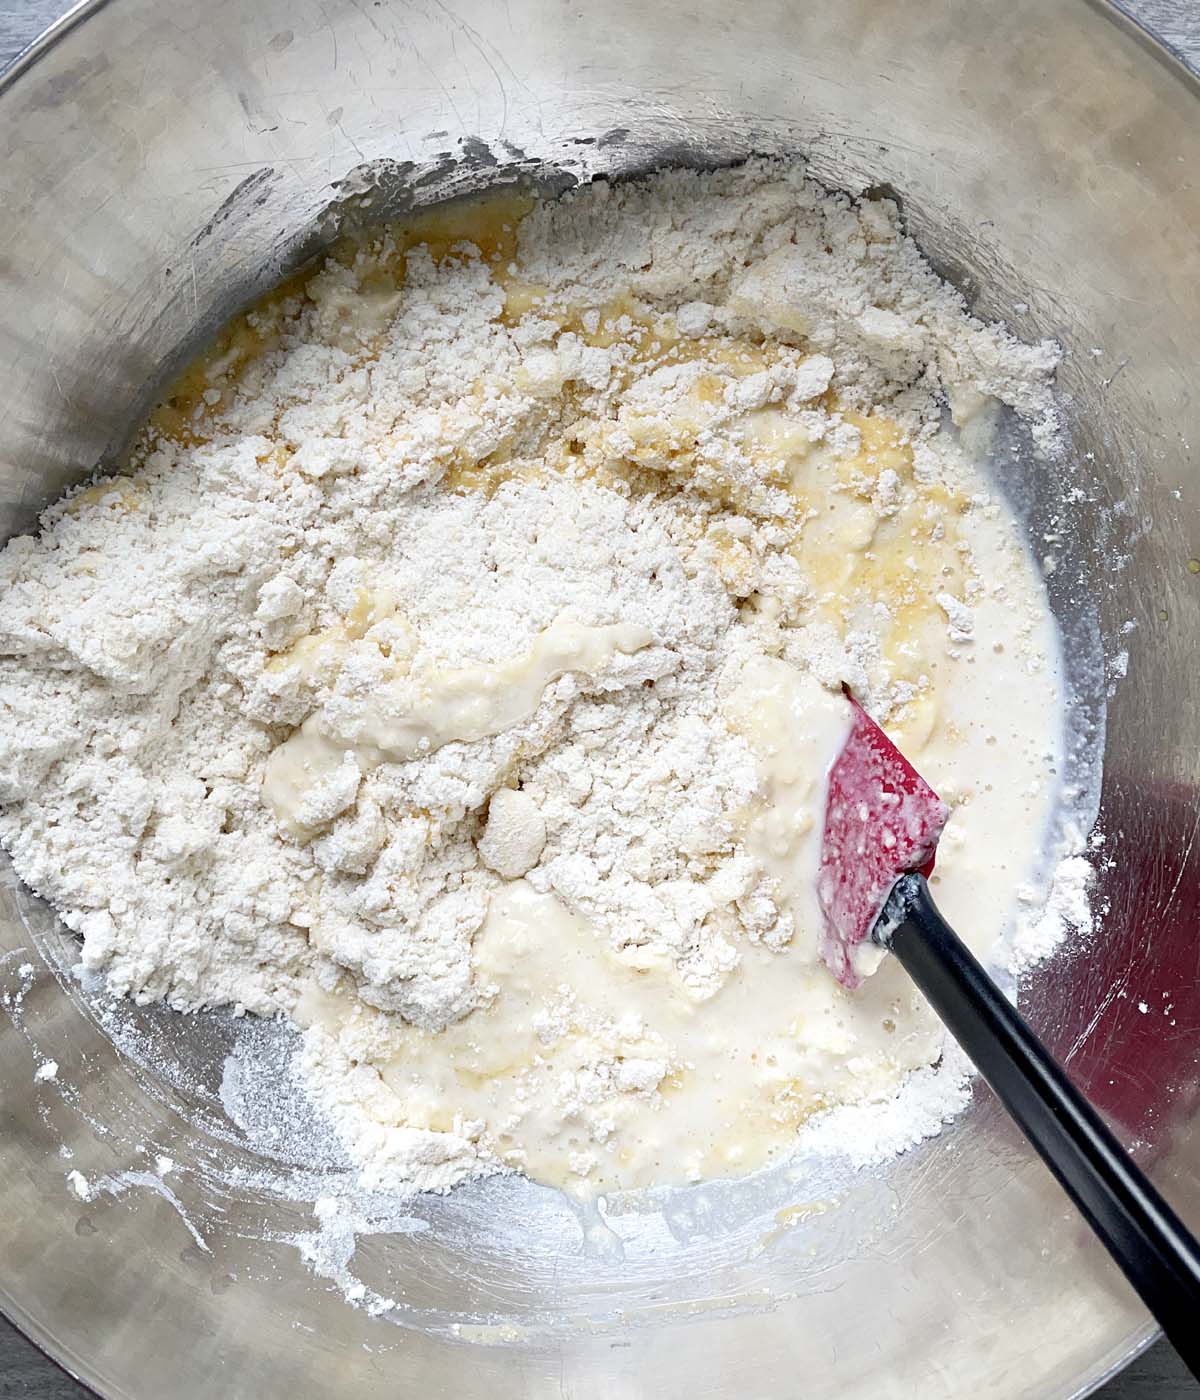
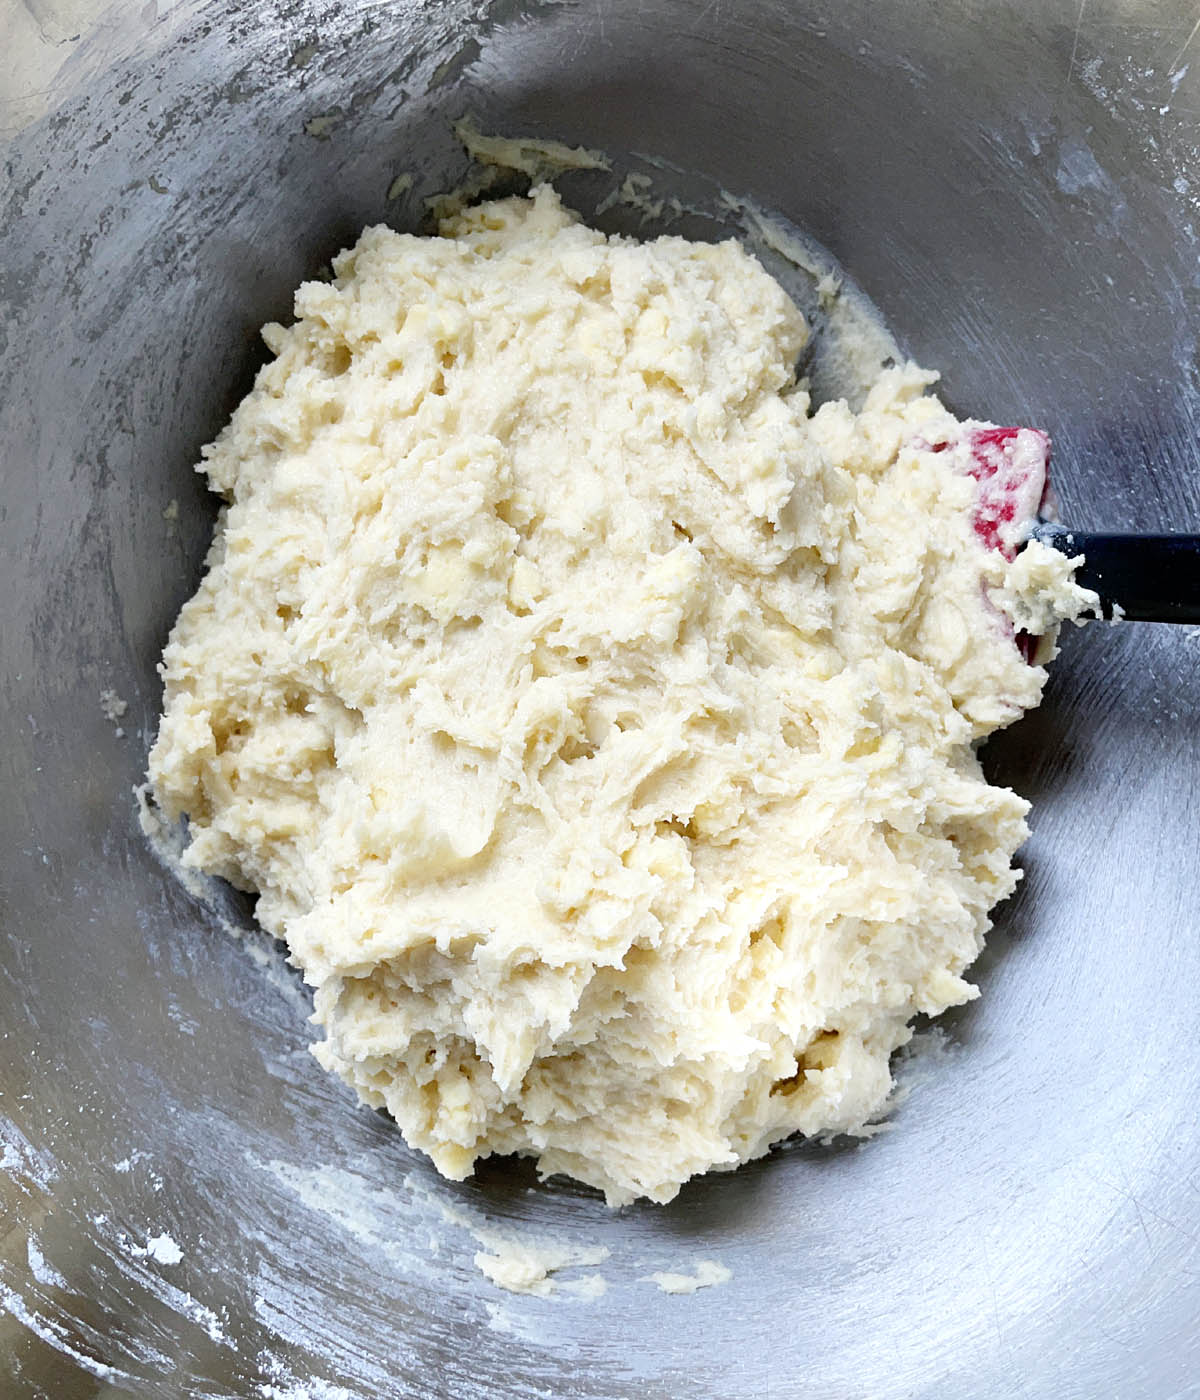
Add the milk and beaten egg to the mixture.
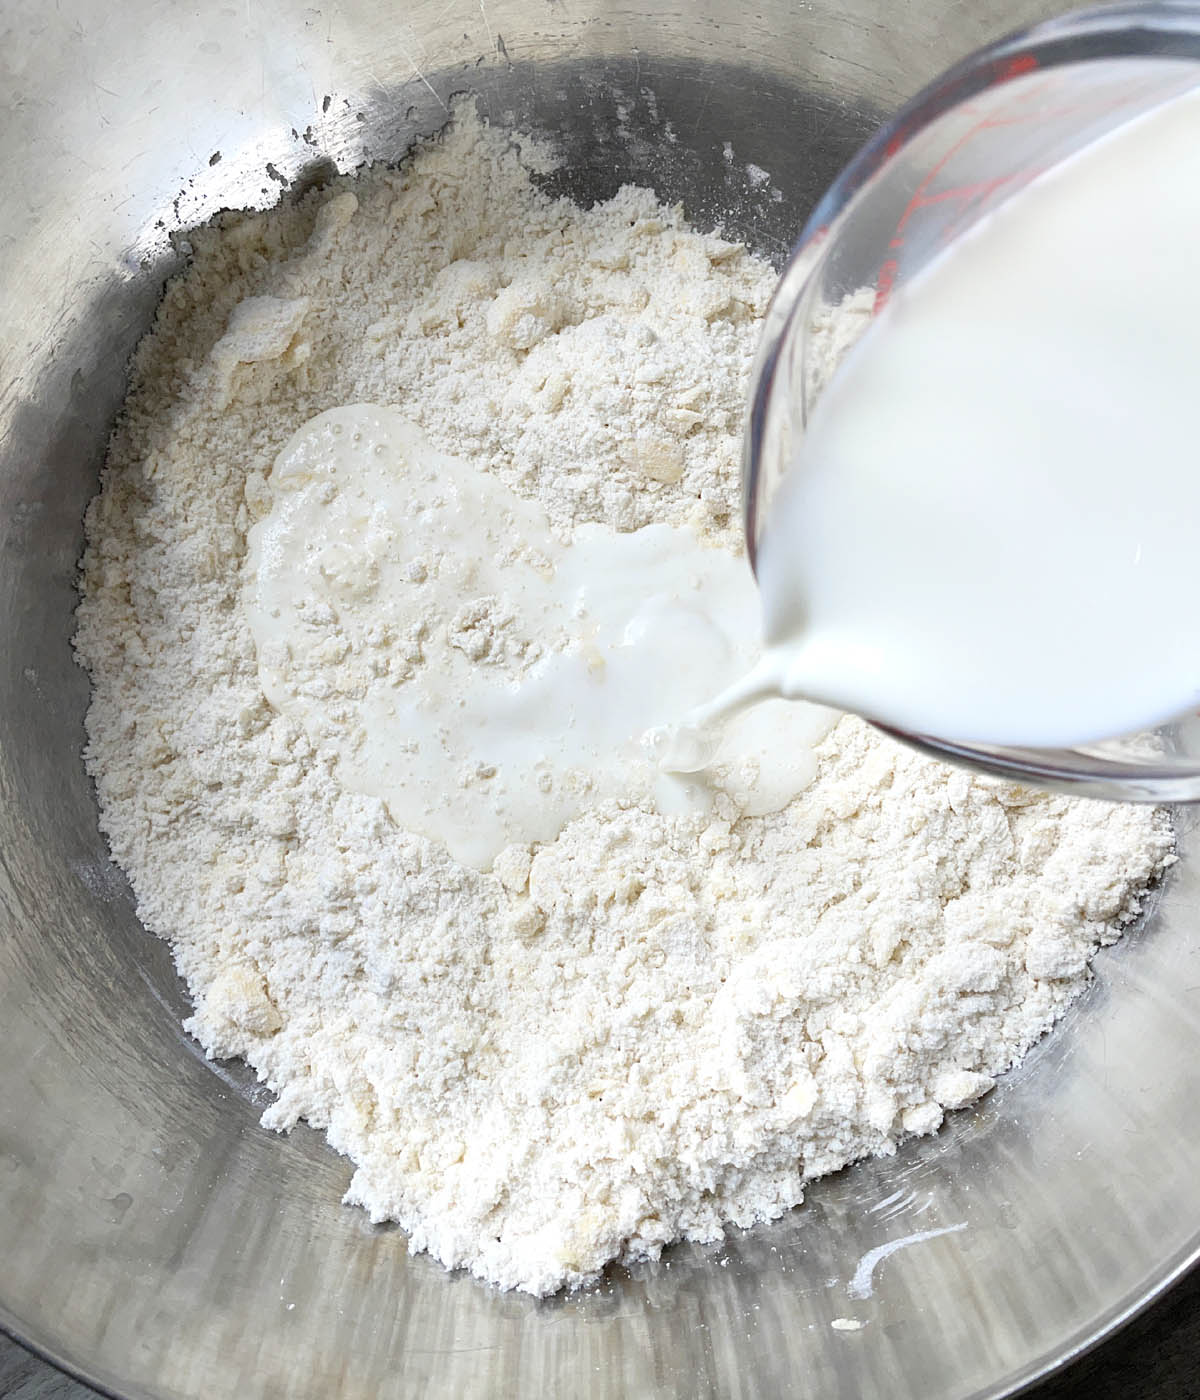
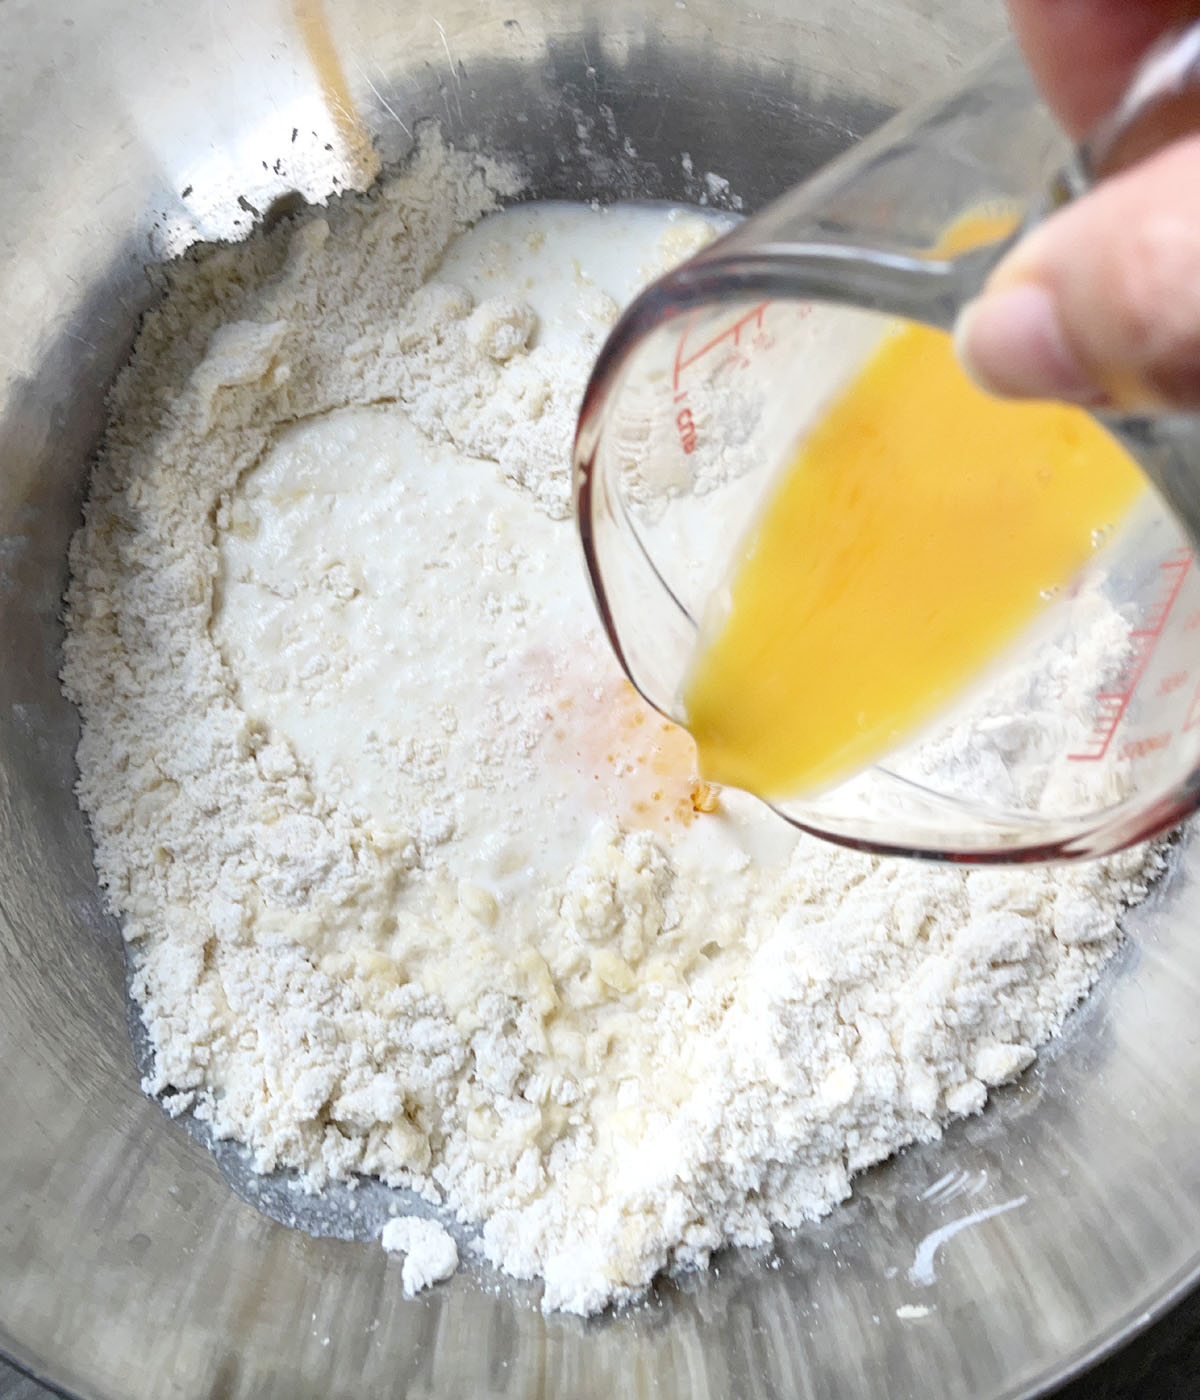
Use a spoon or rubber spatula to mix everything together until it just comes into a dough. The dough will be sticky and it is important not to overmix it.
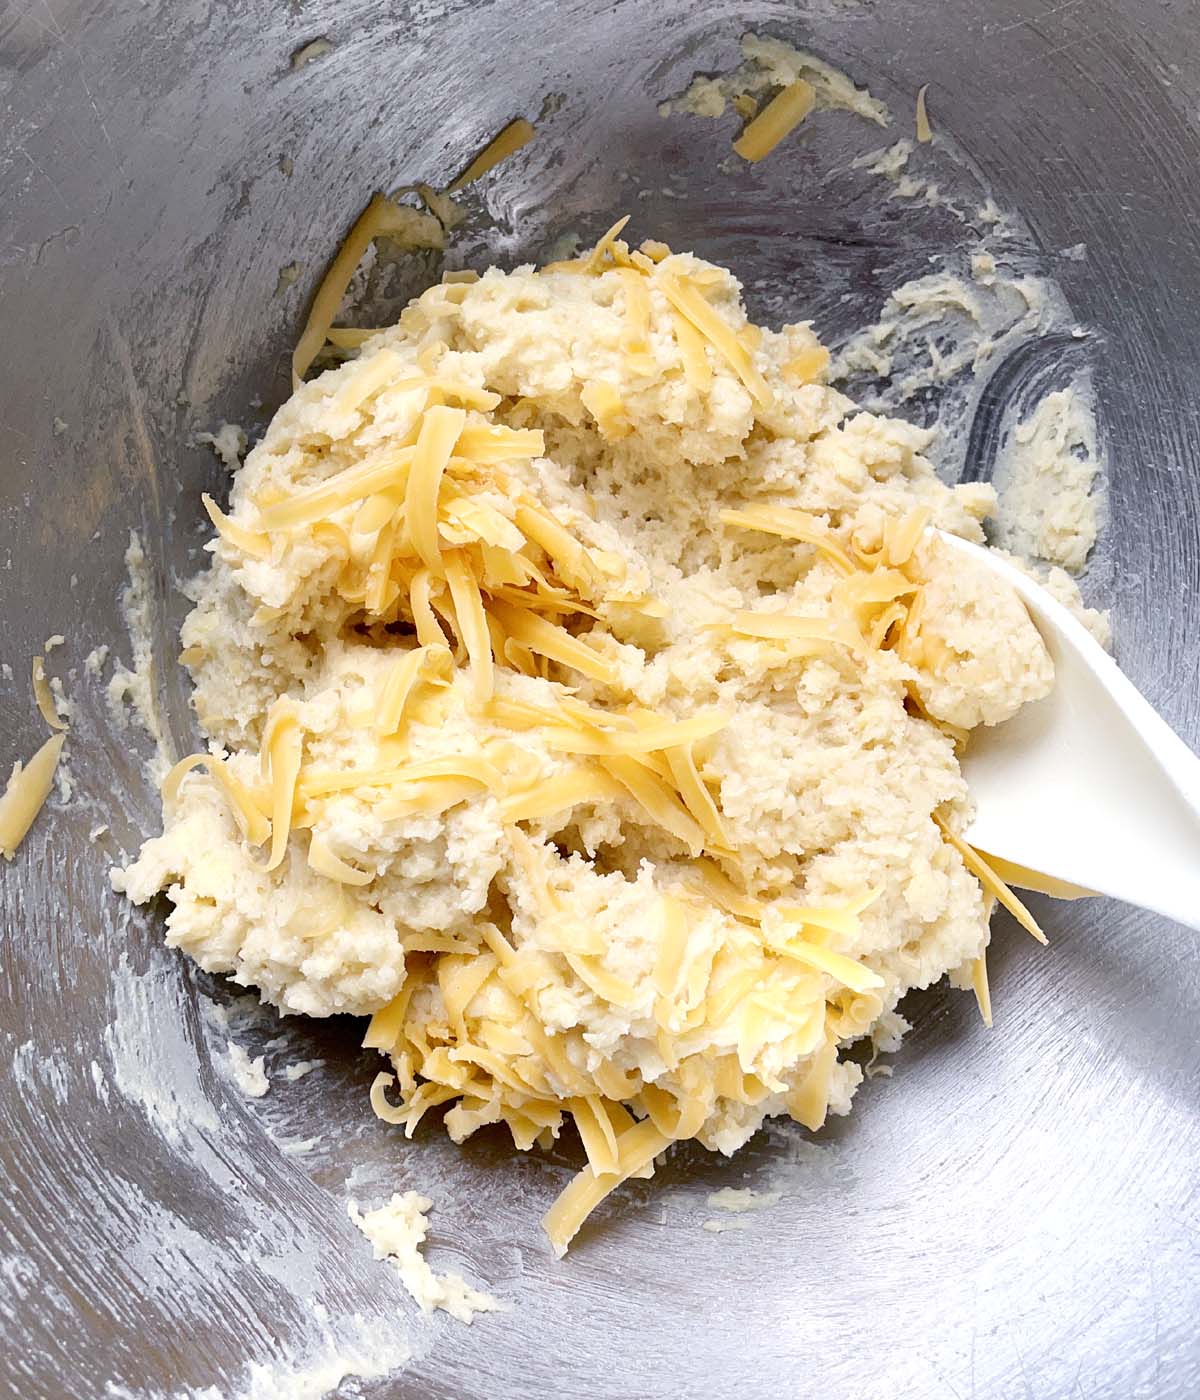
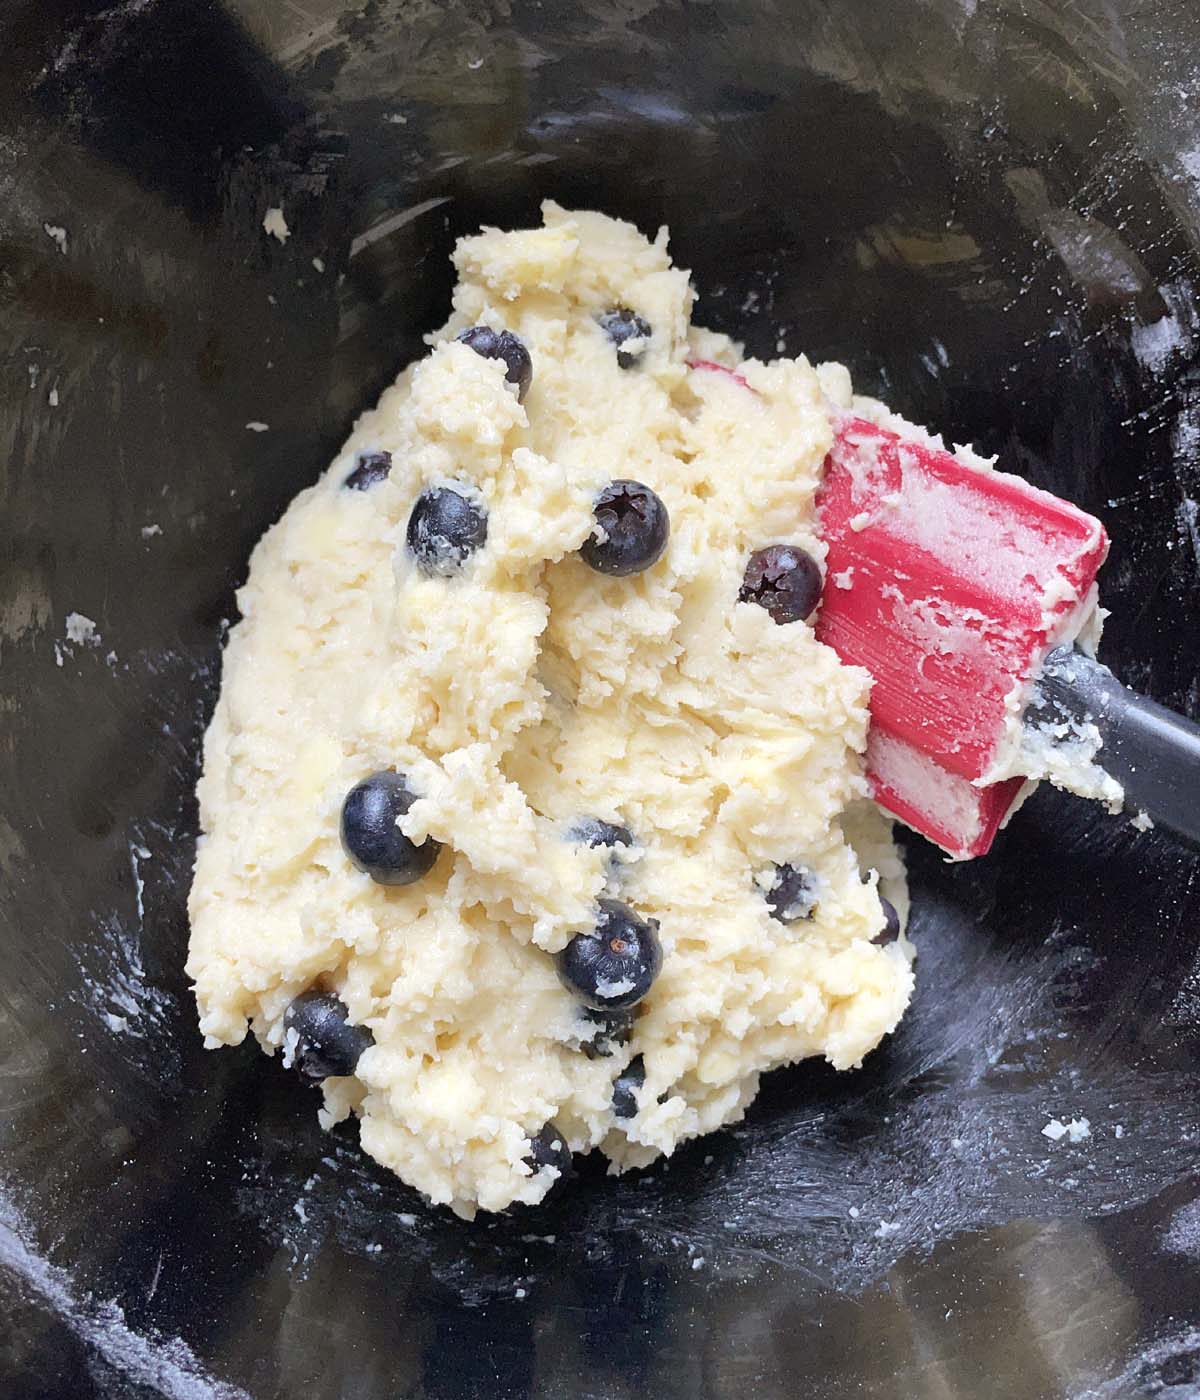
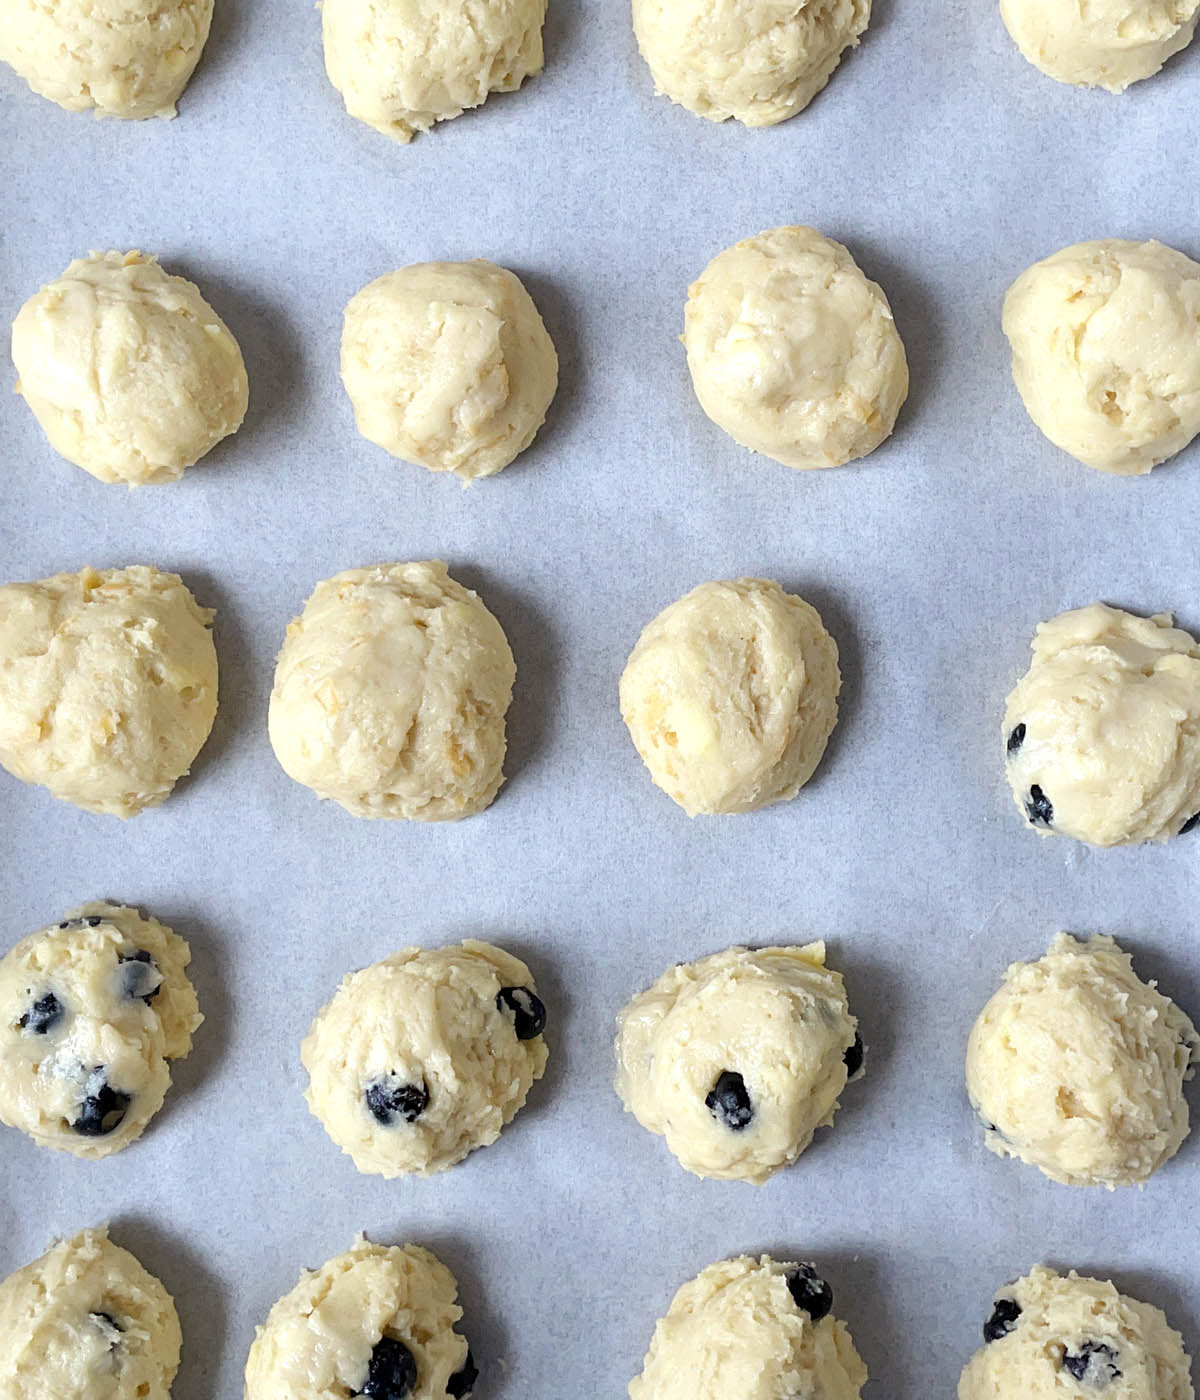
Add your desired filling (grated cheddar, blueberries, cranberries, chocolate chips, etc). If you want to make different flavors from the same batch, divide the dough into different bowls before adding in the different fillings.
Shaping and Baking the Tea Scones
Use a cookie scoop or simply drop tablespoonfuls of dough onto a parchment-lined baking sheet. You don't have to make the scones the same size, but there's nothing wrong with it if you do!
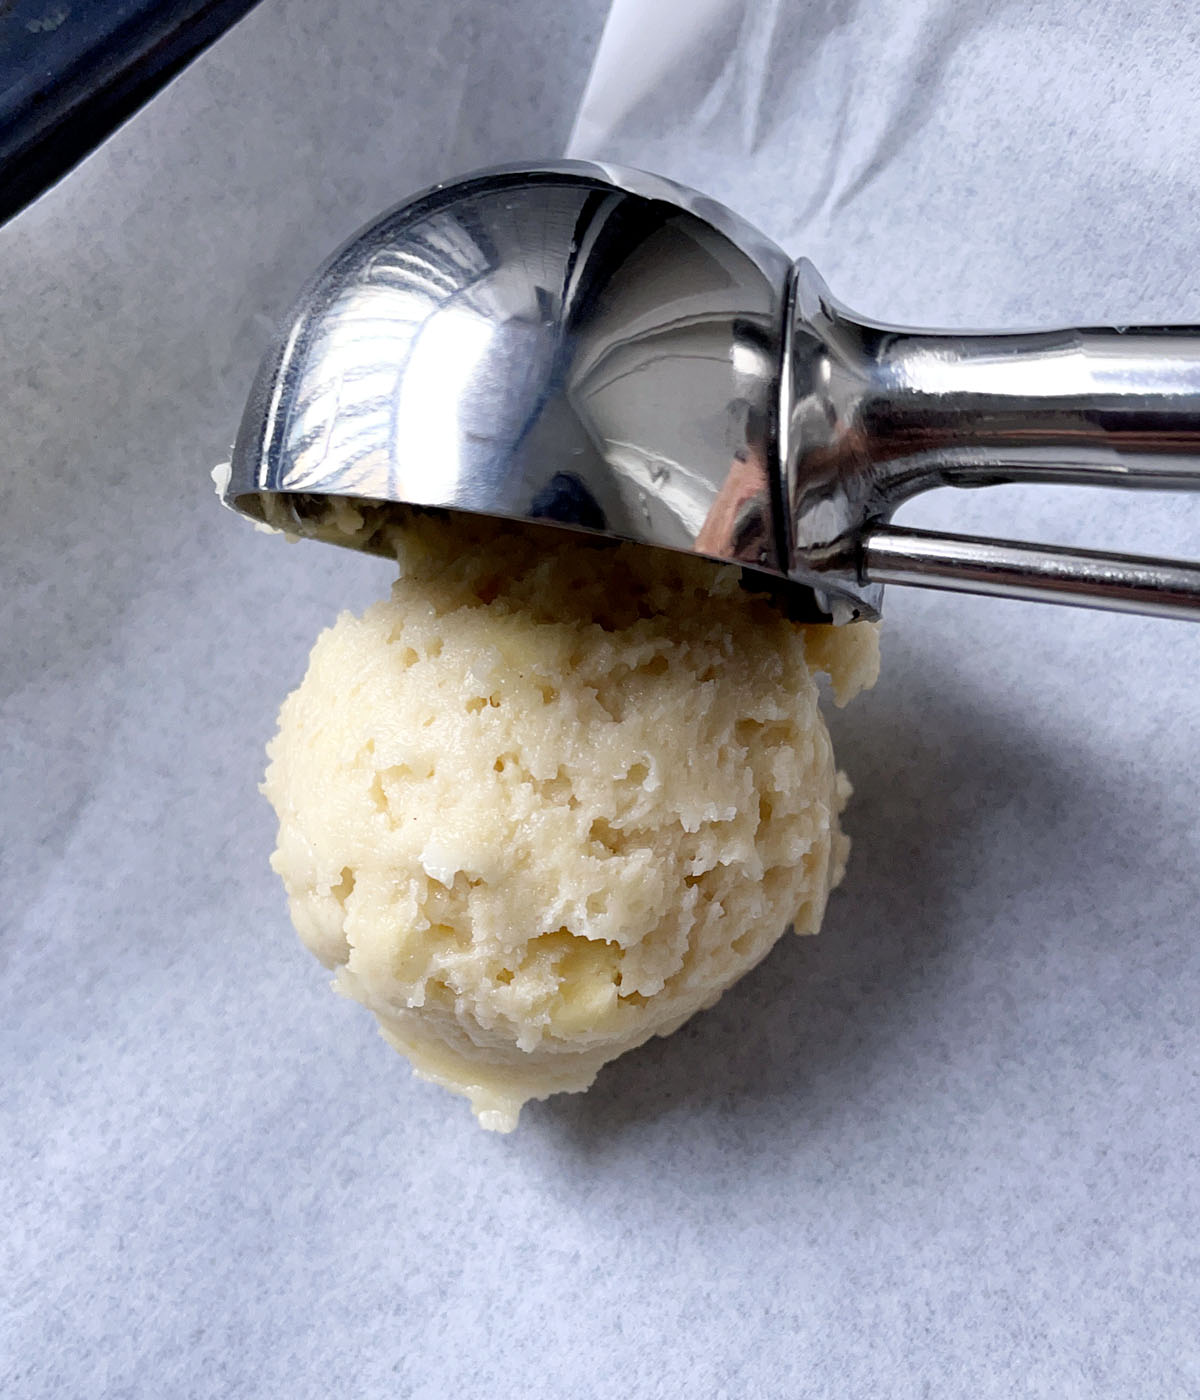
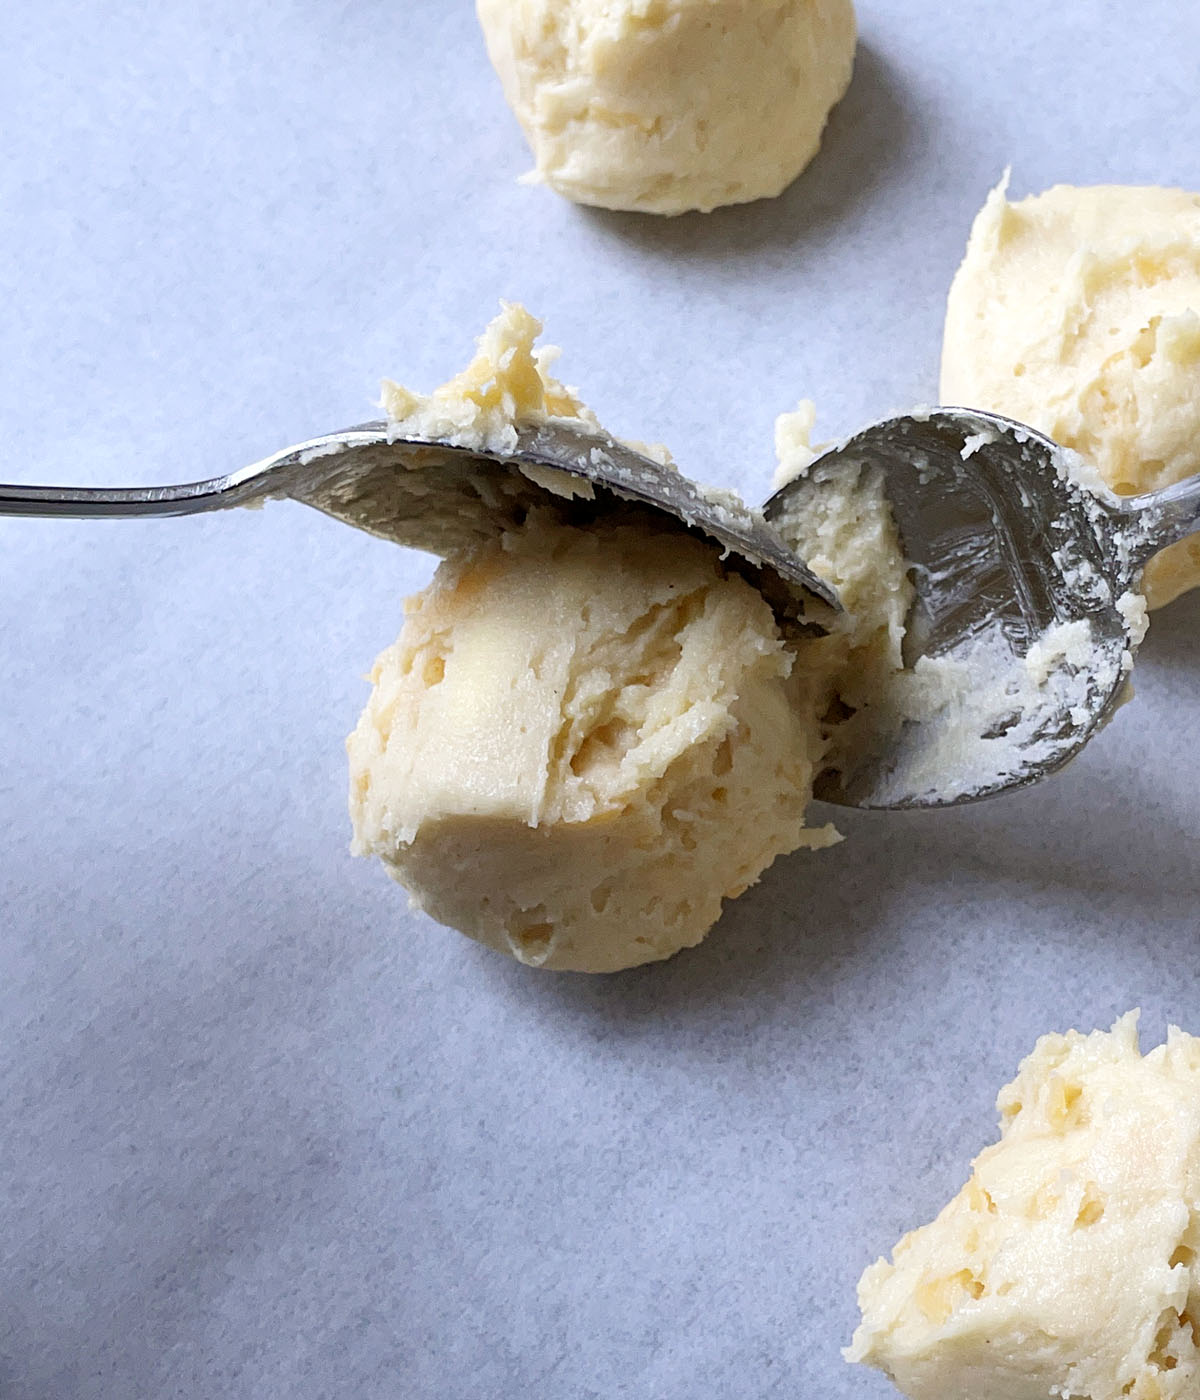
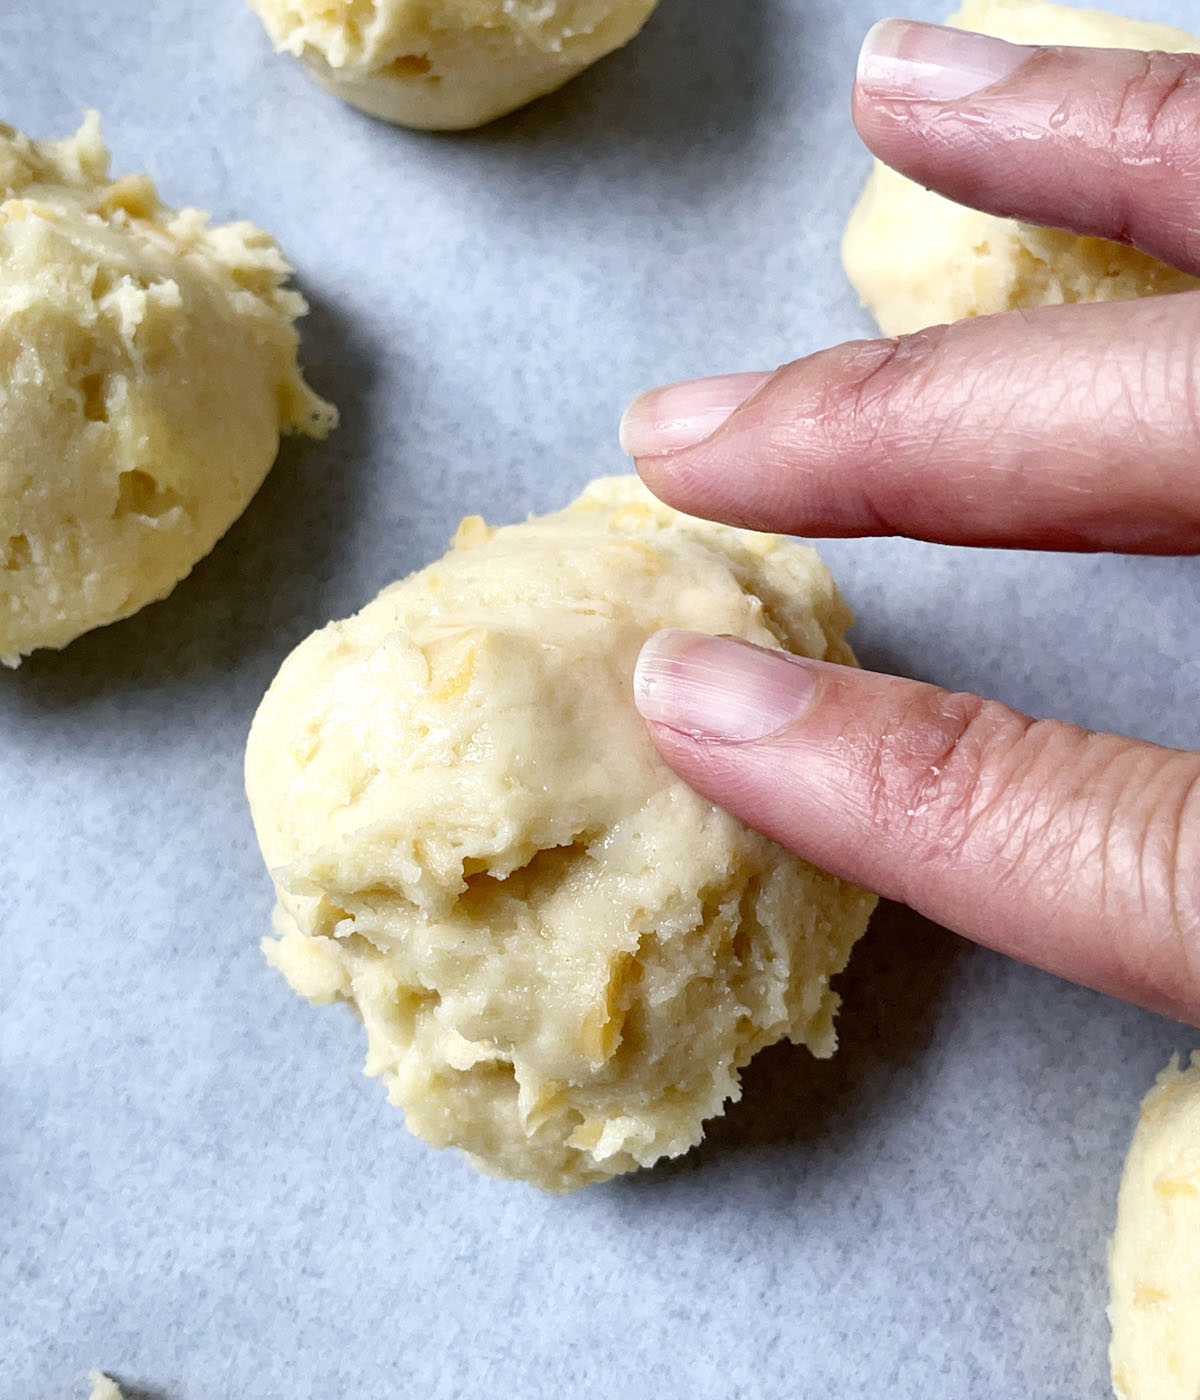
Wet your fingers and gently push down any rough edges or points sticking up from the scoops of dough. (This is an optional step.)
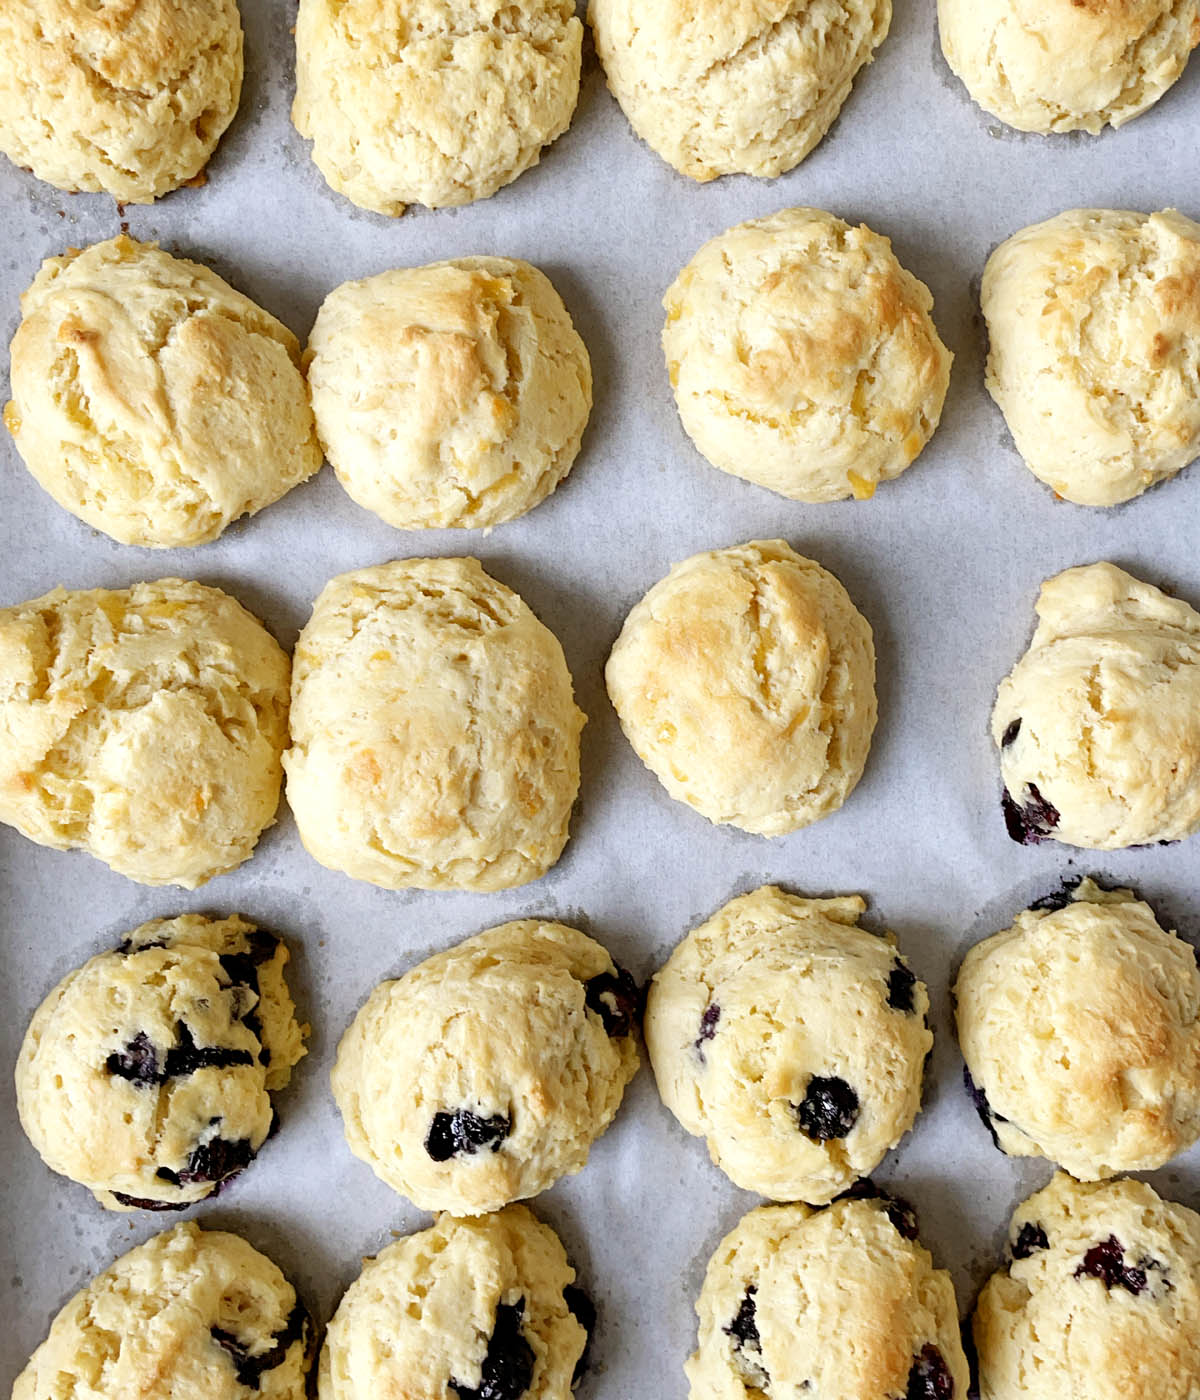
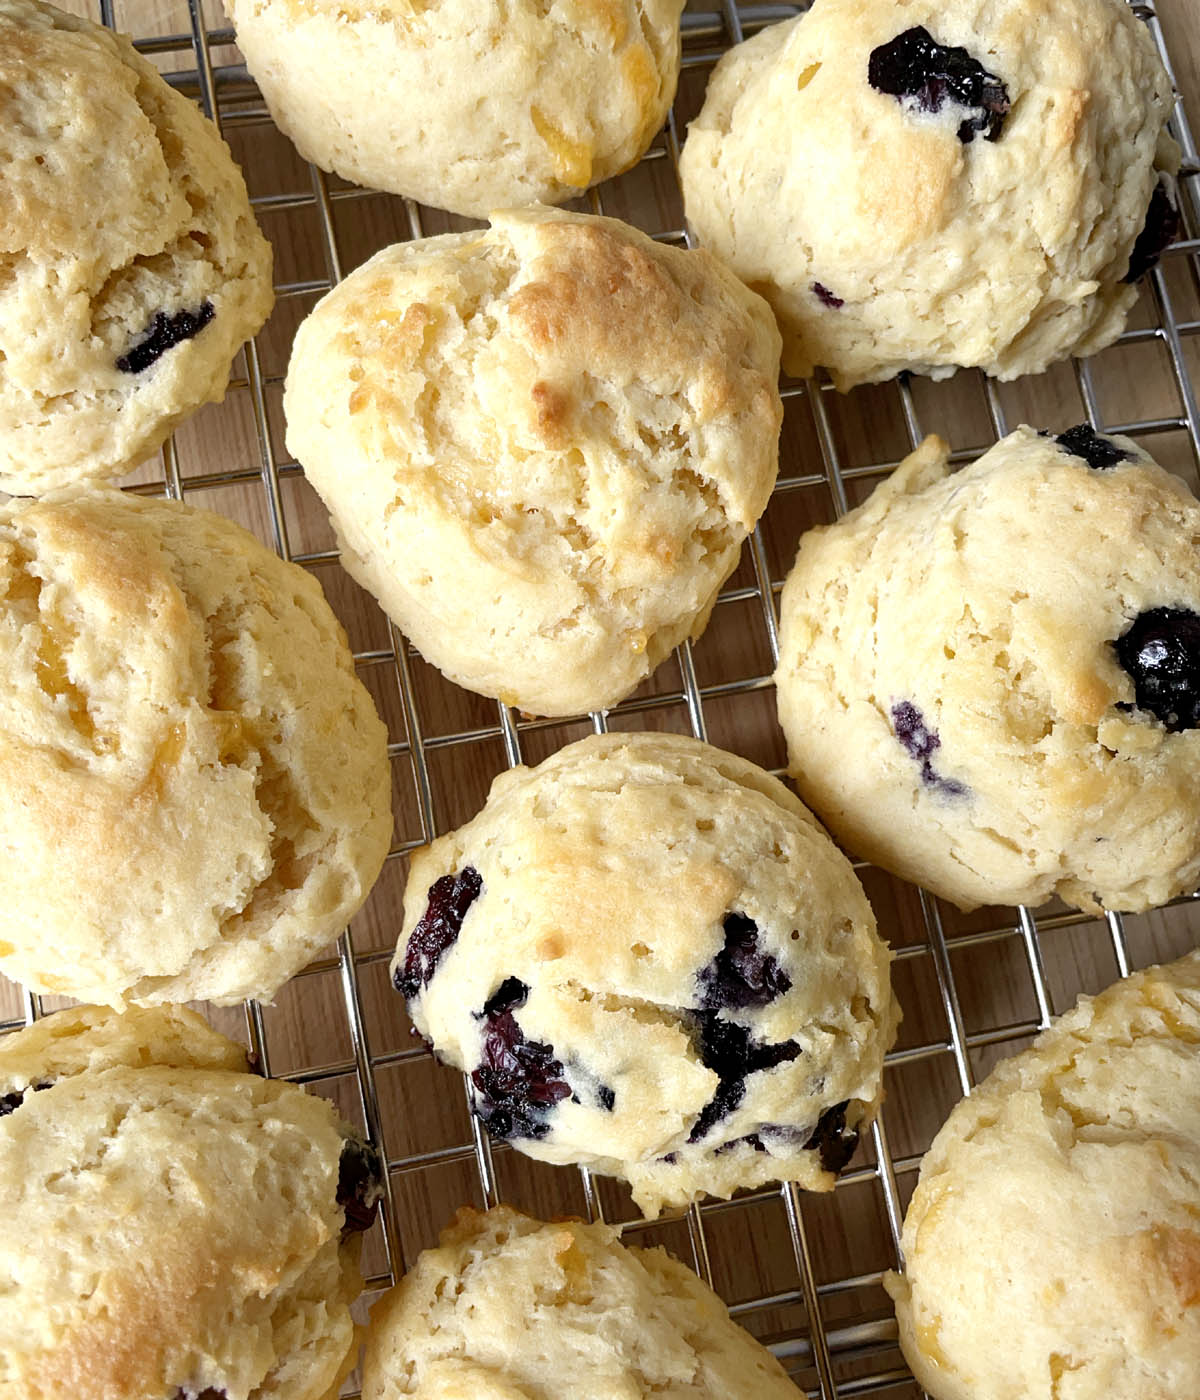
Bake the scones in a 425F/220C preheated oven for 12 minutes until they are golden brown.
Transfer the baked scones to a cooling rack and let them cool for 10 minutes before serving.
How to Serve the Scones
Scones are typically eaten while sipping on a hot cup of tea of coffee. I particularly like them with Coffee Milk Tea, Ginger Honey Tea, or English Tea Latte.
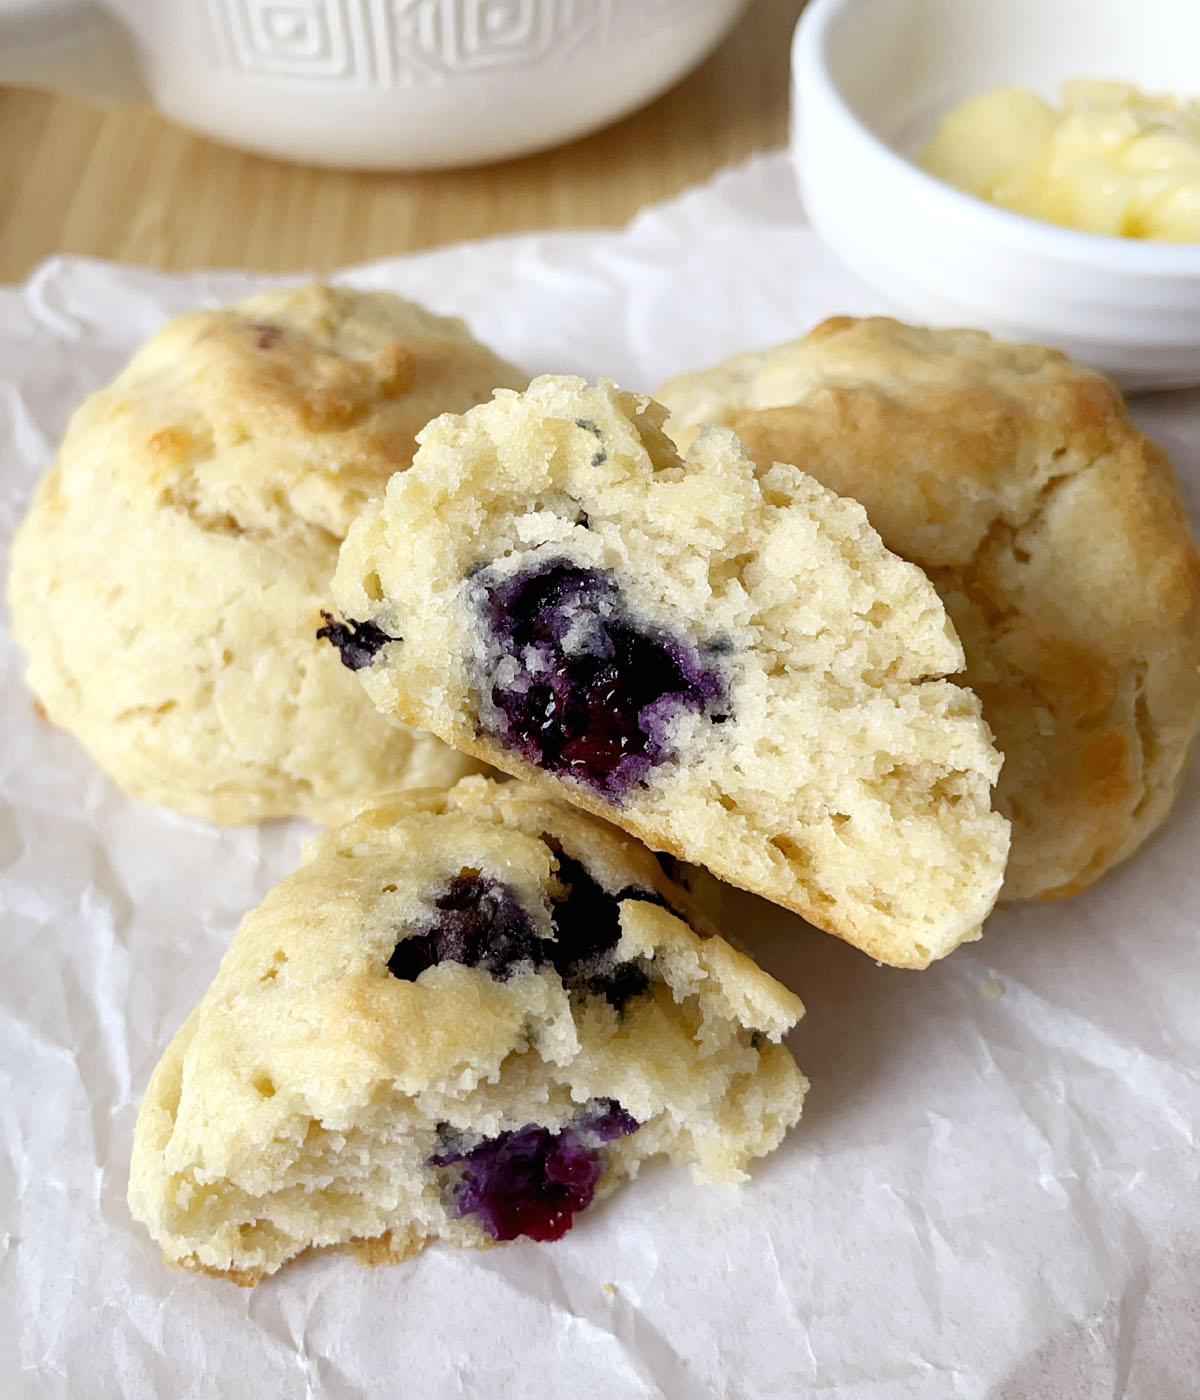
You can spread soft butter on them, or you can go totally British and used clotted cream and jam. My 3-Ingredient Blueberry Jam would be a delicious topping!
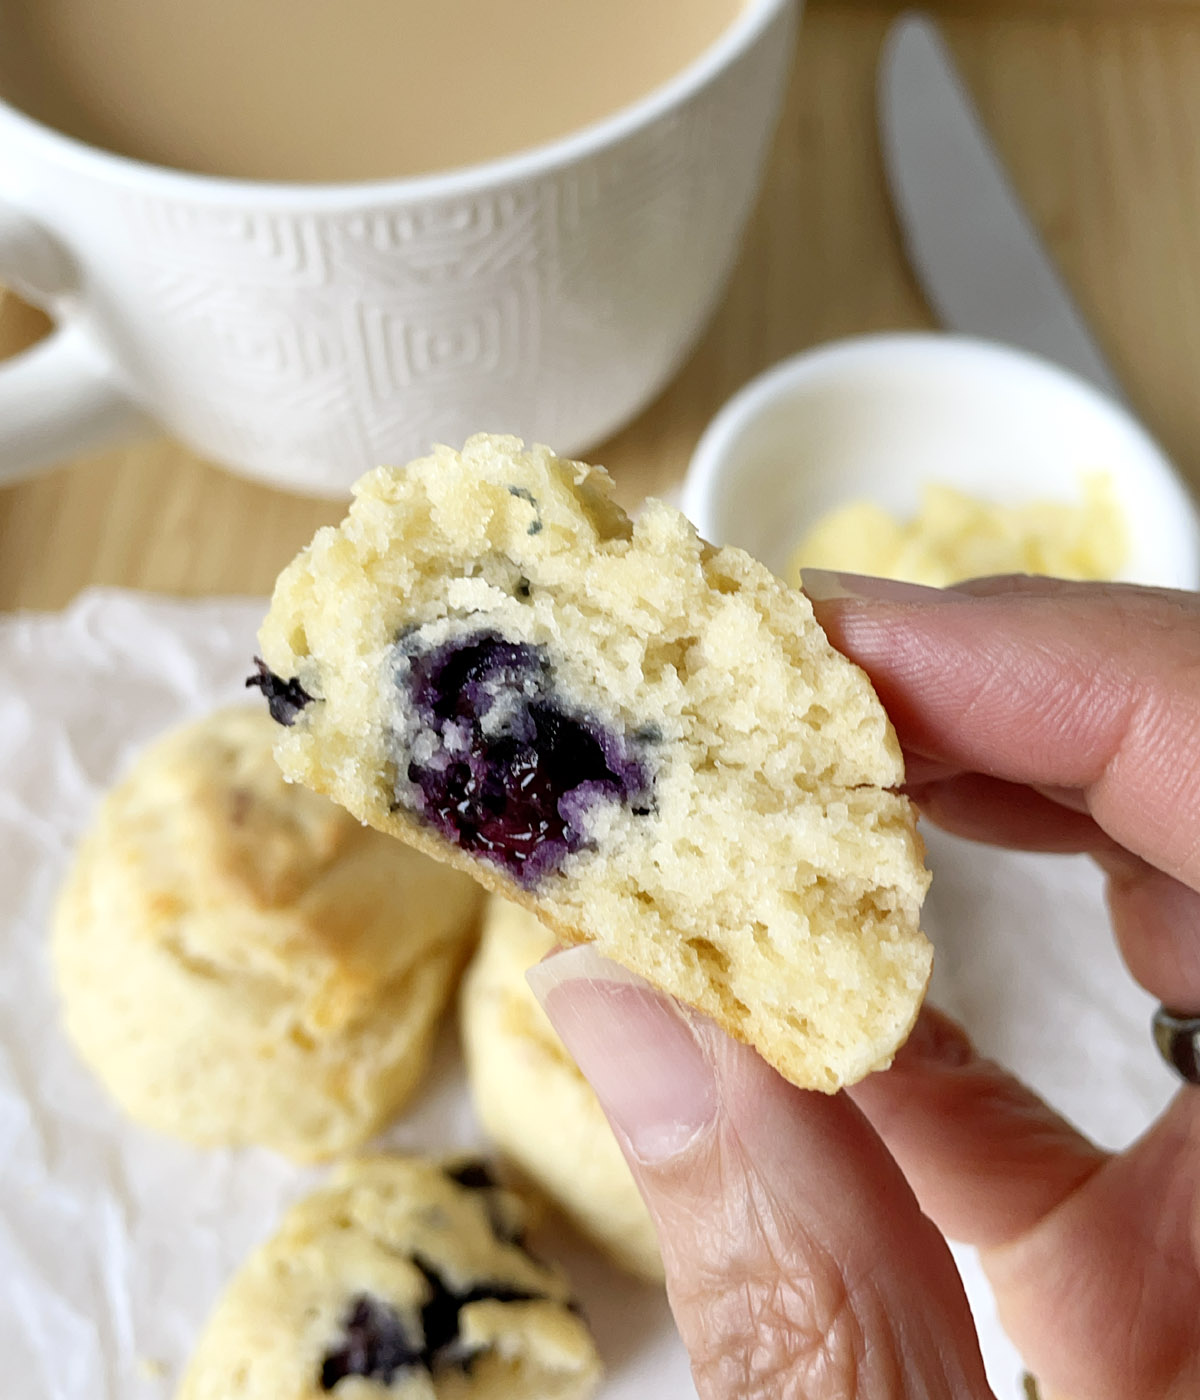
Remember the step of cutting the butter into the flour ingredients? All those bits of butter melted while the scones were baking, making for the tender melt-in-your-mouth texture....buttery goodness!
Beside having them with a cup of tea or coffee, enjoy a scone or two for breakfast, or serve them as part of a brunch along with Bacon For A Crowd or Crustless Roasted Vegetable Quiche.
You Might Also Like These Recipes
If you're looking for other gluten-free scone recipes, be sure to check out my Gluten-Free Cranberry Scones, or my Bacon Cheddar Scallion Scones which are deliciously savory.
If you're looking for other gluten-free breakfast recipes, take a look at Fluffy Grain-Free Almond Pancakes or Easy and Delicious Mochi Pancakes.
Commonly Asked Questions
Yes! After the scones have completely cooled, store them in a resealable freezer bag for up to 1 month. Reheat the scones in a toaster oven or microwave.
I have never tried making these scones with dairy-free substitutes, so I do not know if they would work.
If you don't have tapioca starch, you can substitute it with cornstarch.
Common fillings are cheese, blueberries, dried cranberries, chocolate chips, etc.
You should make the scones right after making the dough.
They can be kept in a resealable container at room temperature for 2 days, or up to 5 days in the refrigerator. Warm them in a toaster oven or microwave.
You would need more flour to create a cohesive dough you can shape and handle to be able to do this. However, adding more flour and working the dough can make the scones less tender. This scones work out best if the recipe is followed as is.

One bite of one of these tea scones and you really will be amazed that they don't have any gluten! It will be hard to stop at just one! With their melt-in-your-mouth deliciousness, they're going to be a hit with everyone, even those who aren't gluten-free!
~ Lisa.
Watch How To Make GF Buttery Tea Scones!

Gluten-Free Buttery Tea Scones
Ingredients
- 240 grams brown rice flour
- 160 grams tapioca starch
- ½ cup sugar
- 5 teaspoons baking powder
- 1 teaspoon xanthan gum
- ½ teaspoon salt
- ¾ cup cold butter, cut into small chunks
- 1 cup milk
- 1 egg, beaten
Mix in 1 cup (optional):
- Fresh blueberries
- Dried cranberries
- Grated cheddar
- Chocolate chips
Instructions
- Preheat oven 425F/220C.
- Combine brown rice flour, tapioca starch, sugar, baking powder, xanthan gum, and salt in a mixing bowl and whisk together to combine.
- Add cold butter chunks to the flour mixture and use the pastry cutter (or fork or two knives) to cut the butter into the dry ingredients. Bits of butter should be well-coated in the flour and resemble coarse crumbs.
- Add milk and beaten egg to the flour-butter mixture and mix well with a spoon or rubber spatula until a sticky dough forms.
- Stir in 1 cup of scone fillings, if desired. If making more than one flavor from one batch, divide the dough to different bowls and mix in the different fillings to each.
- Use a cookie scoop or tablespoons to drop moundfuls of dough onto a parchment-lined baking sheet.
- Flatten any edges or points on the scone mounds with slightly wet fingers, if desired.
- Bake for 12 minutes until golden brown.
- Transfer scones to a cooling rack and let cool for 10 minutes before serving.
- Store leftover scones in a sealed container or bag for 2-3 days. Warm in the toaster oven or the microwave to soften.
Notes
- ¾ cup of butter is approximately 170 grams in weight.
- If you do not have a pastry blender, you can use two knives or a fork to cut the butter into the flour.
- You can also pulse the butter and flour in a food processor, being careful not to process too much. You do not want the butter to get too soft.
- Add dry flavorings like cinnamon or pumpkin spice to the dry ingredients.
- Add wet flavorings like lemon zest or vanilla with the milk and egg.
- If adding fillings to your scones, mix them in after you have mixed the flour mixture with the milk and egg.
- Lightly dampen your fingers to push down any rough spots on the scones before baking, if desired.
- Store leftover scones in a sealed container for a couple of days. Heat scones in a toaster oven or microwave briefly to soften.
This post was originally published on September 8th, 2020, and was republished in September 2023 with new photos, instructional photos and writing.

Vicki
I used Bob red mill 1 -1 for all the flour.
Fantastic.
Thanks, Vicki!
Denise Williams
Wow! I’m so impressed with how these turned out. I needed a breakfast type item for my picky teenager to have. These hit the spot. Easy to follow directions are exactly what I needed too!
Thanks, Denise! That's pretty good if this satisfied a picky teenager! They're hard to please!
Deb
I went to UBC too and loved their scones and of course the famous UBC Cinnamon buns. Now am gluten free, so am excited to try the scones. If I was to have the savory version, would I reduce the sugar? Also, could I use a combination of sorghum and oat flour (or just one on its own) in place of the rice flour?
Now, just need gluten free Cinnamon Buns!!!
Hi Deb! So nice to run into a fellow UBC-er! Yes, if you want to make a savory version, I'd reduce the sugar to, perhaps a tablespoon, or you could try eliminating it completely to see how it works. As for substituting the rice flour, sorghum or oat flour will probably affect the final result, but I would start with just substituting sorghum first. Another good option is buckwheat flour. Finally, I do have a GF savory scone recipe you can look at that is very easy to make that you can take a look at: https://www.adayinthekitchen.com/bacon-cheddar-scallion-scones/. Thanks so much for your questions and I hope you like the scones!
Kelli
Hi
Can I use a cup for cup blend of flour in this recipe?
Thanks
Hi Kelli! I have had readers use all-purpose GF blends for this recipe and other gluten-free recipes with success. I have never tried it myself, but it is definitely worth a try!
Amy Gerber
240 grams brown flour
And
160 grams tapioca flour
How much in cups is the grams equal to ?
Hi Amy. Please bear in mind that gluten-free baking works best and the results are more consistent when you measure out ingredients by weight as it is not as forgiving as using regular wheat flour. That being said, 240g of brown rice flour is approximately 2 1/2 cups, and 160g of tapioca flour is approximately 1 3/4 cup. Flours are measured by loosely spooning into measuring cups and leveling them off. Again, these are approximate and you might need to make slight adjustments with the dry and wet ingredients to get the right consistency. Hope that helps.
Pat
These look amazing. I'm wondering what your suggestions are for freezing them. No doubt they are better fresh.
Hey Pat! I haven't tried freezing them, but I do put them in the fridge after the first day or two, and I have found that reheating them in the toaster oven or microwave works great! I think if I froze them, I'd let them thaw a bit first before reheating them. If you try it, let me know!
Seema
So yummy! Big hit with the family! Thanks Lisa!
Awesome! Thanks so much, Seema!
Wanda
Wow these look fantastic! I'd totally make a batch and take them to the office to share!
Thanks, Wanda!
Elaine
You'd never guess these are gluten-free! Brown rice flour with tapioca is such a great combination. I find the brown rice adds lots of flavour to scones. Thanks for posting!
Thanks, Elaine!