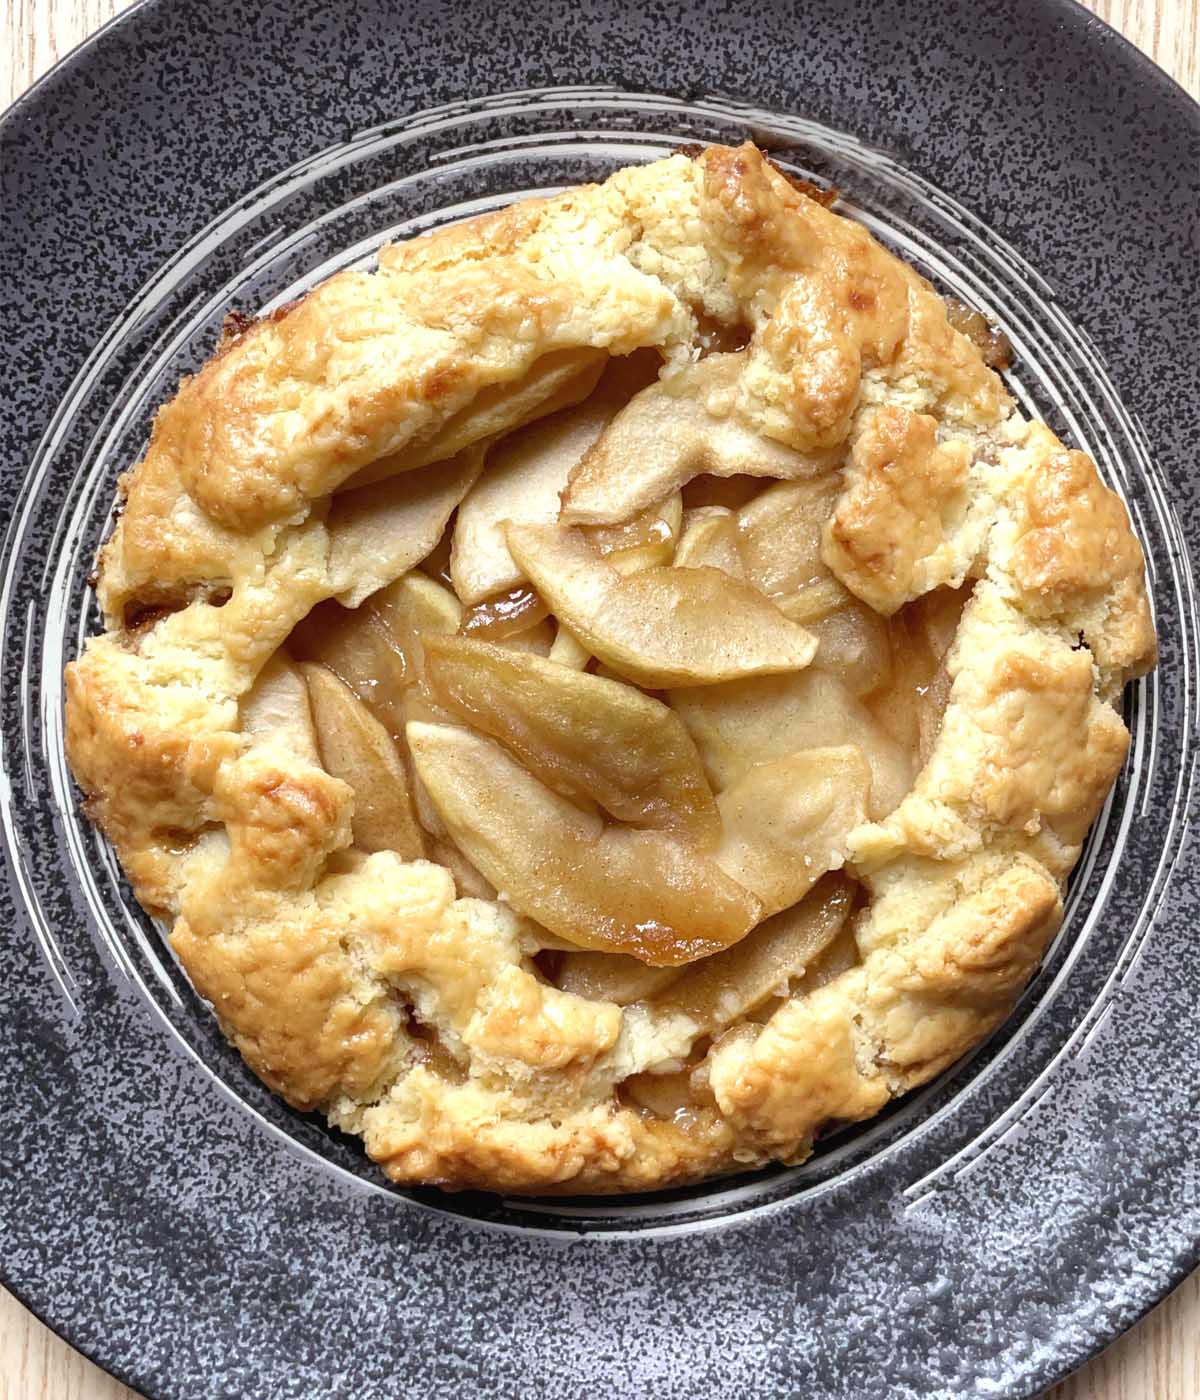
This rustic apple galette is so delicious...you are going to fall in love with your first bite! With its golden buttery flaky crust and perfectly cooked apple filling you will be amazed that it is gluten-free and grain-free! The rustic free-form galette means it is also really easy to make. This recipe is for you if you love apple pie but don't want the pie-making fuss!
Ingredients
For the Filling:
- Granny Smith apple
- Maple syrup
- Cinnamon
- Vanilla extract
- Tapioca starch
For the Crust:
- Almond flour
- Tapioca starch
- Butter
- Sugar
- Salt
- Egg (for egg wash)
How To Make the Apple Galette
Prepare the Apple Filling:
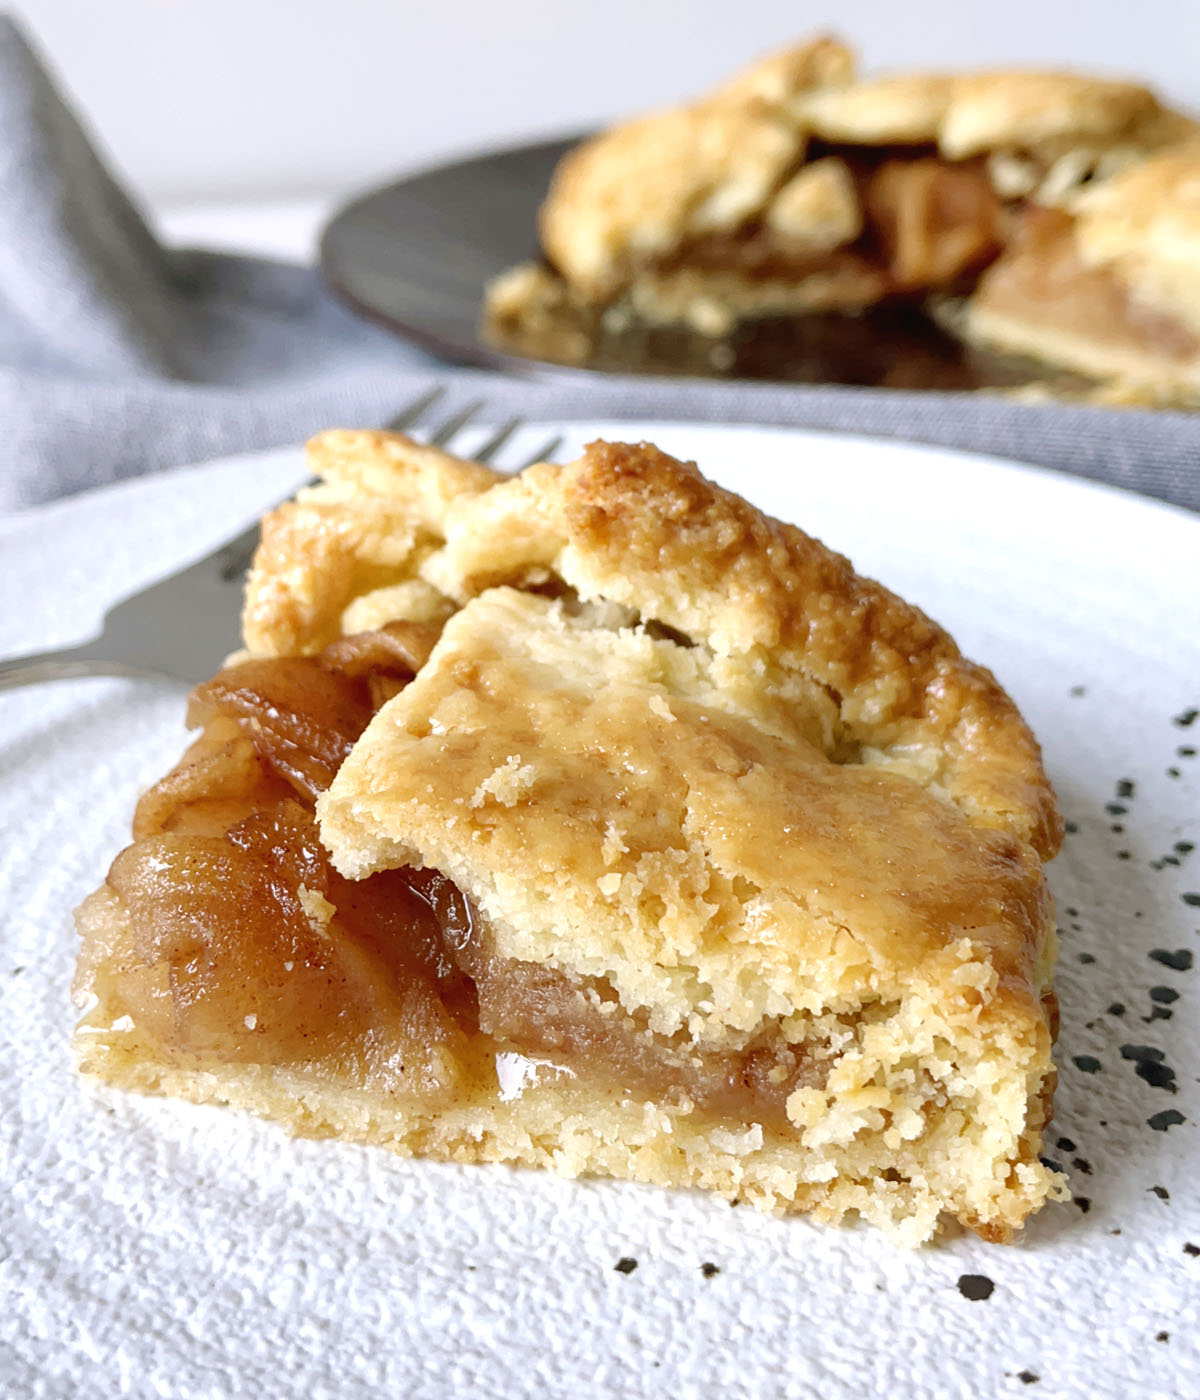
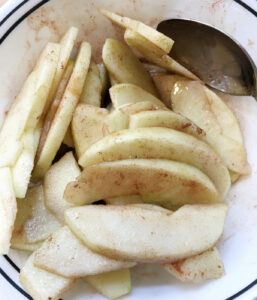
Peel the apple, core it, and cut into thin slices (no thicker than ¼"). Toss the apple slices with maple syrup, cinnamon and a pinch of salt.
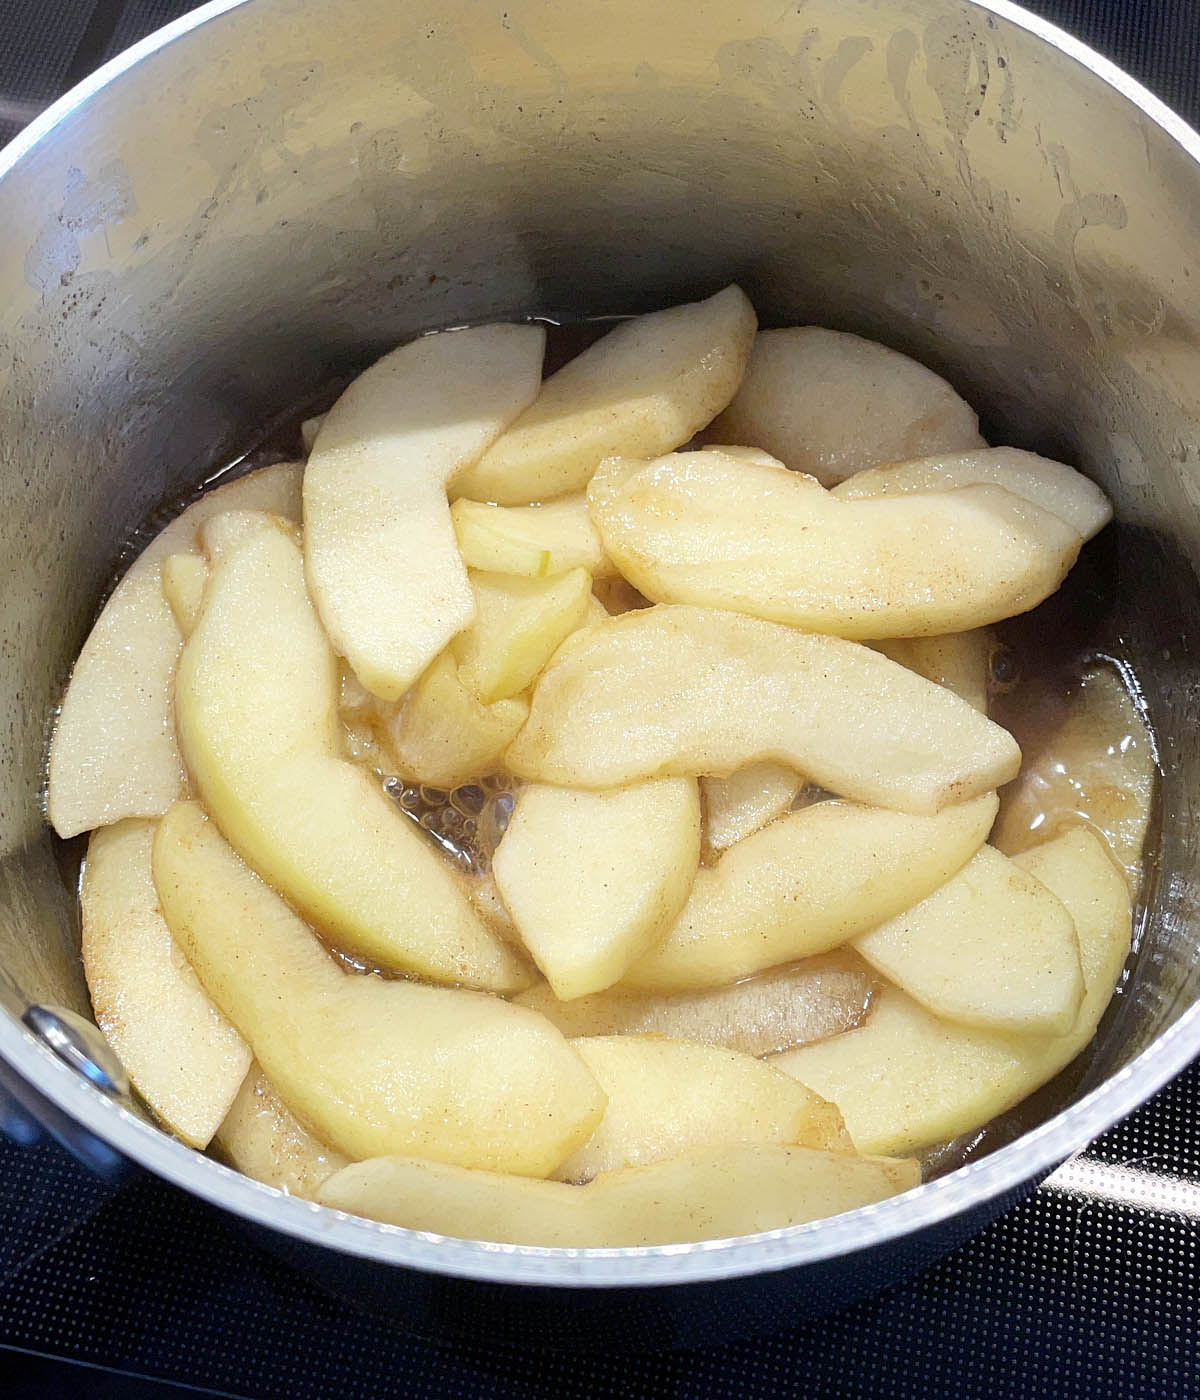
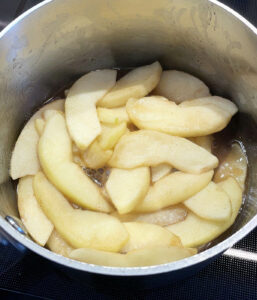
In a small saucepan, melt butter over medium heat and add the apples. Place the lid on (slightly ajar) and cook the apples for 5 minutes.
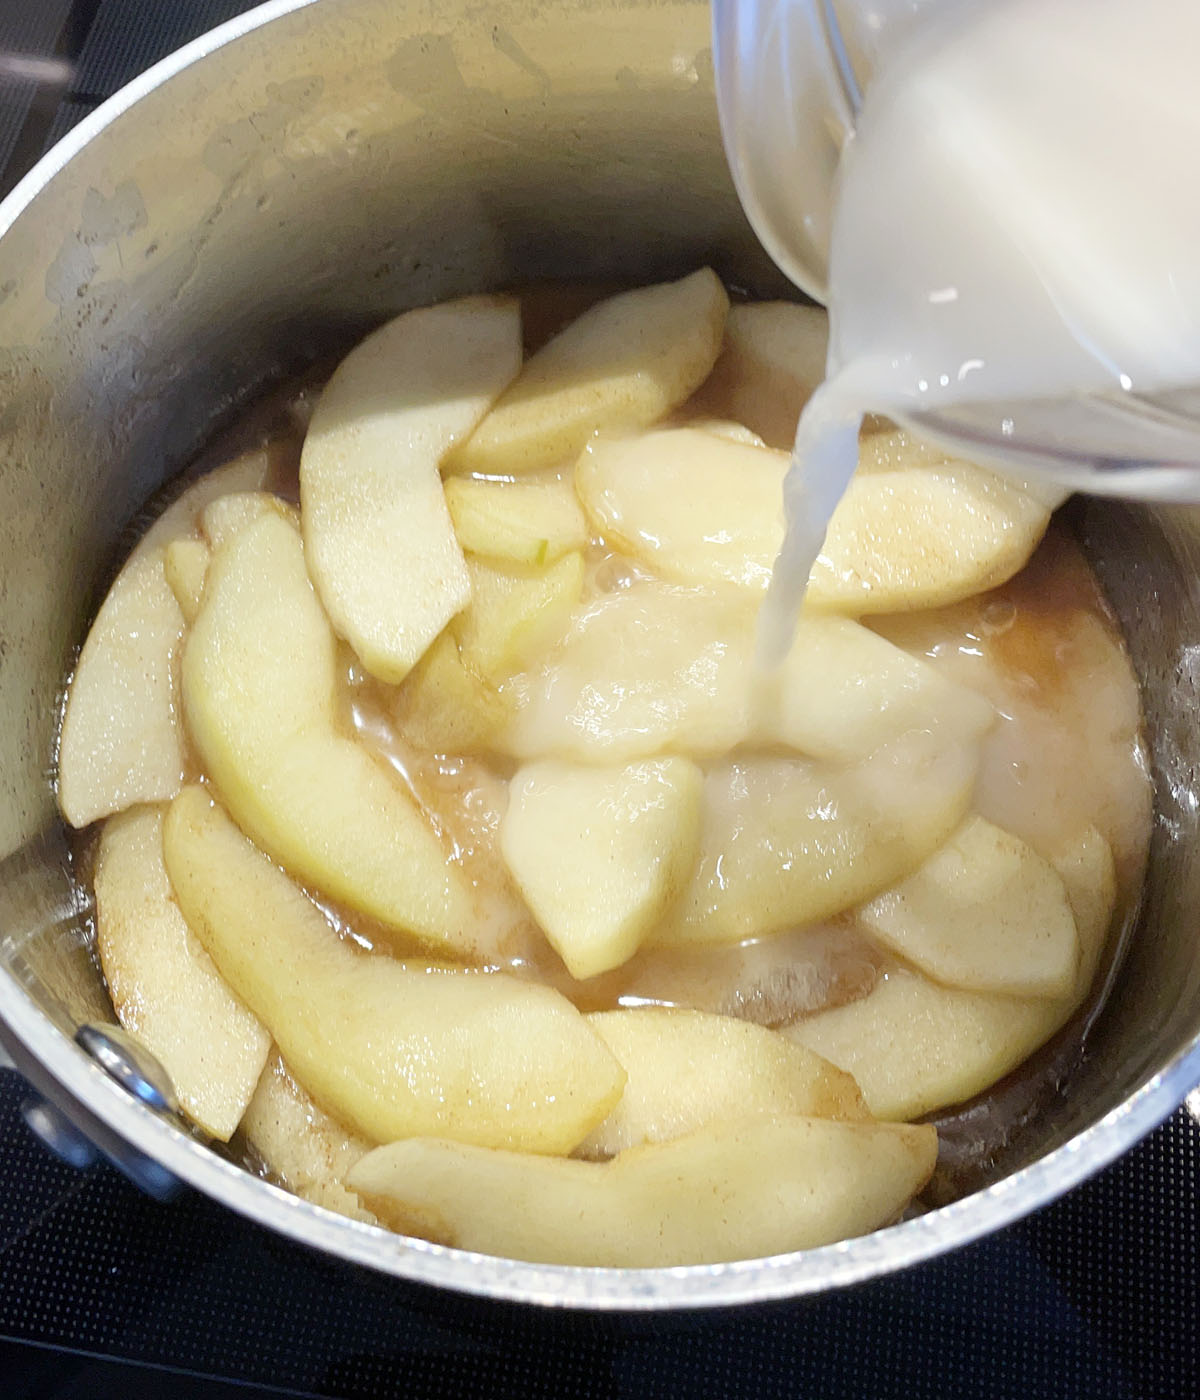
In a small bowl or measuring cup, mix the water, tapioca starch, and vanilla. Add it to the apples in the pot and let the mixture come to a gentle boil.
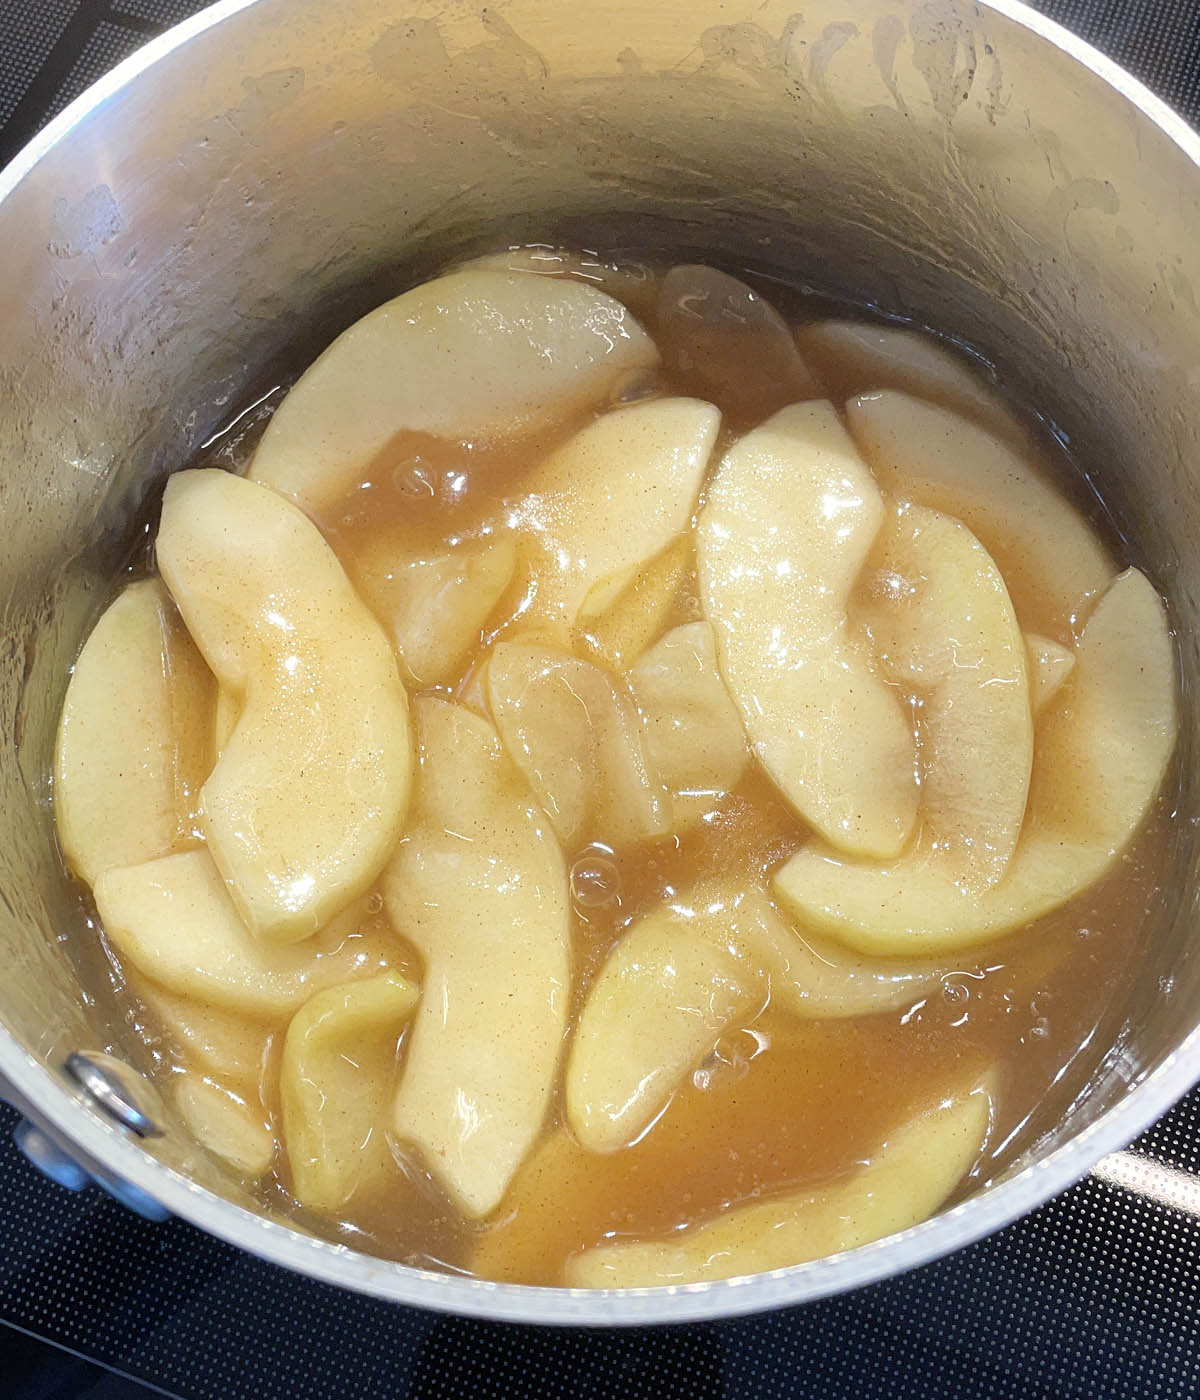
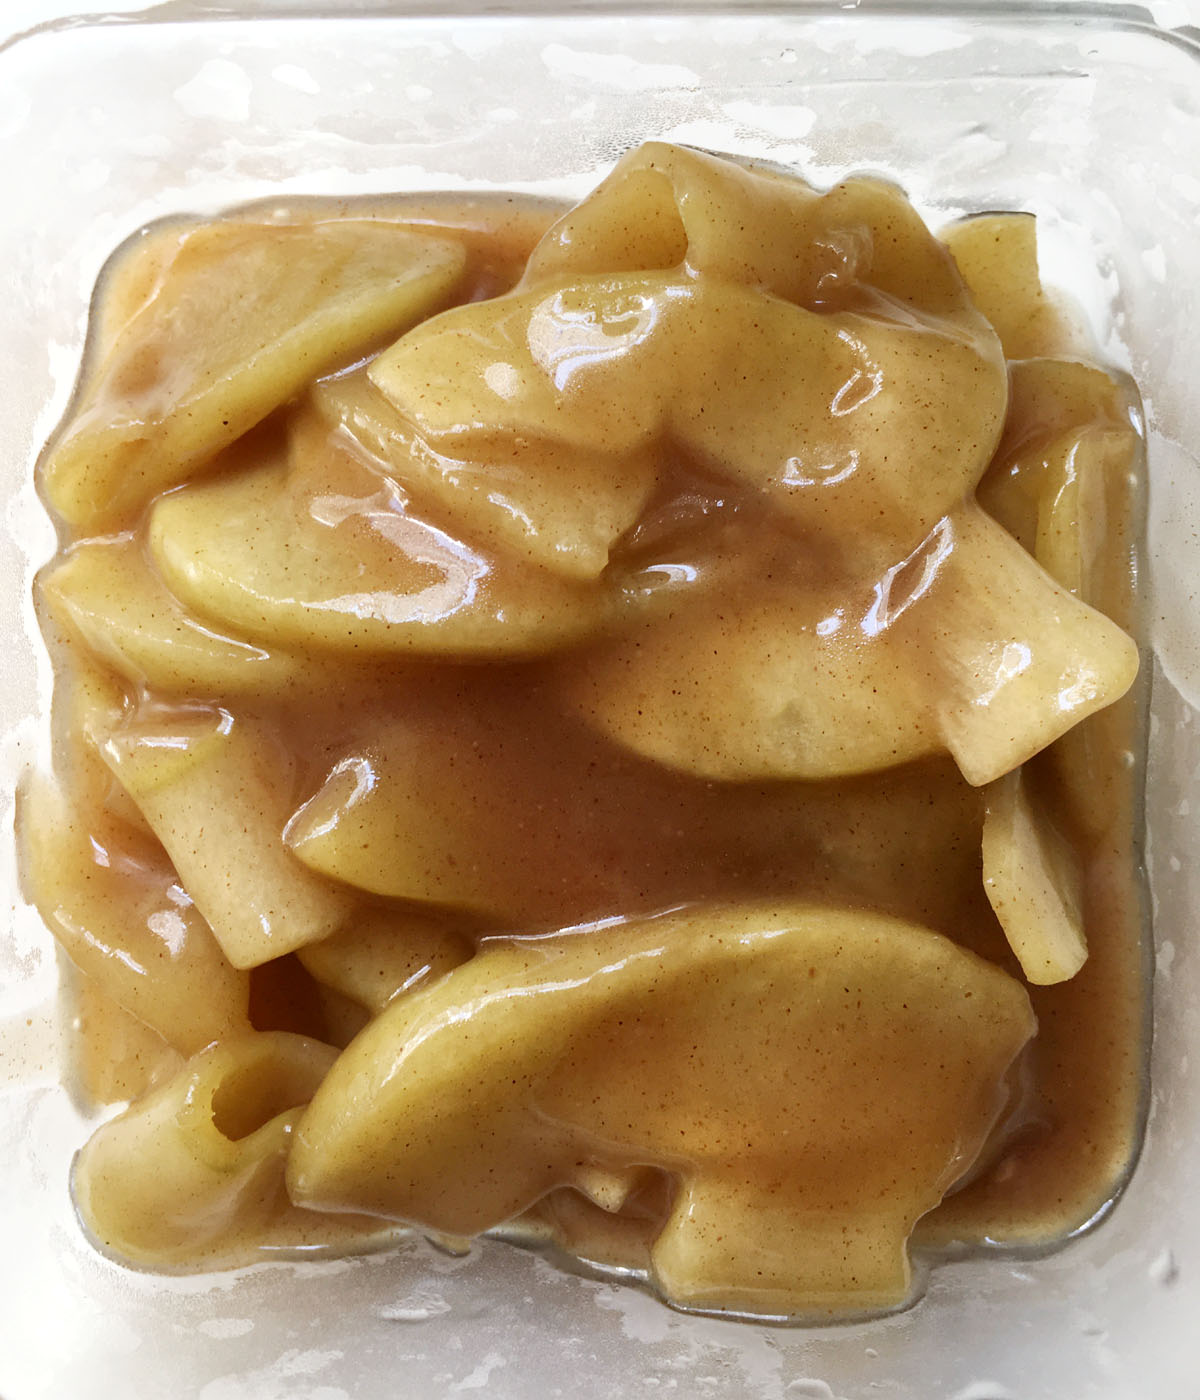
Reduce the heat to low-medium and let the apples cook, uncovered, until the sauce has reduced and thickened, about 5 minutes. Remove the apples from the heat and allow it to cool down completely to room temperature.
Make the Crust Dough:
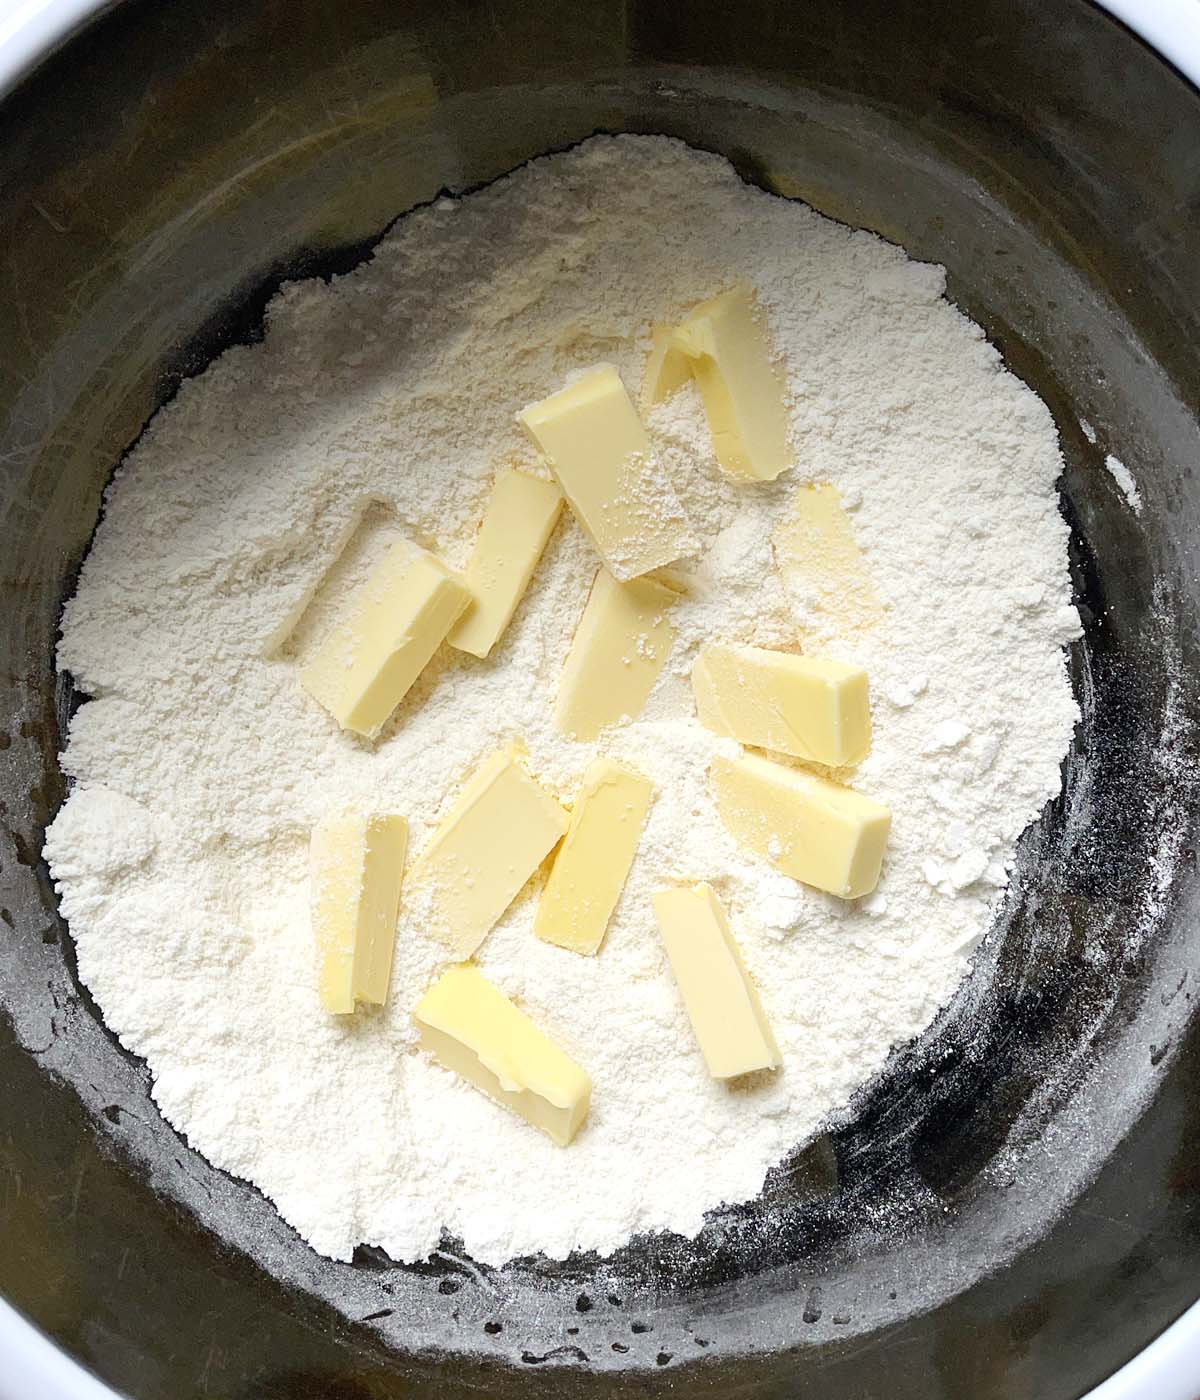
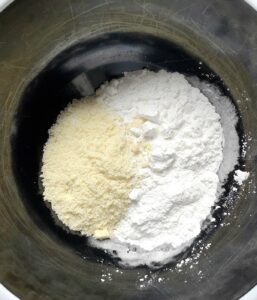
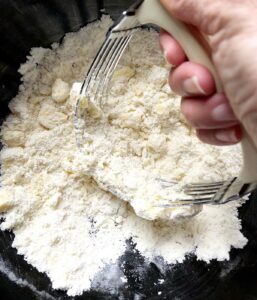
In a medium sized bowl, whisk together the almond flour, tapioca starch, salt, and sugar.
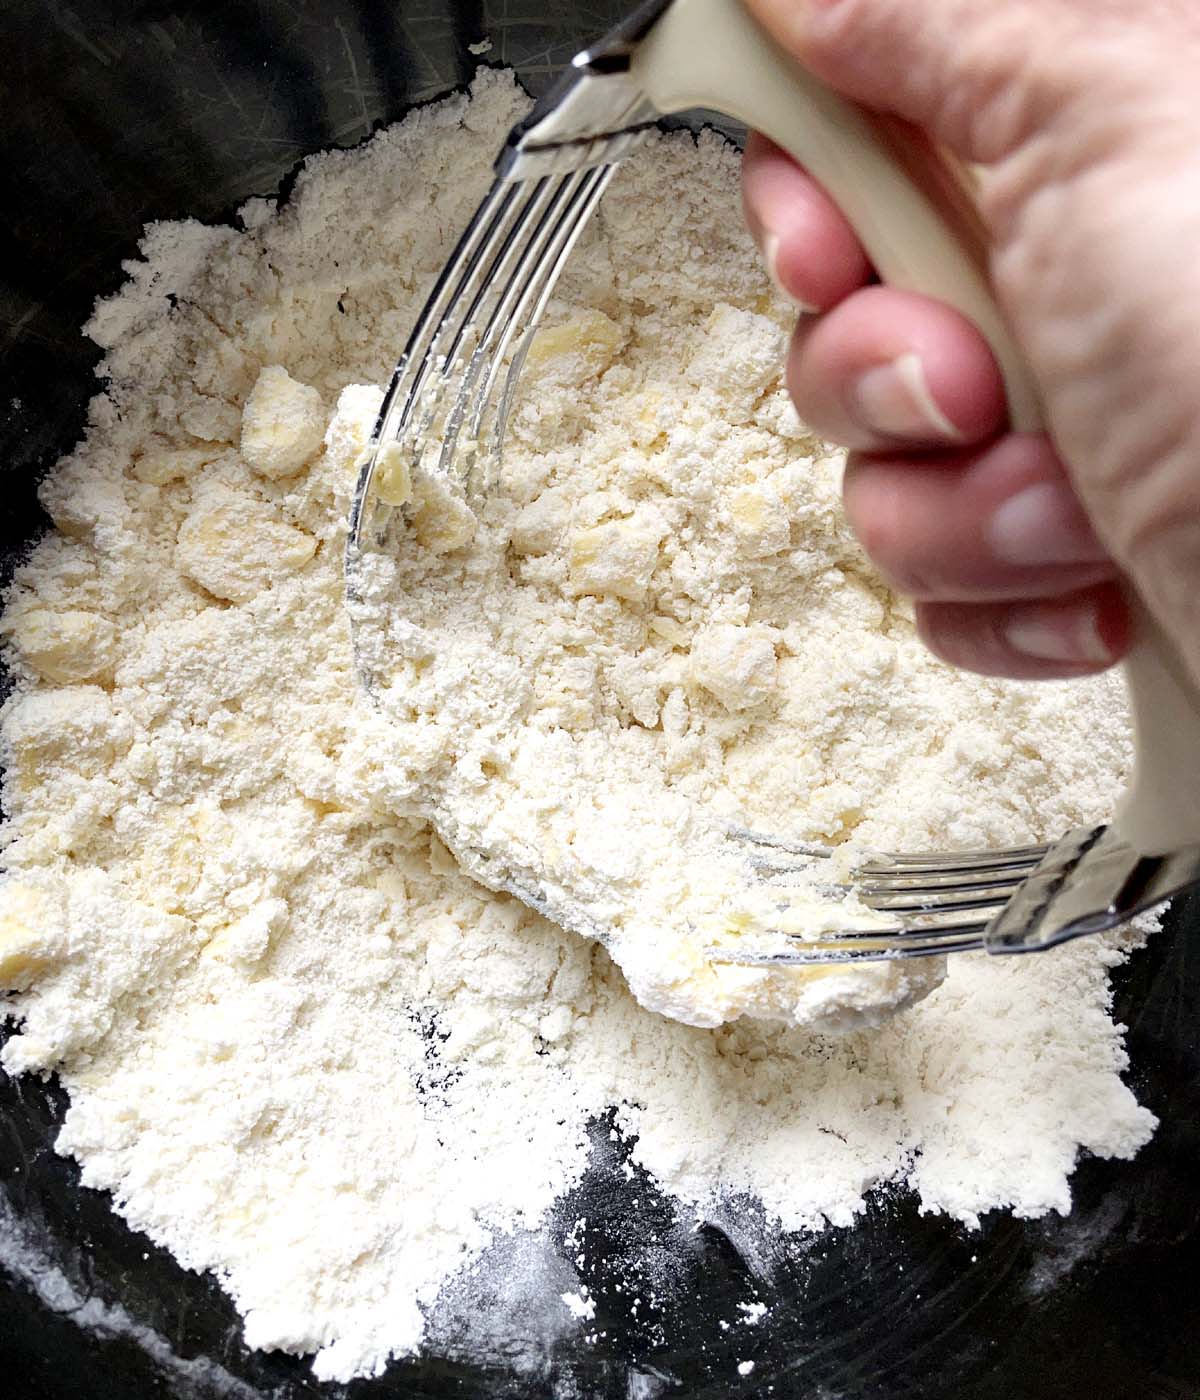
Add the small chunks of cold unsalted butter to the flour mixture and using a pastry cutter, two knives, or a fork, cut the butter into the flour until it resembles pebbles/coarse sand.
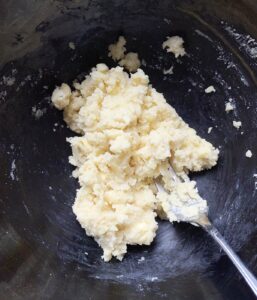
Add a 2 tablespoons of iced water to the butter-flour mixture and use a fork to mix everything together.
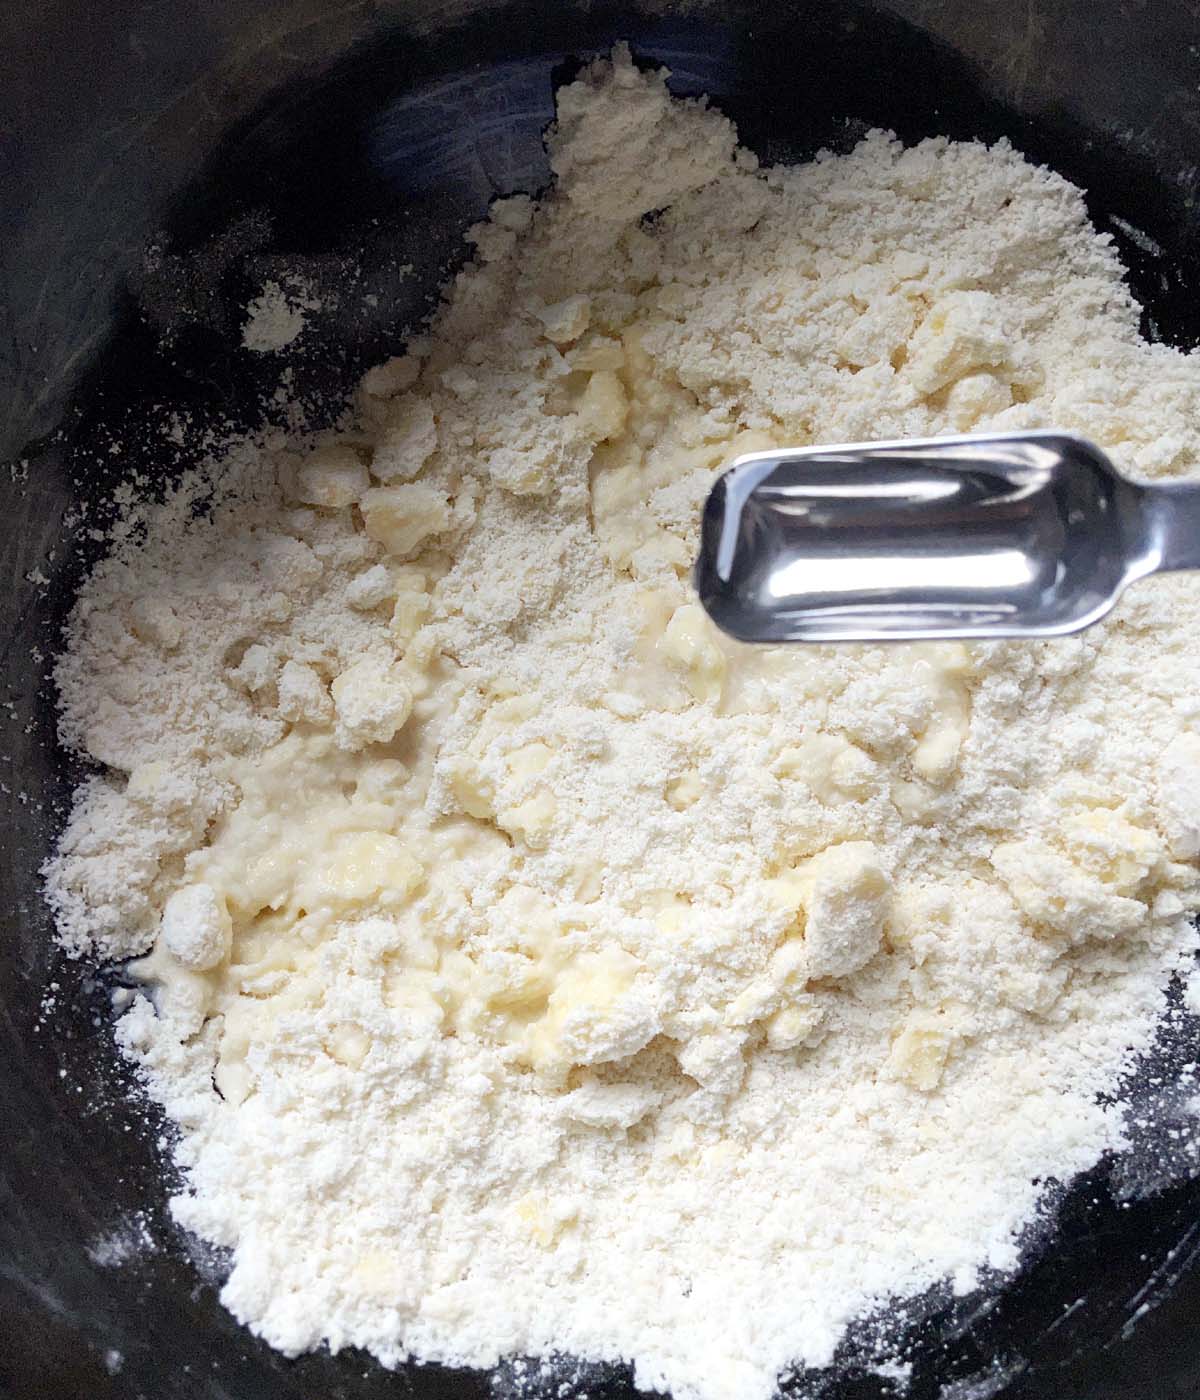
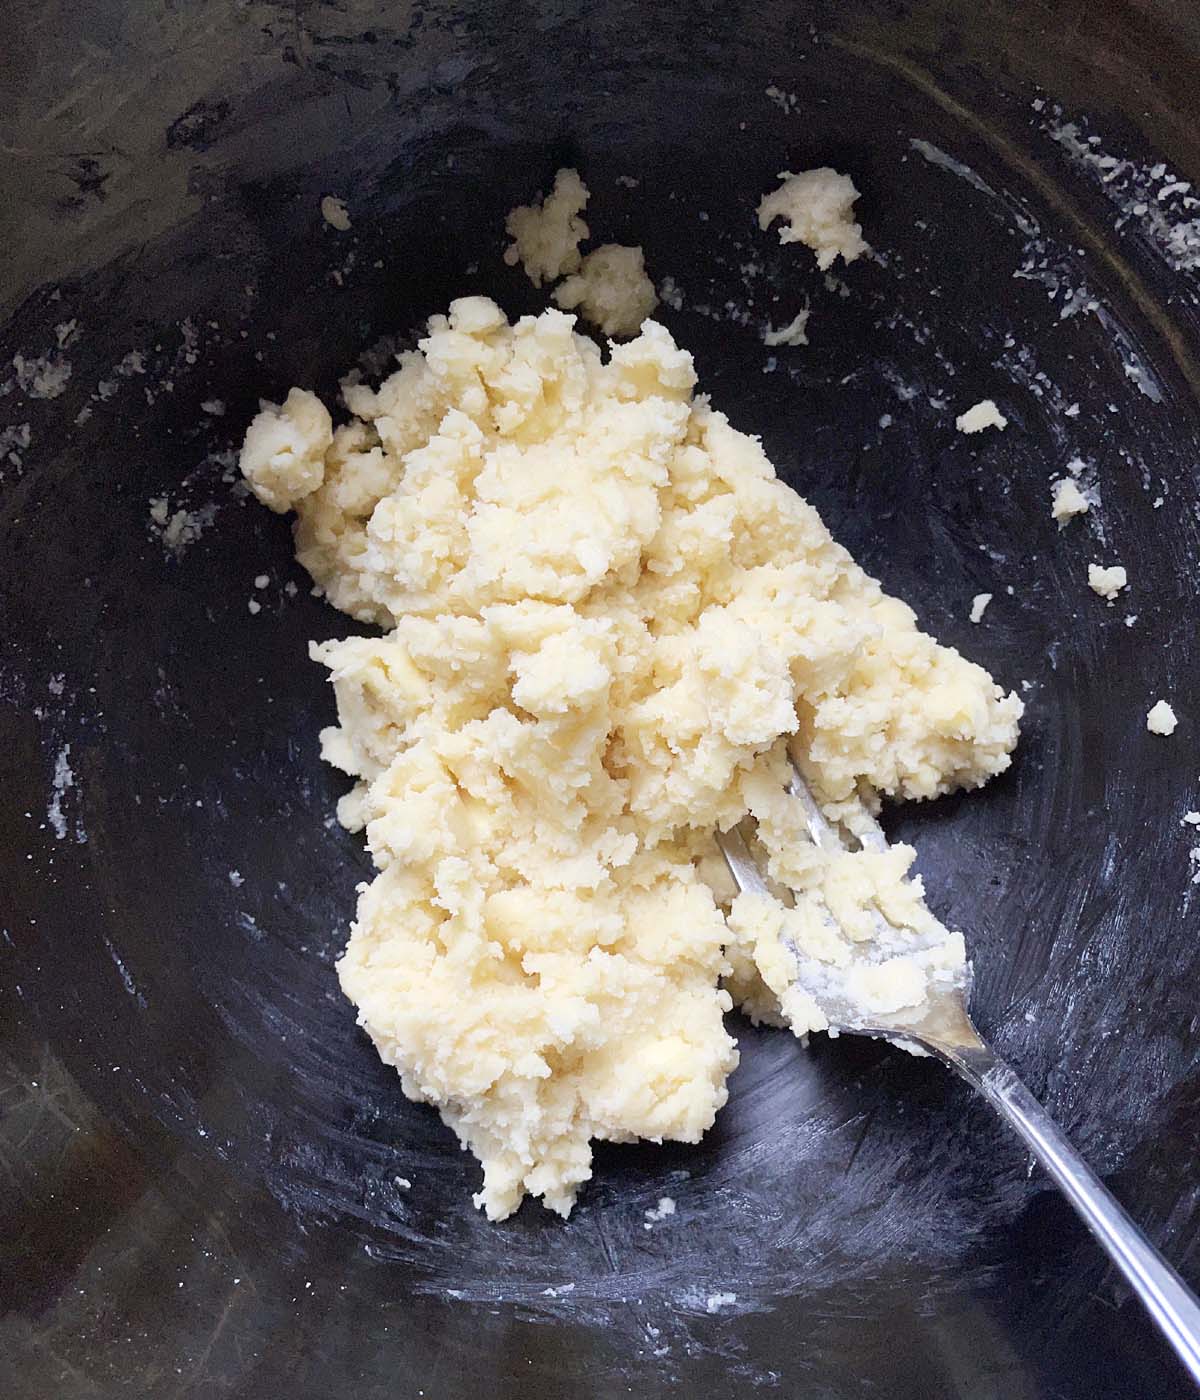
If the dough is still too dry and does not stick together when pressed between your fingers, add more iced water, one teaspoon at a time, mixing after each addition until a dough forms.
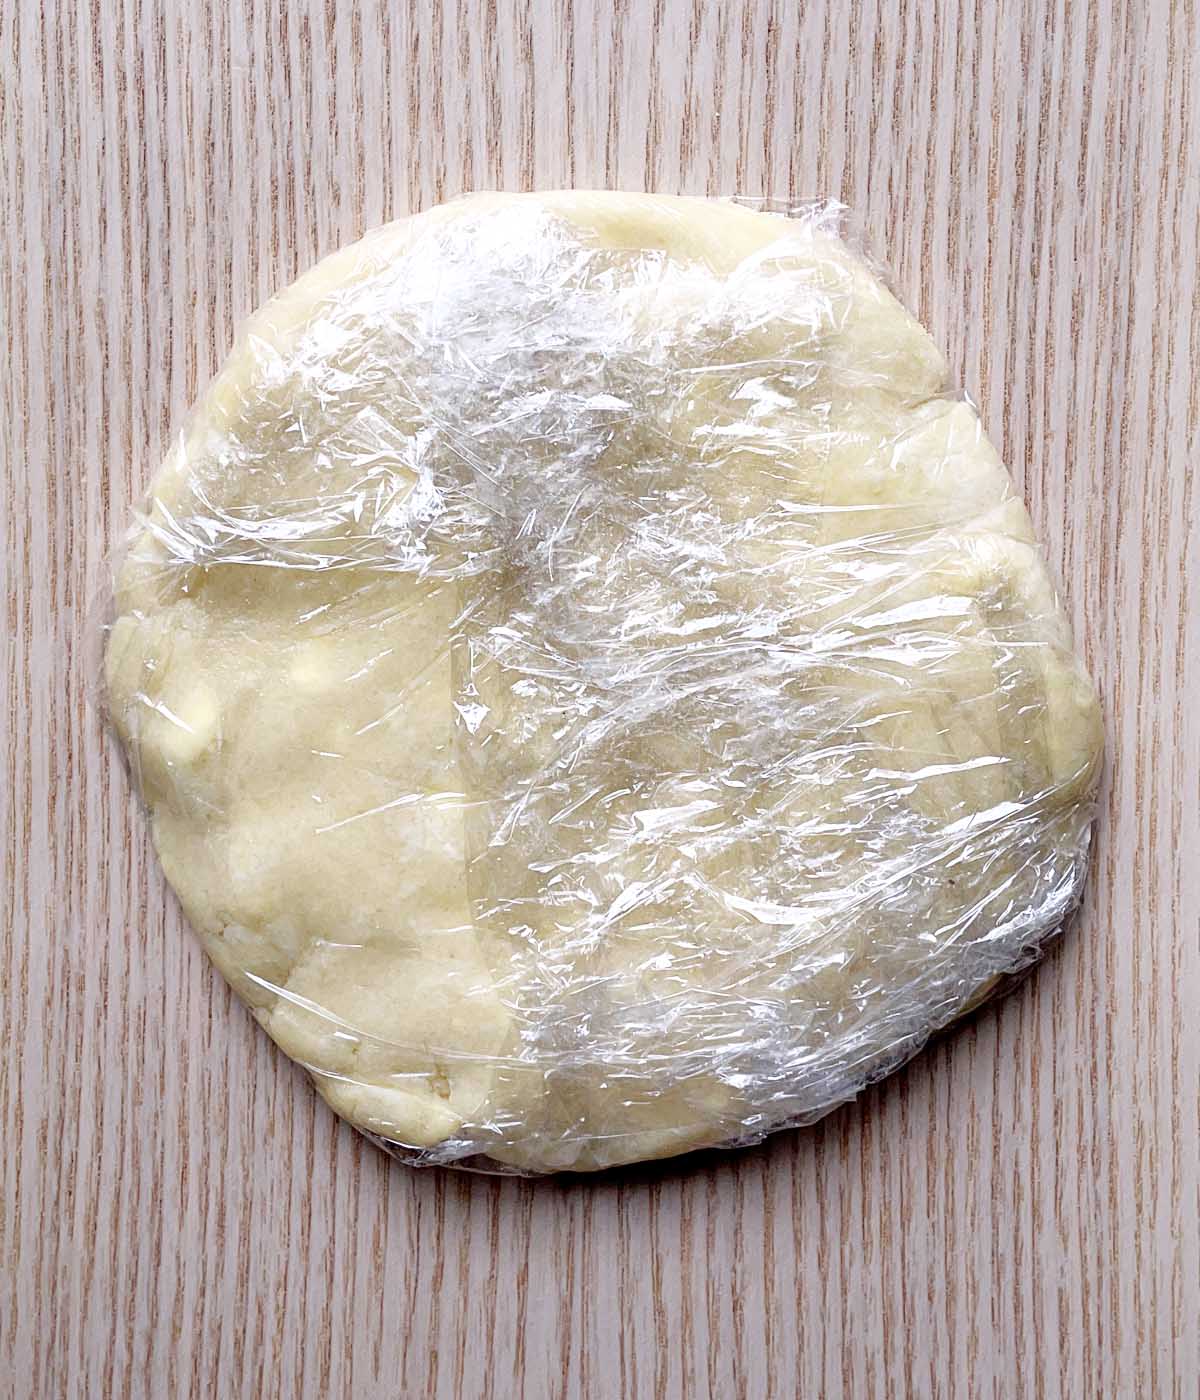
Transfer the dough to a large sheet of plastic wrap and shape the dough into a disc, about ½-inch thick. Wrap the disc in the plastic wrap and refrigerate for at least 30 minutes.
Making the Galette:
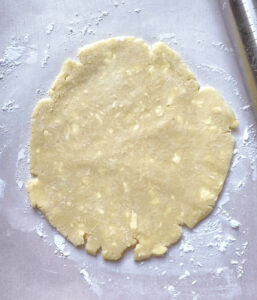
When you're ready to make the galette, line a baking sheet with parchment paper and lightly dust it with tapioca starch. Unwrap your chilled dough and place it on the parchment. Dust your rolling pin with tapioca starch and roll the dough out to about ⅛" thickness or anywhere from 7 - 8 inches across.


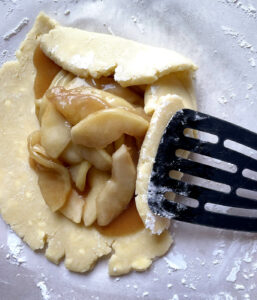
Mound the apple pie filling in the middle of the crust, leaving about 1.5 - 2" border around the apples (you may end up not using all the sauce).
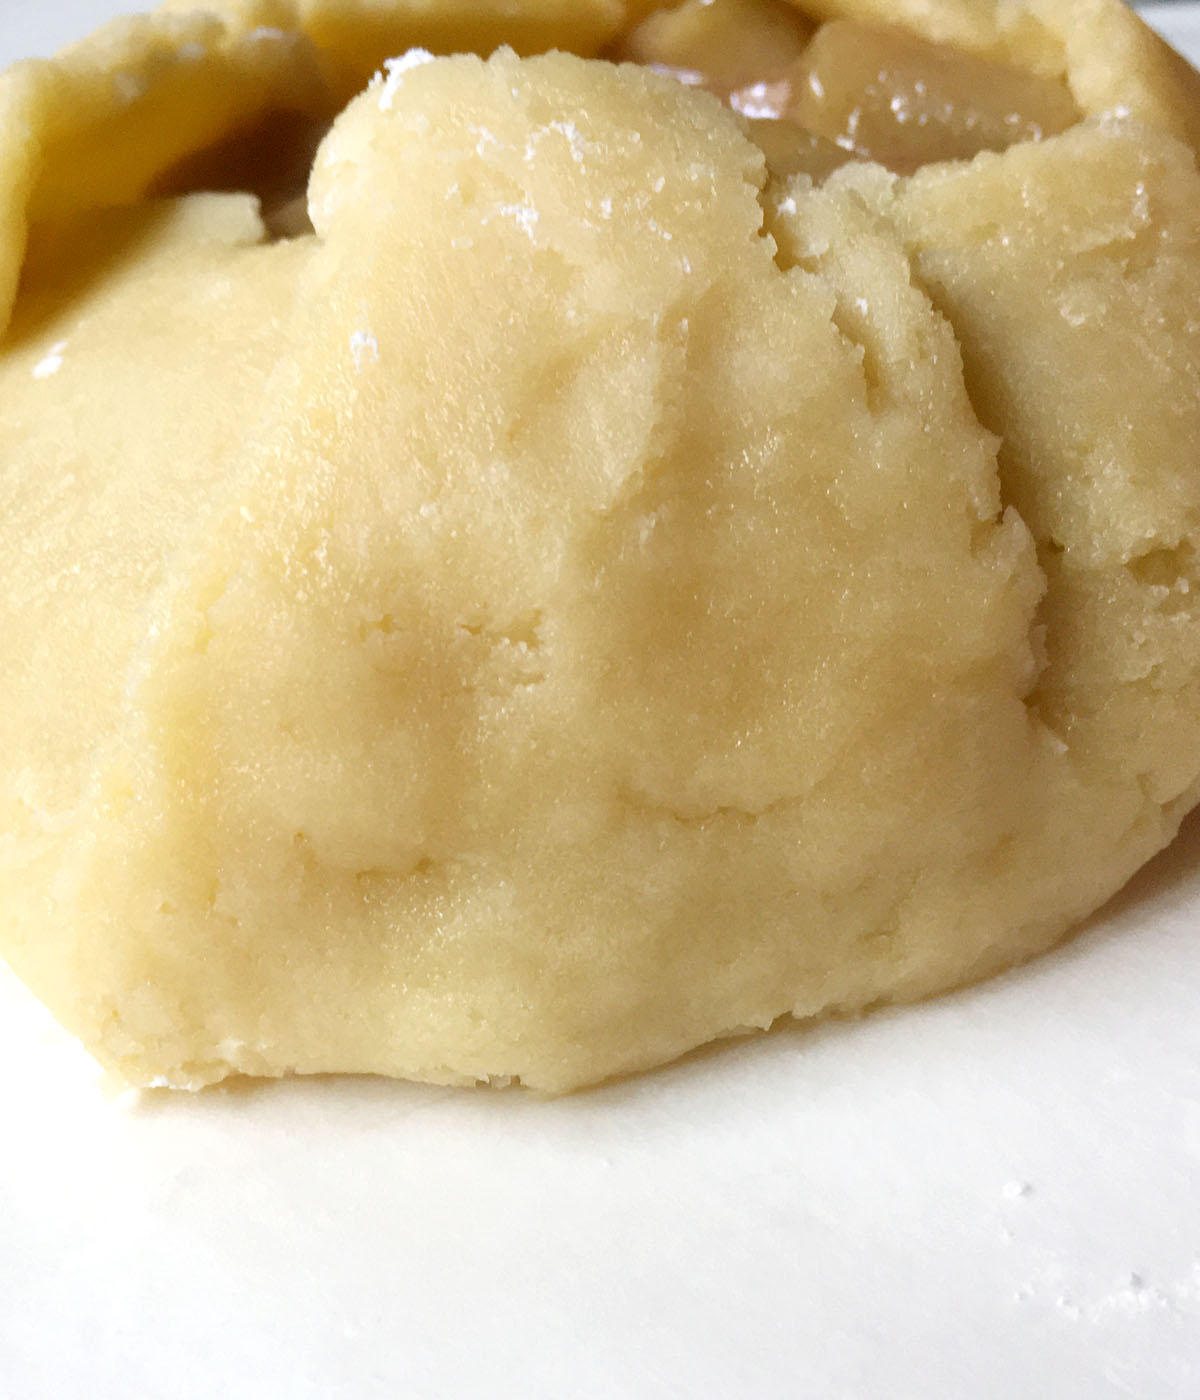
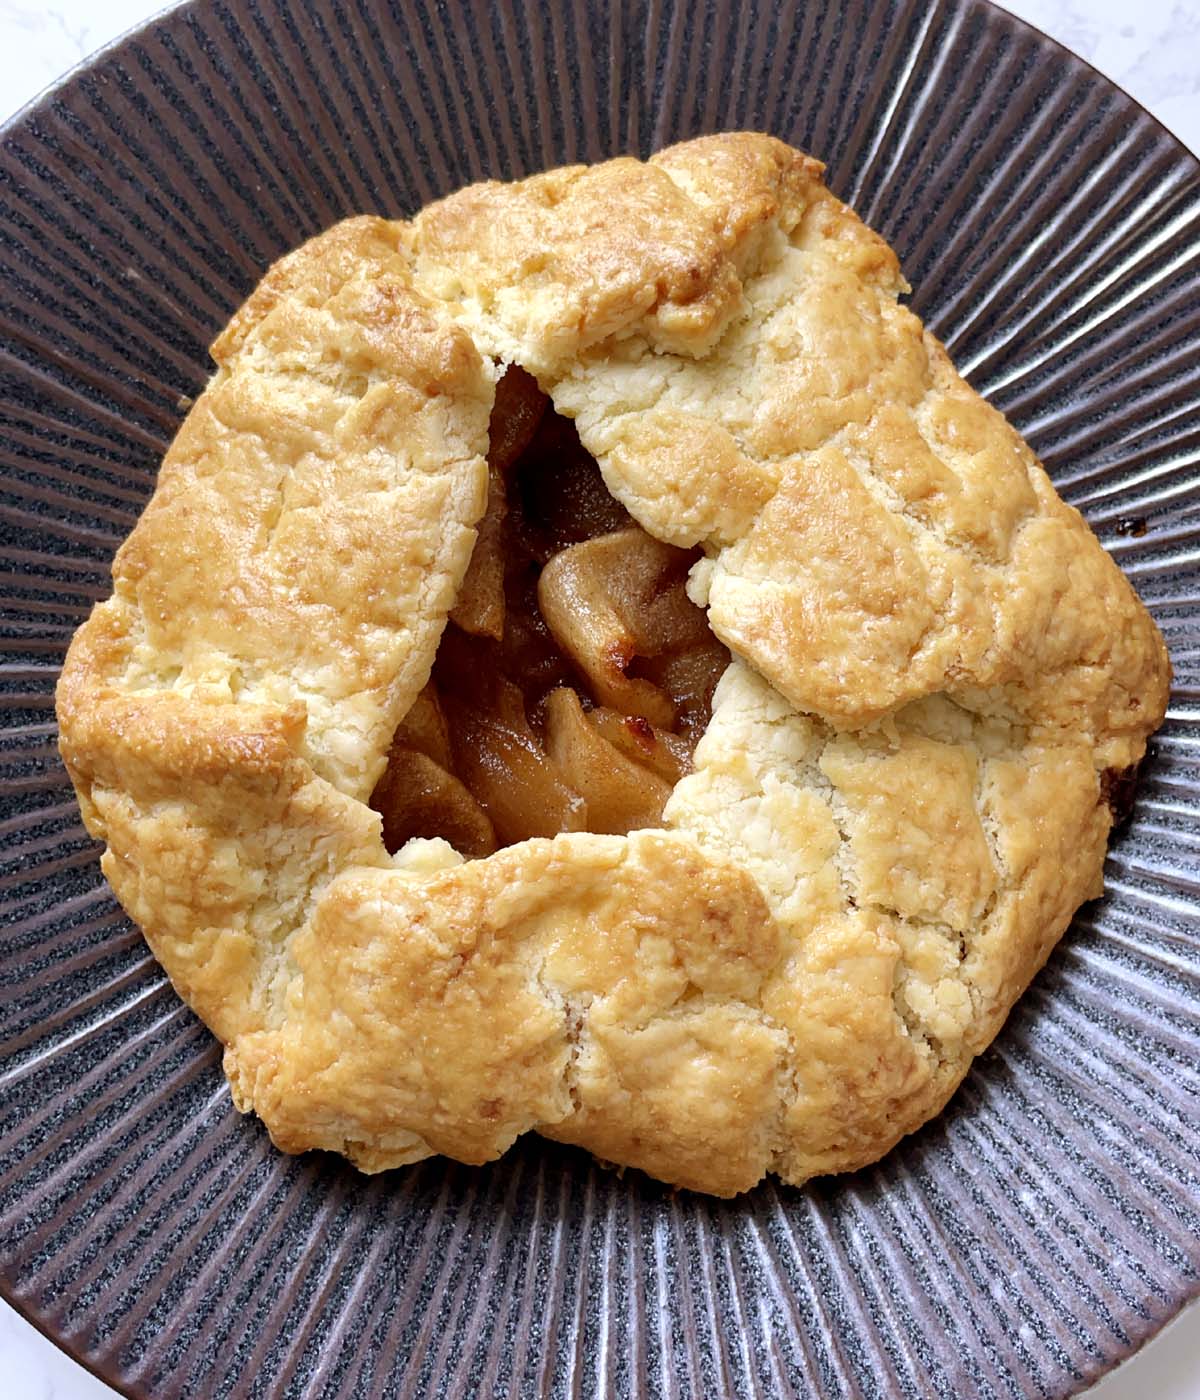
Use a spatula dusted in tapioca starch to lift the dough edges and fold them up against the apple filling. Start with one side, and then continue around the pie, overlapping the corners as you go around.
What if the crust cracks or breaks?
Don't panic! I've had it happen pretty much every time I've made this apple galette and it is completely repairable!
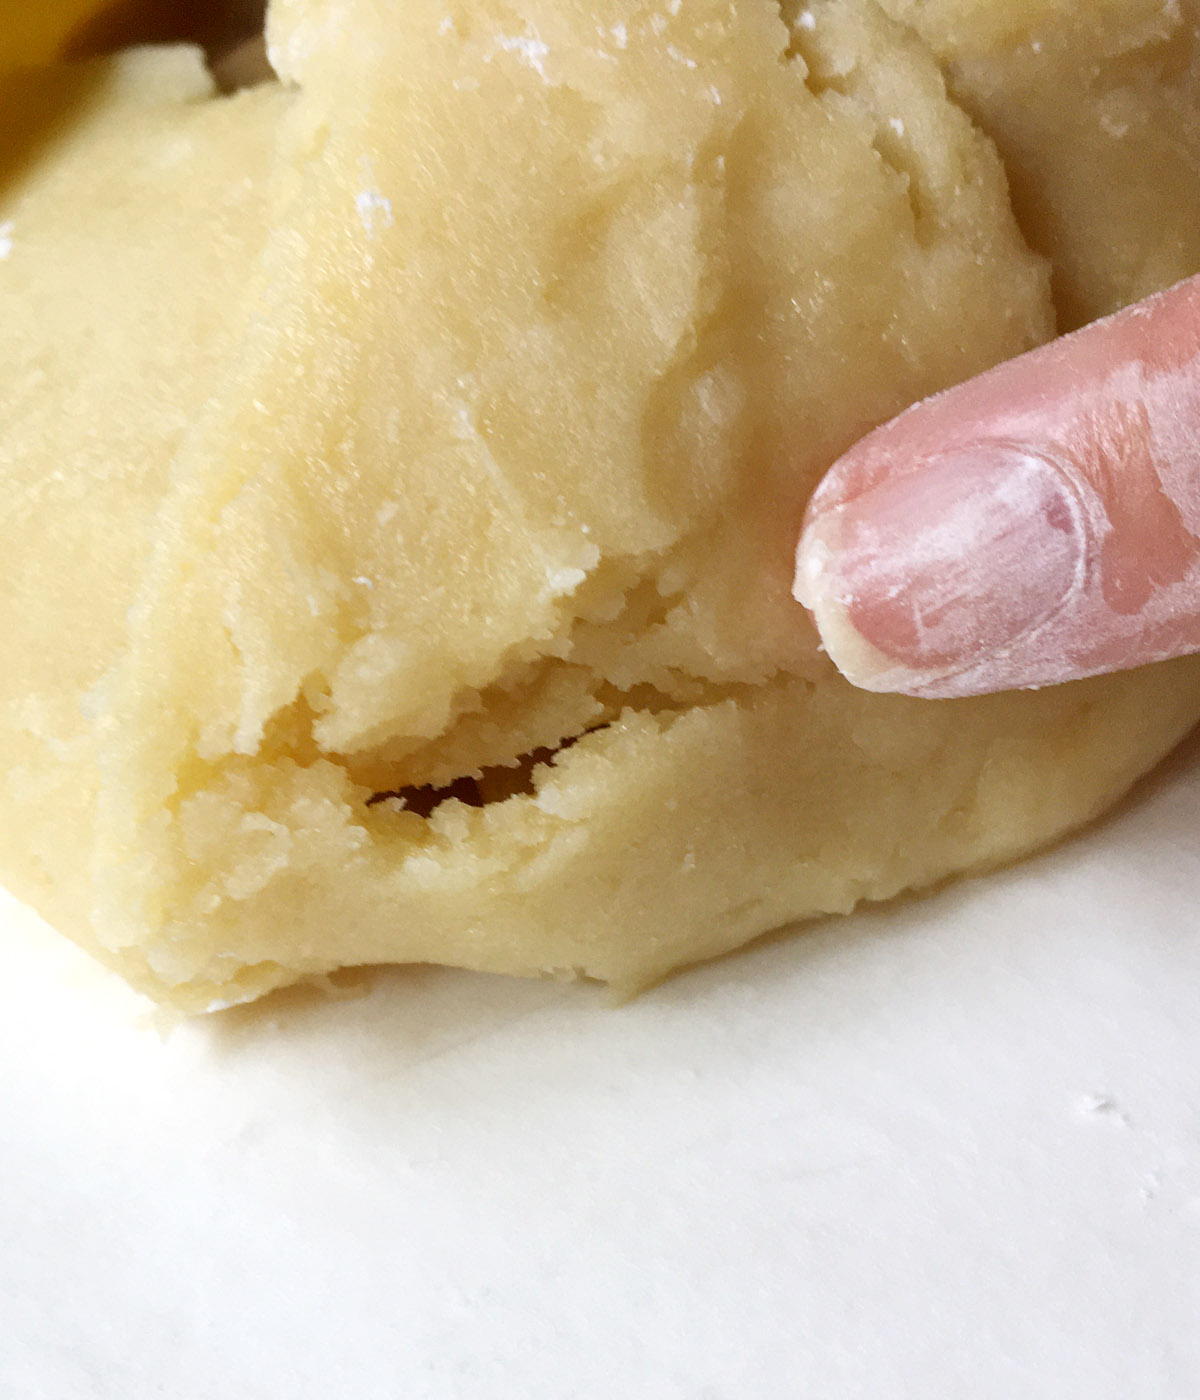
Dust your fingers with tapioca starch and gently press the dough together wherever there are cracks or openings that you want to repair. And there you go...just as good as new!
Bake the Galette
Scramble the egg with a fork and brush the egg wash all over the pie crust. Transfer the apple galette on the parchment paper to a baking sheet.


Bake the apple galette in a preheated 375F/190C oven for 30-40 minutes until the crust is golden brown.
Commonly Asked Questions
Granny Smith apples are the most popular and best suited for baking recipes. They are also easily available. However, Golden Delicious and Gala apples are also good options. Check out The Best Apples For Baking for a more extensive list that includes other varieties.
No. You can toss the sliced apples with the cinnamon, maple syrup, and salt and place them directly in the pie crust. Completely omit the tapioca starch slurry in the recipe.
You can make the apple filling and crust dough 4-5 days before making the galette. Keep both in the refrigerator until ready to use.
I like to serve the apple galette the same day it's made. However, making it a day before you are planning to serve is okay, too.
You can use cornstarch.
Cover and store at room temperature for one day. Store covered in the refrigerator for up to 5 days.
Warm the entire galette in a preheated 350F/180C oven for 10 minutes, or reheat a slice for 5 minutes. You can also, in a pinch, warm it in the microwave for a quick 10-20 seconds.
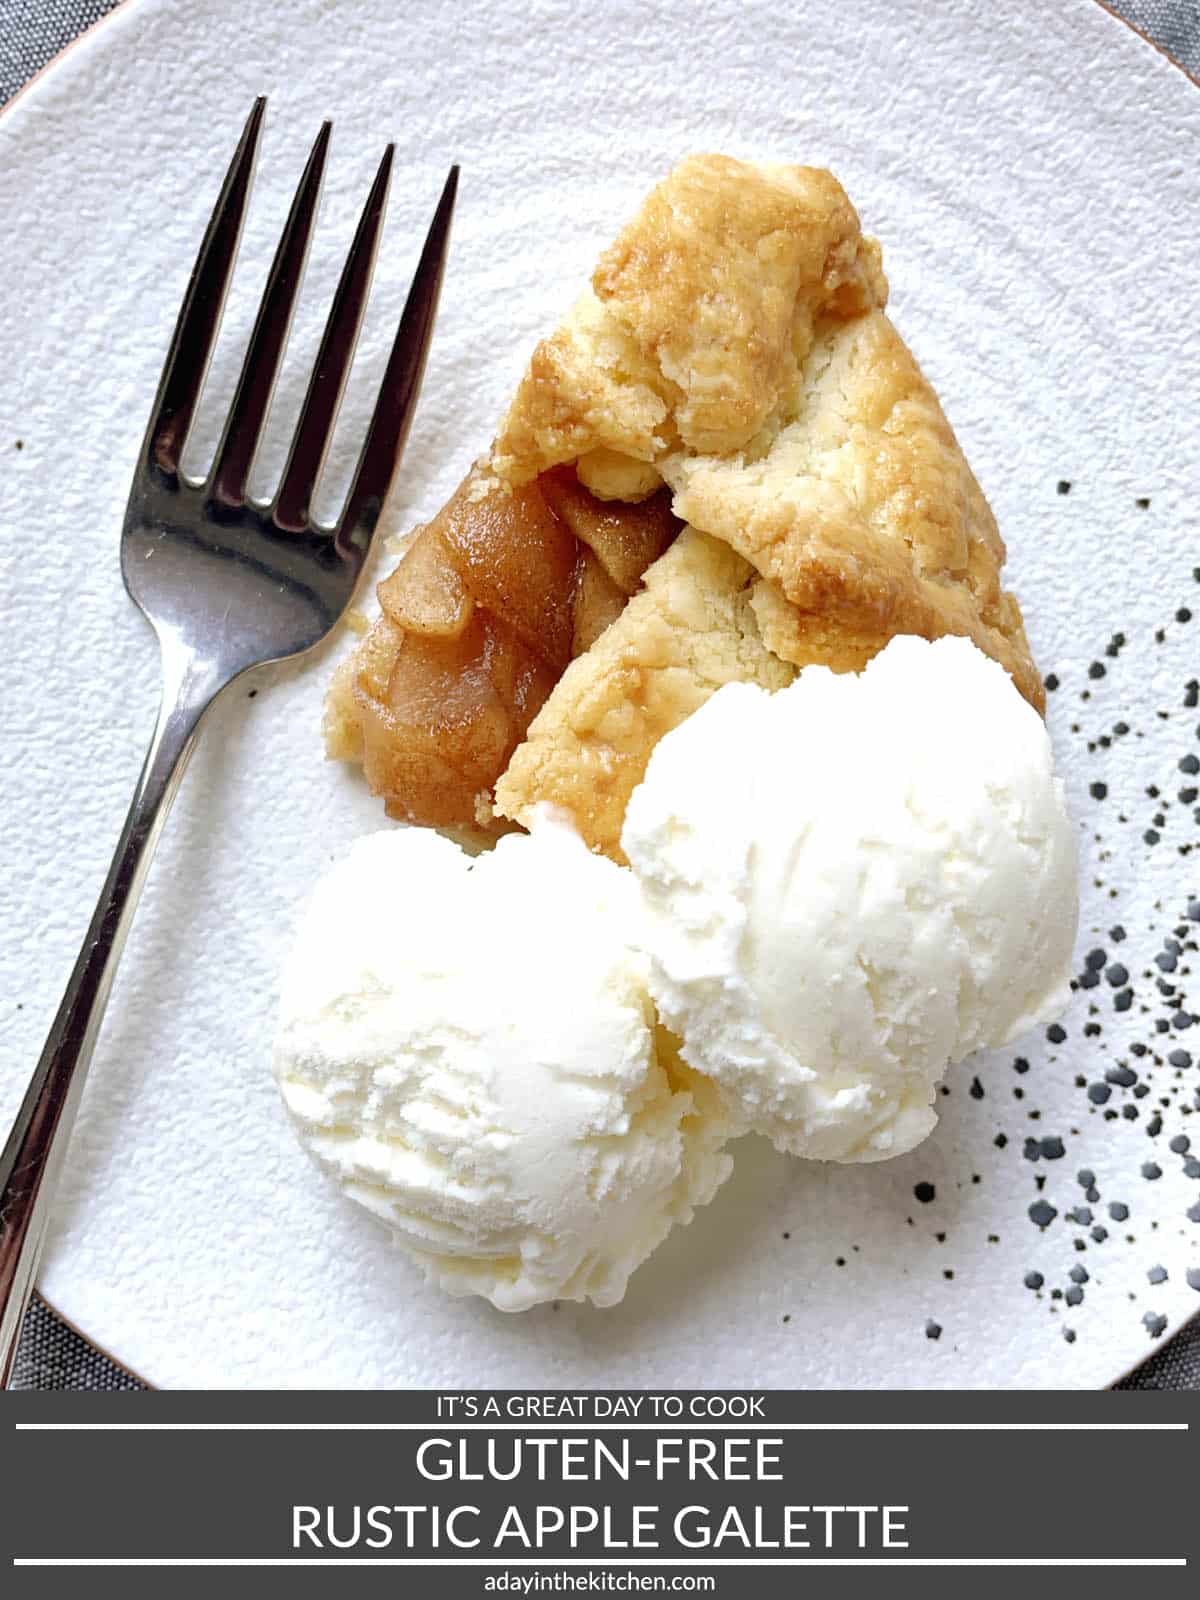
How To Serve The Apple Galette
Go à la mode with the apple galette and top it with your favorite vanilla ice cream, or whip up some homemade whipped cream! You will be amazed at how wonderfully delicious it is!
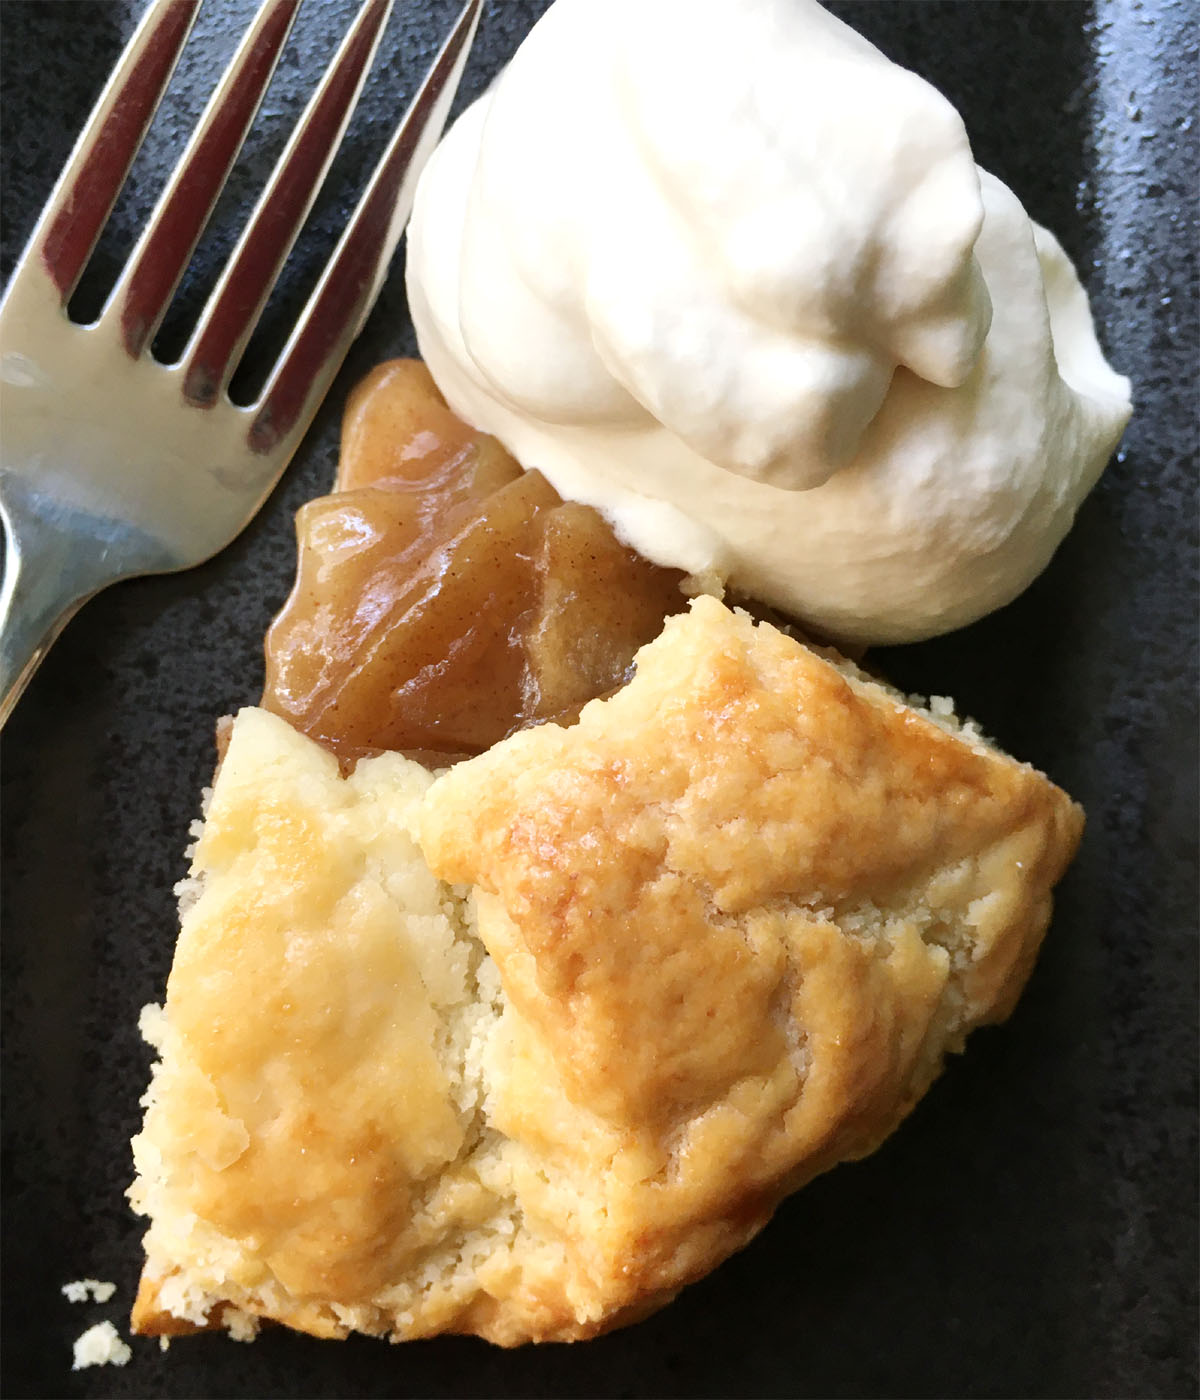
Remember to warm up your slice before topping it with whipped cream or ice cream...but that being said, it also tastes great cold from the refrigerator!
You're going to want something to drink while you enjoy your apple galette. Considering whipping up some Coffee Milk Tea, English Tea Latte, Ginger Honey Tea, or Cold-Brewed Coffee!
Other Gluten-Free Desserts You Might Like
If you're looking for more dessert recipes, be sure to check out these options!
- Creamy Crustless Cheesecake
- Flourless Chocolate Lava Cakes
- Almond Apple Crumble
- Decadent Flourless Chocolate Cake
They are all delicious and sure to make everyone happy, whether they are on a gluten-free diet or not!
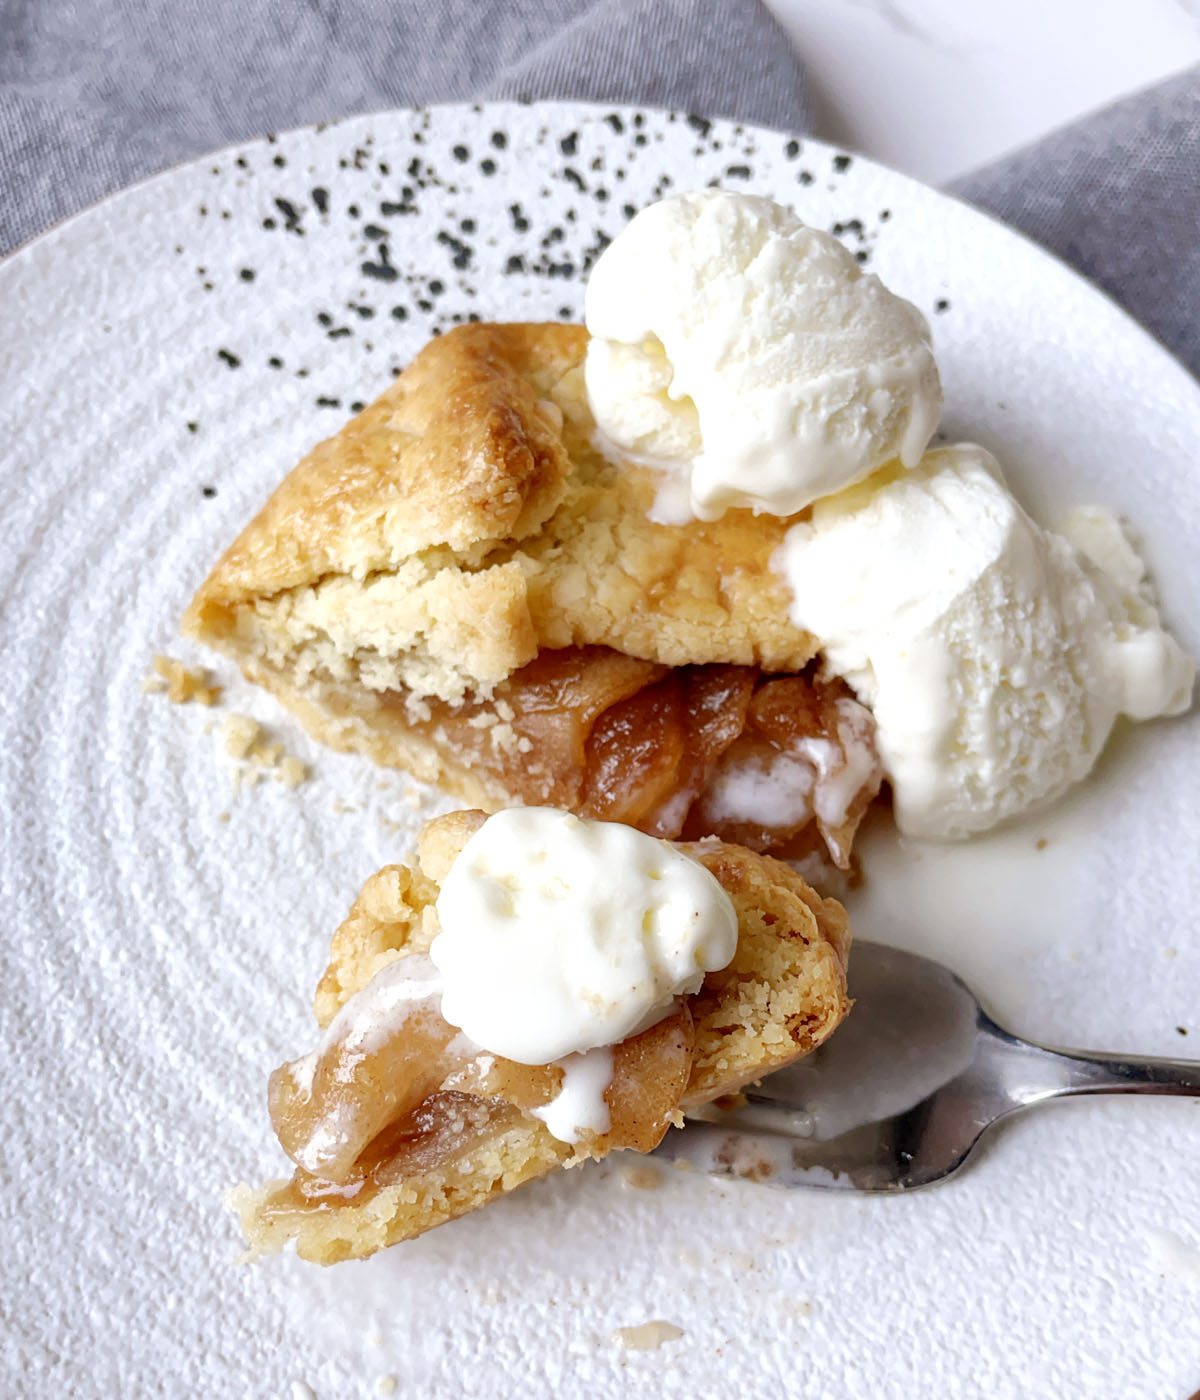
If you want apple pie but can't be bothered to make a full pie, this rustic apple galette recipe is for you! It is every bit as worthy and delicious as an apple pie, but SO much easier to make, and the rustic look is also just as pretty to look at! Top that off with the added bonus that this apple galette is gluten-free and grain-free and this is a total dessert winner! It's apple pie comfort in every bite!
~ Lisa.

Rustic Apple Galette
Ingredients
Apple Pie Filling:
- 1 large Granny Smith apple, peeled, cored, and sliced thin
- 2 tablespoons maple syrup
- ¼ teaspoon cinnamon
- Pinch salt
- 1 tablespoon unsalted butter
- 2 tablespoons water
- ½ teaspoon tapioca starch
- ¼ teaspoon vanilla extract
Pie Crust:
- 60 grams almond flour
- 50 grams tapioca starch
- 56 grams cold unsalted butter, cut into small chunks
- ¼ teaspoon salt
- ¼ teaspoon sugar
- Iced water
- 1 egg, for egg-wash
Instructions
Apple Pie Filling:
- Heat a pot over medium heat and add the unsalted butter.
- Mix apple slices with maple syrup, cinnamon, and salt.

- Add apples to the pot, stirring to coat in the melted butter.
- Cook for 1 minute, then reduce heat to low. Cover pot with lid, leaving a slight gap, and simmer for 5 minutes, stirring apples occasionally.
- In a measuring cup or bowl, combine water, tapioca starch, and vanilla. Mix well and set aside.
- Uncover pot and add the tapioca slurry to the apples. Stir to combine.
- Continue to simmer the apples until the sauce has reduced to about half, stirring regularly. This may take about 5 minutes.
- Transfer apple filling to a shallow dish to cool completely to room temperature before making the galette or before transferring to the refrigerator for later use.


Pie Crust:
- In a mixing bowl, combine almond flour, tapioca starch, salt and sugar.
- Add cold butter chunks to the dry ingredients and use a pastry blender or two knives to cut the butter in until it is coarse in texture.
- Add 2 tablespoons of ice cold water to the mixture and work in with a fork. If dough does not stick together and is still too crumbly when you try to squeeze some together with your fingers, add more ice cold water, 1 teaspoon at a time.
- Transfer dough to a sheet of plastic wrap and use the plastic wrap to help shape the dough into a disc about ½-inch thick. Wrap the dough in in the plastic wrap and refrigerate for at least 30 minutes.

Making the Pie:
- Preheat oven 375F/190C.
- Lay a sheet of parchment paper on a baking sheet and lightly dust the paper with some tapioca starch. (Alternatively, you can transfer the parchment with the galette on it to a baking sheet right before it is about to go in the oven.)
- Dust a rolling pin with tapioca starch and roll out the pie crust dough on the parchment paper to approximately ⅛" thickness, or so it is 7-8 inches across. Working quickly and dust the rolling pin with tapioca starch as necessary to prevent sticking.
- Mound the cooled apple pie filling in the center of the crust, leaving approximately a 1 to 1.5-inch border around it. (You may end up not using all the apple filling sauce.)
- Using a spatula dusted in tapioca starch, gently fold the pastry edges up over the the apple pie filling. Continue all around the apple pie filling.
- If the crust cracks or tears, dust your fingers with tapioca starch and simply pinch any gaps back together.
- Scramble the egg well in a bowl with a fork. Brush the egg wash all over the pie crust.
- Transfer the pie on the parchment to a baking sheet if you did not do that at the beginning.
- Bake for 30 minutes, until the crust is golden brown.

Notes
- Granny Smith are good go-to apples, but you can also use Golden Delicious, Gala, etc. or a combination.
- This recipe uses one apple, but if you want more apple filling, using 1 ½ is probably a good amount. Using 2 apples may end up being too much to be contained in the crust.
- Cornstarch can be used to substitute the tapioca starch.
- You can make the apple filling and crust dough and store them in the refrigerator for up to 5 days before making the galette.
- Store leftover apple galette covered at room temperature for a day, or for a few days in the refrigerator.
- Sprinkle sugar on the pie crust after you brush it with egg wash, if desired.
** This recipe was originally published November 23rd, 2020, and republished November 7th, 2023 with an updated recipe, new writing, and new photos.


Sonira
Made this the second time today on demand from my family. Such a great recipe and so low in sugar and carb. Thank you!
I am so happy to hear that, Sonira, and thrilled that your family loves it! Thanks so much for trying my recipe and for your comments!
Sharon
I grew up with homemade apple pie for special occasions too. I can't tell you how much I loved that pie my mom would make! Your galette looks fab and I plan to try it for our Christmas this year. Thanks!
Thanks, Sharon! That would be so wonderful for you to try it for your Christmas...I hope it doesn't disappoint!
Kristen Kaethler
We love apple anything in our house, so we will definitely be making this if I can find tapioca starch. Otherwise I will just make a regular crust.
Thanks, Kristen. Tapioca starch can often be found in Asian markets or in the Asian food aisle of your supermarket. It would probably also work with cornstarch.